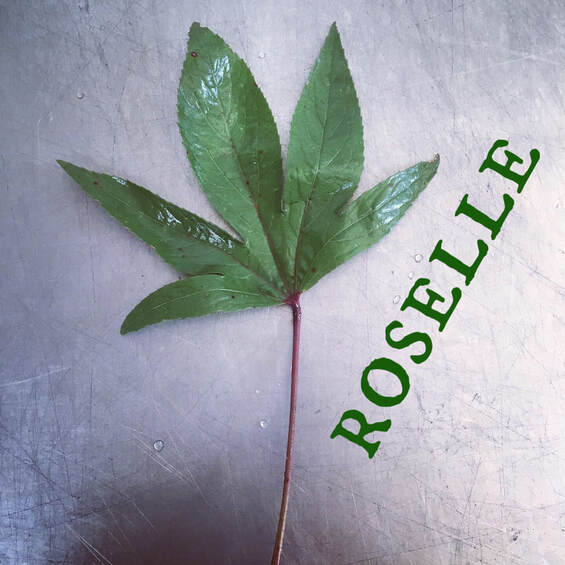
 ROSELLE (also called gongura or Jamaican sorrel) A couple of years ago Rao, our entomologist friend from India, gave us a small number of roselle plants. We were immediately hooked and have been enjoying it ever since, adding more plants each year. It thrives in the sweltering temperatures of late summer in Alabama and it has a unique flavor that always leaves me wanting more. His suggested preparation is to toast mustard seeds in oil, adding garlic and a chile pepper (optional), and then briefly sautéing the roselle leaves with those ingredients. We tried it this way and it was delicious. The flavor is a bit sour, like sorrel or rhubarb, and there is some okra-ness in the texture. The tart recipe below features both of those aspects – the sourness is used as in a rhubarb tart and the texture serves to help the tart ‘set’. Roselle is in the same family as okra and hibiscus. We are currently harvesting the leaves, but the calyces (“the sepals of a flower, typically forming a whorl that encloses the petals and forms a protective layer around a flower in bud”) can also be harvested and used in the same way as culinary hibiscus, as in a tea. Roselle is also used in pickling and can be paired with lentils or shrimp. Please let us know what you think! Here is an article on roselle: http://www.thestar.com.my/lifestyle/food/features/2015/04/12/roselle-makes-you-feel-blooming-marvellous/ Gongura Pachadi From indianhealthyrecipes.com Heat 3 to 4 tablespoons of oil in a pan. Add clean and plucked roselle leaves to the hot pan. Fry until the leaves wilt. Set them aside to cool completely. To the same pan, add more oil and fry the chiles until crispy. Switch off and add cumin. When they cool down, add them to a food processor with garlic and salt. Blend until smooth. Add the leaves and pulse to get a coarse texture. Roselle Tart Adapted from rareseeds.com 1½ cups sugar 1 tablespoon flour ½ teaspoon cinnamon 1/3 cup water 4 cups roselle leaves, coarsely chopped ½ teaspoon lemon extract 2 tablespoons butter ½ cup pecans, toasted and coarsely chopped 1 tart crust Mix together the sugar, flour, and cinnamon in a saucepan and add whisk in the water. Place over medium-heat and bring to a simmer, stirring occasionally. Add in the roselle, cover, and cook until tender, anywhere between 20-40 minutes. Remove from heat and whisk in the lemon extract and butter. Stir in the pecan pieces and set aside. Preheat oven to 375° F. Roll the tart crust out and bake for 10 minutes (pie weights recommended). Place the filling in the curst and return to oven and bake for another 30 minutes. Serve cool. Burmese Roselle Leaves with Bamboo Shoots & Shrimp - Chin Baung Kyaw from chumkieskitchen.blogspot.com “In Burmese cuisine, roselle leaves are called chin baung ywet or sour leaf. It is perhaps the most widely eaten and popular vegetable in Burma. The leaves are fried with garlic, dried or fresh prawns and green chili or cooked with fish. A light soup (hinjo) made from roselle leaves and dried shrimp is also a popular dish." 1 bundle roselle leaves, washed and chopped 1 (8 oz.) pkg. bamboo shoots, fresh or pickled and sliced 1 lb. shrimp, peeled and deveined (optional for vegetarians) 6 Tbsp. vegetable oil 1 large onion, diced 8-10 cloves of garlic, diced 1 green chili, diced 1 large tomato, diced 1/2 tsp. shrimp paste/ngapi (optional for vegetarians) 1/4 tsp. turmeric powder 1 Tbsp. fish sauce (optional for vegetarians) Marinate shrimp in fish sauce and turmeric for 15 minutes and set aside. Heat oil over medium-high heat and fry garlic, onions and chilies until onions turn translucent. Add tomatoes and shrimp paste and stir-fry until tomatoes break down and oil resurfaces. Add roselle leaves and bamboo shoots, mix thoroughly and simmer over medium heat until roselle leaves are cooked and all liquid is absorbed. Add marinated shrimp and cook for another 5 minutes. Serve with steamed rice. 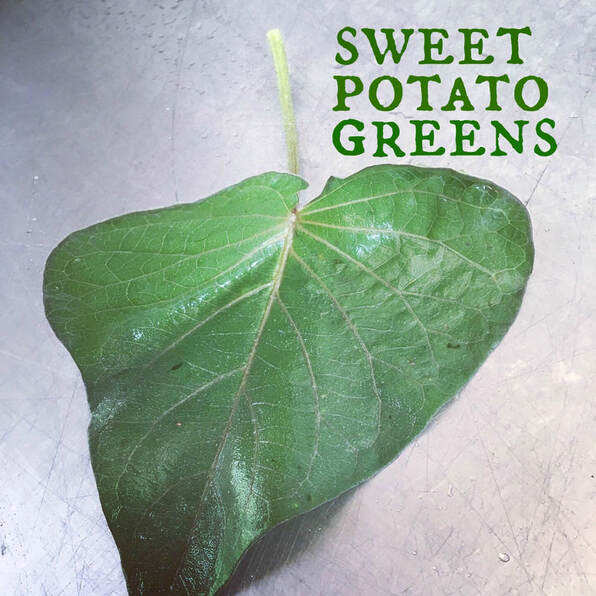 SWEET POTATO GREENS You know the tuber well from pies and fries, but did you know that you can also eat the leaves? They have been in staple in many countries, especially in African cuisine, for as long as sweet potatoes have been grown. I made a simple salad by cutting the leaves very thinly (chiffonade) and marinating them with minced shallot, vinegar, olive oil, and salt. After that it sat for 15 minutes or so, I added some chopped tomatoes. We ate it with crab cakes and were impressed with how the leaves holding their texture. The flavor was mild. http://www.epicurious.com/archive/blogs/editor/2012/08/cooking-with-sweet-potato-greens.html Sauteed Sweet Potato Greens From The Broad Fork by Hugh Acheson Serves 4 as a side "They are wonderfully rich in vitamins A and K and in polyphenols, and have magical way of hitting that hot pan and wilting into a beautiful pile of silky goodness in a minute's time." 1 tablespoon grapeseed oil 1 pound sweet potato greens, stems finely chopped and leaves torn kosher salt 1 teaspoon freshly squeezed lemon juice 1 teaspoon cold unsalted butter pinch of crushed red pepper flakes Place the largest saute pan you have on the stove, or use a wok. Crank up the heat to high, and when the pan is blazing hot, turn on the hood vent. Add the grapeseed oil and swirl it around in the pan. When the first wisps of smoke waft off the oil, add the greens. Cook them for 1 minute, as you would spinach, quickly stirring them around halfway through. Season with kosher salt while they are cooking, and then add the lemon juice, butter, and red pepper flakes, stirring well to combine. Remove the pan from the heat and transfer the greens to a paper-towel-lined plate. Blot off the excess moisture and serve immediately. Vadouvan and Corn and Sweet Potato Leaves From Heritage by Sean Brock Serves 6 as a side “I can never understand why more people in the South don’t eat them (sweet potato leaves). Other cultures consider them a treat and here are all these farmers in the South growing sweet potatoes who have never tasted the leaves, much less tried to sell them.” 4 ears corn in the husk, soaked in water for 1 hour 12 sweet potato leaves 1 tablespoon Vadouvan spice (recipe below) 1 tablespoon unsalted butter Preheat the oven to 400 degrees. Put the corn on a rimmed baking sheet and bake it for 15 minutes, or until the kernels are soft. Remove it from the oven. When the corn is cool enough to handle, remove the husks and silk and cut the kernels from the cobs. Set aside. (This can be done up to 1 day ahead. Refrigerate the kernels, and bring them back to room temperature when ready to proceed.) Wash the sweet potatoes leaves, drain them, and pat them dry. Make stacks of the leaves, roll them into cylinders, and cut them into ½-inch-wide ribbons. Combine the corn and sweet potato leaves in a large skillet over medium heat. Add the Vadouvan and butter and toss to coat. (This can be kept warm on the back of the stove for no more than 8 minutes. It should be made as close to serving time as possible.) Vadouvan Spice From Heritage by Sean Brock Makes ½ cup “This spice mix is great on pumpkin and fall squash, as well as on lamb, lobster, and scallops. Vadouvan is a curry powder that takes its influences from both India and France.” 1 pound sweet onions, cut into 1-inch pieces 8 ounces shallots, halved 6 garlic cloves 2 tablespoons vegetable oil ½ teaspoon fenugreek seeds 1 ½ teaspoons thinly sliced fresh curry leaves (optional) 1 ½ teaspoons ground cumin ½ teaspoon ground cardamom ½ teaspoon brown mustard seeds ½ teaspoon turmeric ¼ teaspoon grated nutmeg ¼ teaspoon crushed red pepper flakes 1/8 teaspoon ground cloves 1 ½ teaspoon kosher salt ½ teaspoon freshly ground black pepper Working in batches, pulse the onions in a food processor until very coarsely chopped; it’s okay if there are a few large pieces remaining. Repeat with the shallots, and then the garlic. Heat the oil in a 12-inch heavy nonstick skillet over high heat until it shimmers. Add the onions, shallots, and garlic and cook for 2 minutes, stirring frequently, then reduce the heat to low and cook until the onions and shallots are golden and lightly browned in spots, 25 to 30 minutes. Remove from the heat. Position a rack in the middle of the oven and preheat the oven to 350 degrees. Line two rimmed baking sheets with parchment paper. Grind the fenugreek seeds in a spice grinder or clean coffee grinder or with a mortar and pestle. Add them to the onion mixture, along with all the remaining ingredients, and stir until combined. Spread the mixture on the prepared baking sheets as thinly and evenly as possible. Bake, stirring occasionally and rotating the baking sheets, for 1 to 1 ¼ hours, until the mixture is well browned and barely moist. Cool to room temperature, then transfer to a container, cover, and refrigerate. Tightly covered, the spice mix can be refrigerated for up to 10 days. Sweet Potato Leaves Salad From panlasangpinoy.com 1 large bunch sweet potato leaves, stems removed and cleaned 3 pieces medium tomatoes, sliced 1 thumb ginger, shredded 1 medium red onion, sliced 6 tablespoons sugar cane vinegar ½ teaspoon white sugar ½ teaspoon salt ½ teaspoon ground black pepper 2 cups water Place water in a cooking pot and let boil. Blanch the sweet potato leaves. This is done by putting the leaves in boiling water. Let it stay for about 20 to 30 seconds. Remove the leaves and submerge in a bowl of cold water for 30 seconds, and let dry. In a large bowl, combine sweet potato leaves, tomatoes, ginger, onion, sugar, salt, pepper, and vinegar. Gently toss until all the ingredients are distributed. Serve as an appetizer. Share and enjoy! Gongura Biryani
From ujwalasdelicacies.com 3 cups rice 5 cups gongura (Roselle or Jamaican sorrel leaves) 2 carrots 2 potatoes 1 medium onion 2 eggplants ½ tsp - cumin 1 spicy cinnamon stick 3 anise stars 3-5 bay leaves 4 tbsp. - ghee 1 tbsp. - oil 1-2 tsp - coriander powder ½ tsp - chili powder 5 green chilies 5 sprigs cilantro Salt Soak rice for at-least 1 hour Cut onion, carrots and potatoes into cubes. Place deep X shaped slit to eggplant. Separate gongura leaves from stem. Discard stem. In a pot, add 2 tbsp. oil. Then add gongura, ¼ of onion and green chilies. Close the lid and cook till soft. Let it cool and grind to paste. Add water if needed. Keep it semi solid consistency. It should be watery also like paste. Meanwhile to another pot, add 4½ cups of water and boil. Now add bay leaf and rice. Lower flame to low, and cook rice till water drains. Take big pot, add ghee. Add cumin, star anise, cinnamon fry till golden brown. Add onion, carrot, eggplant and potatoes. Close lid and cook for 10 minutes. Add salt, stir and cook for 5 more minutes. Now add gongura paste, chili powder and coriander powder. Cook for 5 minutes. Now take gongura mixture into another bowl. Leave 1 layer of mixture on the bottom. Now add a layer of rice. On top of rice add another layer of gongura mixture. Add layers till all gongura and rice is placed. Place aluminum foil on the pot and close lid on top of foil. Placing aluminum foil ensures steam not to escape. We cooked rice partly, by this process we are cooking rice in gongura steam. Gongura taste penetrates rice and gives it aromatic flavor and taste. Close lid and cook on very low flame for almost 20-30 minutes till rice is cooked. Mix well, garnish with cilantro. Serve hot immediately.
0 Comments
 Below are 2 job descriptions. Both are somewhat flexible, though working at a farmer's market is required. The Part-Time Farm Crew Member may work best for someone living in Birmingham. Email margaretann@snowsbendfarm.com with a resume or completed application.
 JOB TITLE Farm Crew Member SUMMARY Farm Crew Members are involved in all aspects of the farm, including crop production (planting, maintaining, harvesting, washing, and packing), CSA and restaurant deliveries, and vending at farmer’s markets. Applicants should know that we are a production farm with a strong focus on hard-work, efficiency, and getting things done. QUALIFICATIONS
DUTIES
WORK RELATIONSHIPS Supervised by farm owners. Works closely with farm owners and other farm workers. We rely on staff members to communicate details, observations, anything and everything pertinent to their job. Good communication is a must. HOURS In the spring, early summer, and fall months there are typically up to 60 hours available and a minimum of 40 hours required. There is a slight dip in available hours in the peak heat of summertime, but still at least 40 available. In the winter, there is typically 40 hours, but some weeks the weather can have an effect on those. However, we grow and sell year-round so there is not a significant drop. The schedule for the majority of the year looks like this: M-F 7am-3pm (flexible end times, depending on how many hours employees would like to work) Saturday 5/6am – 1/3pm (depending on which farmer’s market you attend) 5-day work weeks are also an option COMPENSATION Farm Crew Members start at $12/hour Access to loads of high quality, delicious produce. 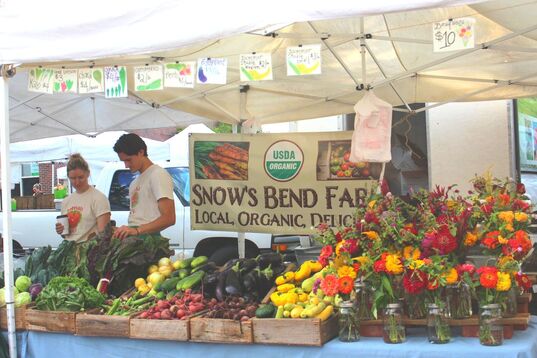 JOB TITLE
Part-Time Farm Crew Member SUMMARY Part-Time Farm Crew Members are involved in all aspects of the farm, including crop production (planting, maintaining, harvesting, washing, and packing), deliveries, and vending at farmer’s markets. Applicants should know that we are a production farm with a strong focus on hard-work, efficiency, and getting things done. QUALIFICATIONS
DUTIES
WORK RELATIONSHIPS Supervised by farm owners. Works closely with farm owners and other farm workers. We rely on staff members to communicate details, observations, anything and everything pertinent to their job. Good communication is a must. HOURS There are some hours available working from home which can be discussed during an interview. Otherwise, the schedule for the majority of the year looks like this: Thursday – meet at Red Cat Coffee House to accept home deliveries, then delivery around 15 boxes to homes around Birmingham Friday – 7 am to 4 pm work on the farm Saturday 6am – 1pm work at Pepper Place Farmer’s Market COMPENSATION Part-Time Farm Crew Members start at $12/hour Access to loads of high quality, delicious produce. 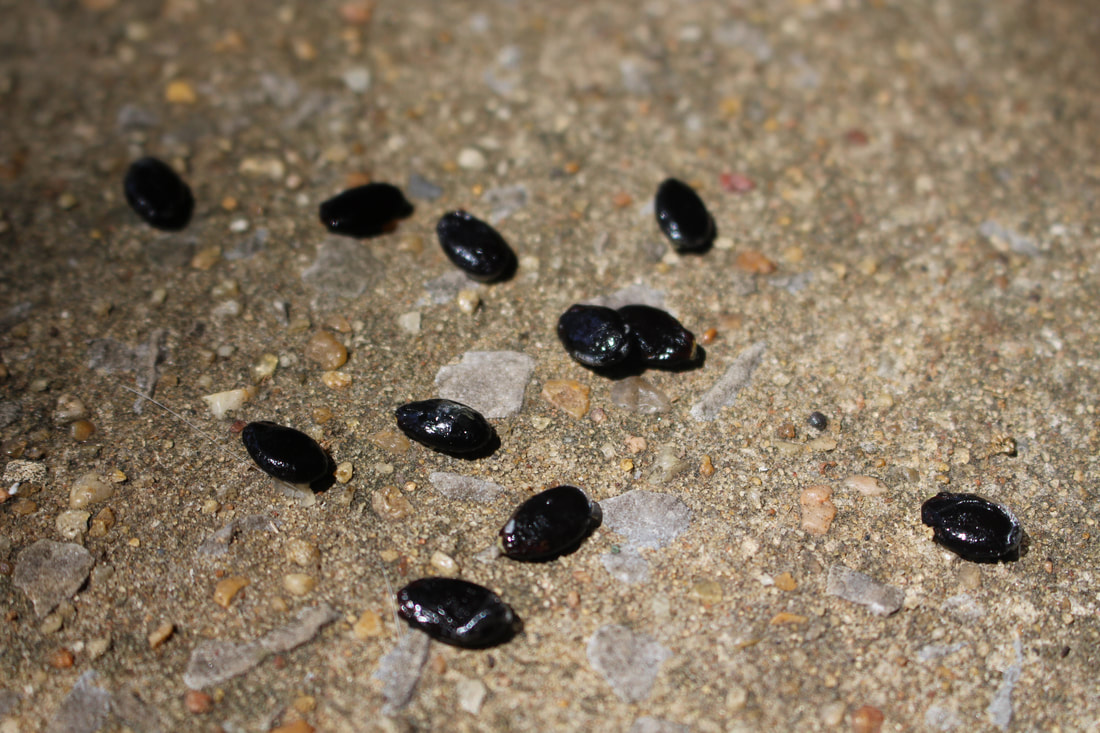 Where is your ideal setting for enjoying a cold slice of watermelon? Mine is along our private sand bar on the Black Warrior River, just down the bluff from where we grow them. We swim and then take a break to munch on slices of melon, spitting the seeds out. Once satiated, we swim again. Each year, we plant a melon patch on this bank, simply by spitting out the seeds. 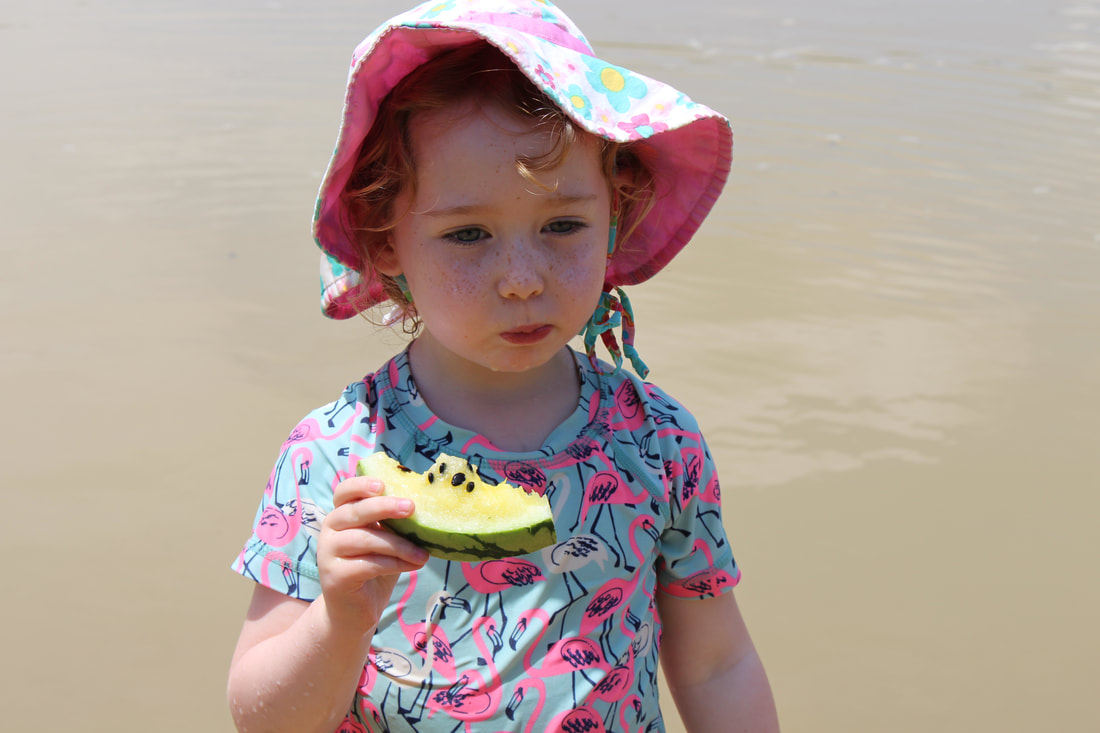 My second favorite spot is on the front steps of our home. As I begin to cut a melon, it is so ripe that the knife barely touches the rind and it splits open. I arrange each piece on a platter, and tell the whole family to come outside. We often eat watermelon outside because it can be a messy snack and because then we can spit the seeds and we may have the opportunity to catch up with our neighbors. By stepping out into the thick air of an Alabama summer afternoon, we are embracing that moment, that season, and elevating it with watermelon, turning a typical summer day into a celebration. 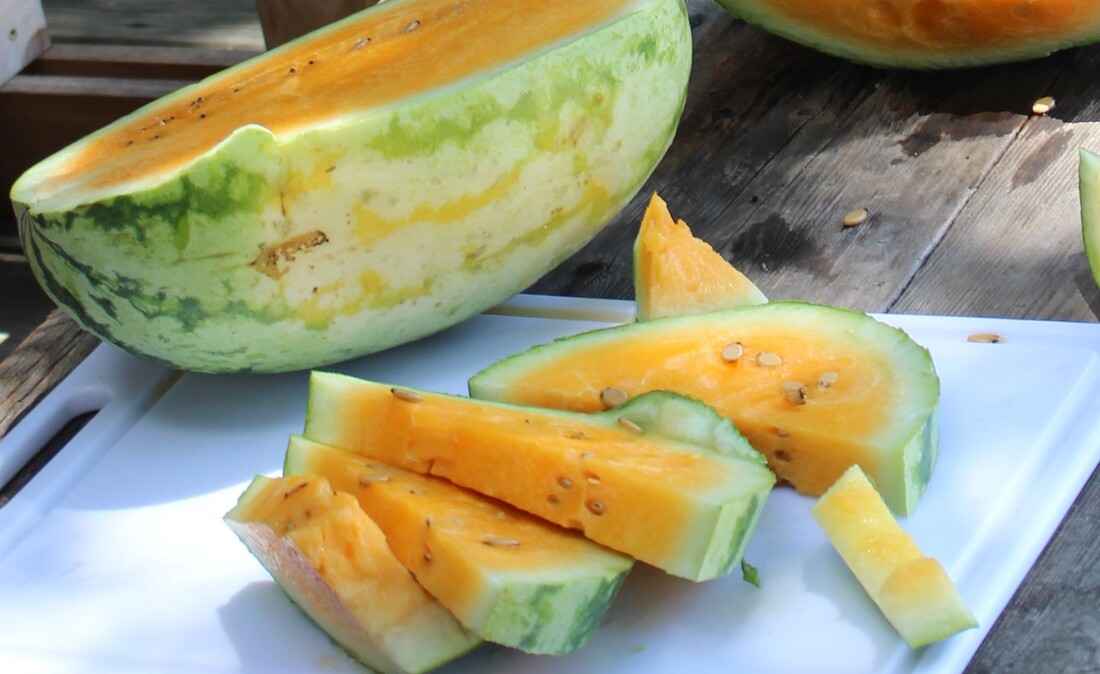 Orangeglo It was in that setting that I offered a slice to our 6-year-old neighbor. They struggled with it for a while before I realized that they didn’t know how to eat watermelon with seeds in it. From there I continued to see signs that this iconic symbol of summer may be fading away. The next day, I walked into a grocery store and was immediately face-to-face with a full grown woman dressed as a slice of watermelon, covered in the black, teardrop shaped seeds, yet serving samples of seedless watermelon.  enjoying a Blacktail Mountain Seedless watermelons are more common in grocery stores, but almost all the melons being sold at a farmer's market will have seeds. We don't grow seedless watermelons for a few reasons. The seedless watermelon seeds cost 50 cents per seed, which is quite expensive as commercial seeds go. Then you have to spray the seedlings with a crocus-derived alkaline, called colchicine, commonly used to treat gout. You must then plant all of your watermelons and, for every 2 or 3 rows of those, you must also plant a row of melon plants just for pollinating. I don't want to get too deep into the science of this here, but basically, the seedless watermelons are a triploid, carry 3 chromosomes instead of 2 and as a result when they are fertilized, the seeds fail to mature. If you want to go deeper on this subject, here is a great article: https://botanistinthekitchen.blog/2015/09/18/triple-threat-watermelon/ or an easy-to-digest video here: https://www.youtube.com/watch?v=ohN0y03yMco 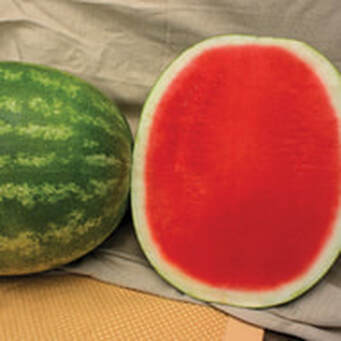 picture from a seed catalog, it looks like something is missing The parts around the seeds are always my favorite. It seems to me that the melon ripens up the most right around those seeds. 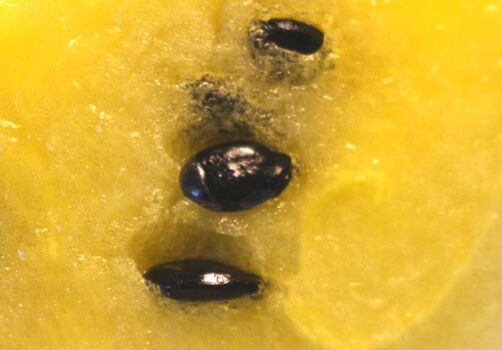 close up of a Yellow Doll If we do need to eat the melon indoors, I'll cut it into chunks by finding the areas with the least amount of seeds first. Typically, around the rind there are some large seedless areas and then again in the center. The seeds generally form a ring in the middle. When I am left with the middle parts, full of seeds, I may pick them out or I may just eat that part right away (it's the best!). Sometimes I will send the seedy parts through a sieve and create watermelon juice to enjoy on its own or turn into a margarita! 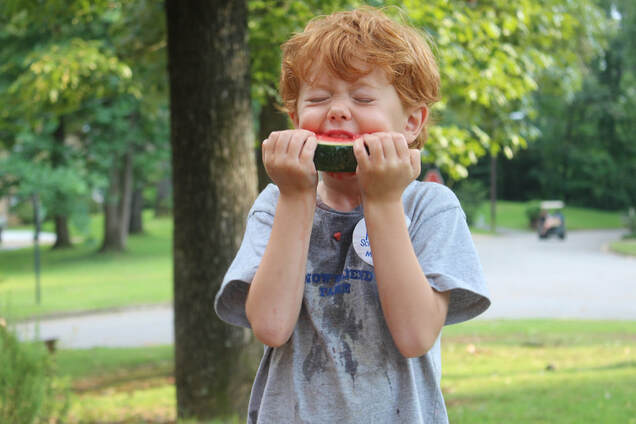 it gets a little messy sometimes Just today, a melon split open in the packing shed. It was fresh from the walk-in and very chilled. I had a million things to be doing at that moment, but I could not resist that bright, red sweetness calling to me from where it sat on a stainless steel table and I am so glad that I listened. I ate it and had a mouth full of seeds. I shot them out like automatic ammunition. As soon as I had that first bite, I thought to myself I needed that. Not only did I need the hydrating properties (watermelons are 92%) water, but also the vitamins it is packed with, all wrapped up in a satisfying snack. It was the sweetness of summer, concentrated and cooled.  have your own seed spitting contest, all you need is a melon and , if you have it on hand, some sidewalk chalk Spit seeds, see whose goes the farthest, and invite neighbors over to join in. Teach a kid the joys of watermelon seed spitting, revel in the heat of summer and the delicious flavor that it brings. Eating watermelon is an event, not just a food. Take a moment to go slow, that is what summer is for.  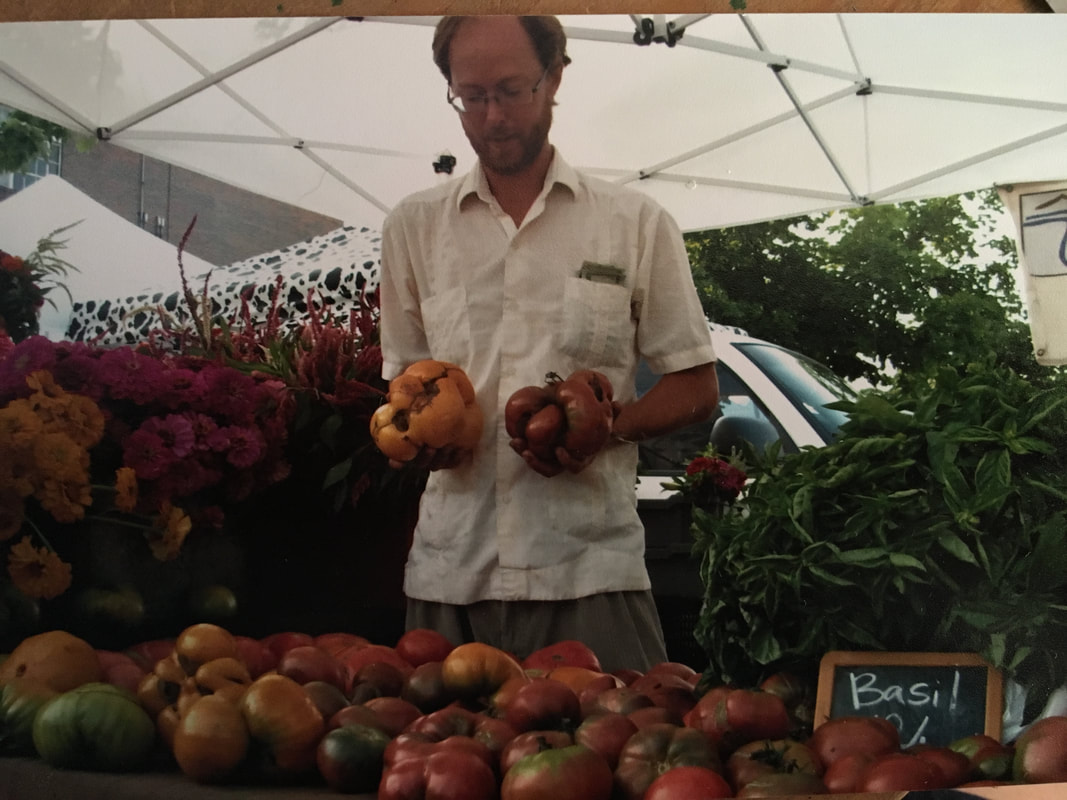 Saturday mornings are for sleeping in, lingering at home in your pajamas, leisurely drinking a warm cup of coffee, and then making your way to the farmer's market, right? Not so for a market farmer. My Saturdays begin when the sky is black and the birds, still fast asleep, have not even considered their morning song. I groggily get dressed and gulp down a few sips of coffee before getting behind the wheel of the truck and heading to Birmingham. I choose a fast-paced playlist, loud enough to keep me focused. If the sky is clear, I’ll enjoy a colorful sunrise just before pulling into the designated Snow’s Bend corner of the Market at Pepper Place. Many of my fellow farmers have had to wake up much earlier and drive farther than I have. A busy market is worth it for us. In late May through July, we earn the money that will keep us going through the winter. For months now, we have worked hard growing the food, we have spent days harvesting and washing it, and hours packing, driving, and setting up before the opening bell rings.  David and I were introduced to farmer’s markets while we were interns. Our Saturday mornings then were spent at the bustling Seattle area farmer’s market we attended in Redmond, Washington. We quickly realized that we loved talking about food, sharing recipes, and trading with other vendors. Daily revelations on our plates were slowly converting us to a diet of fresh, organic produce. Once we had taken our first steps down that path, we knew that there was no turning back. We ate salads with smoked tuna piled high on top, eggplant parmesan with fresh tomatoes, perfectly prepared beets with thyme and goat cheese, and we made pancakes from scratch with fresh raspberries. Our market neighbor, Les, specialized in tomato plants, garlic, and apples. The many distinct varieties of each of these amazed us. Gravenstien apples and Korean Rocambole garlic were stand outs. Les gave us our first tomato plants and we grew them in whiskey barrels outside of our intern trailer.  setting up at the Tuscaloosa market our first year Once we were back in Alabama and had started our own farm, we were excited to take what we had grown to the market. In Tuscaloosa, at that time, the Tuscaloosa Farmer’s Market was run by the Truck Grower’s Association. The “under-the-bridge market”, as we referred to it, was indeed under an overpass. This market was a remnant of the old, sell out of the back of your truck style market of the 1970s. Typically, there was about one customer for every 5 or 6 farmers. A new customer would arrive and all of the farmers would be watching them to see who they would buy from. It was awkward. The very first day a farmer there told me that she really just came down to “talk with my kinfolk”. 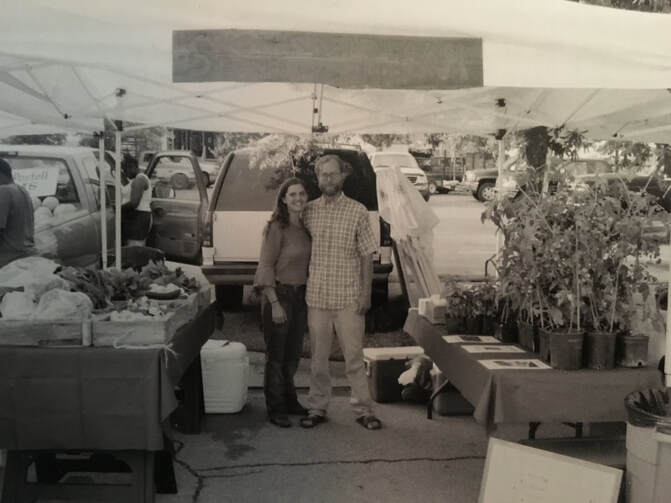 our first Pepper Place market in 2004 In mid-May of our first year, after many discouraging Saturdays at the Tuscaloosa market, The Market at Pepper Place in Birmingham opened and we were ready! That first day, we sold out of everything except for a couple of bunches of radishes and a few tomato plants. It seemed like we might actually be able to pull off this farming gig! Customers were hungry for our produce and the response in the following weeks was encouraging. In our early years, it was only David and I, working every minute, side by side. We would break up the long Friday harvest; gathering greens and roots early in the morning and return to the field for tomatoes, cucumbers, squash, basil, and zinnias in the late afternoon. During the hottest part of the day we would wash the greens and bunch root vegetables in our shaded packing area. Flowers were always the last thing we would pick. The air would begin to cool and dusk would settle on the farm. That is when we would crack open the cold beers for the home stretch. One Friday in those early years, before a big farmer's market, we had completed the morning harvest and needed to return for those high dollar afternoon items. The hand-me-down suburban we were driving at the time decided it did not want to accelerate forward. It would, however, drive in reverse. We were at our cabin, which is on top of a hill, and the fields are down by the river. The road leading down is a steep and winding dirt road. David, determined as he is, decided he could drive down this road to the field backwards. I chose to walk. He did make it down, we got the harvest in, and a family member was able to lend us their truck for travel to market the next day. There have been dead batteries at 5 am with a truck full of produce, flat tires on the interstate, and alarms not going off, but once we arrive at our market tent, there is a rush of excitement. Sharing the fruits of our labor with people that appreciate it makes it all worthwhile. 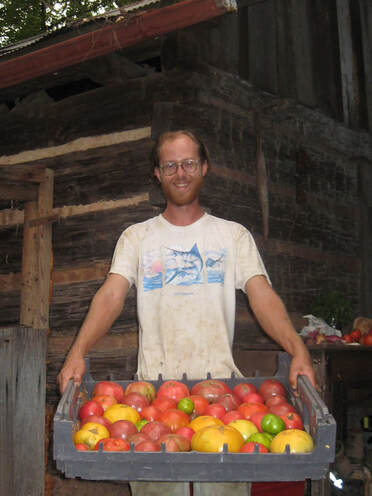 David loading for market in 2005 Packing the vehicles for market in the peak season is a skill that David mastered early on. It is a large-scale, 3-D game of Tetris, where everything must fit together perfectly. Buckets of flowers, especially the top-heavy sunflowers and cockscomb, must be packed last and secured so that as we make the bumpy, wide turn out of the gate they do not fall over. Unpacking at our booth Saturday morning is reminiscent of a clown car unloading. Instead of clowns though, it is coolers of lettuce, kale, chard, carrots, and beets; boxes of squash, cucumbers, eggplant, okra, and melons; buckets of basil and bouquets. 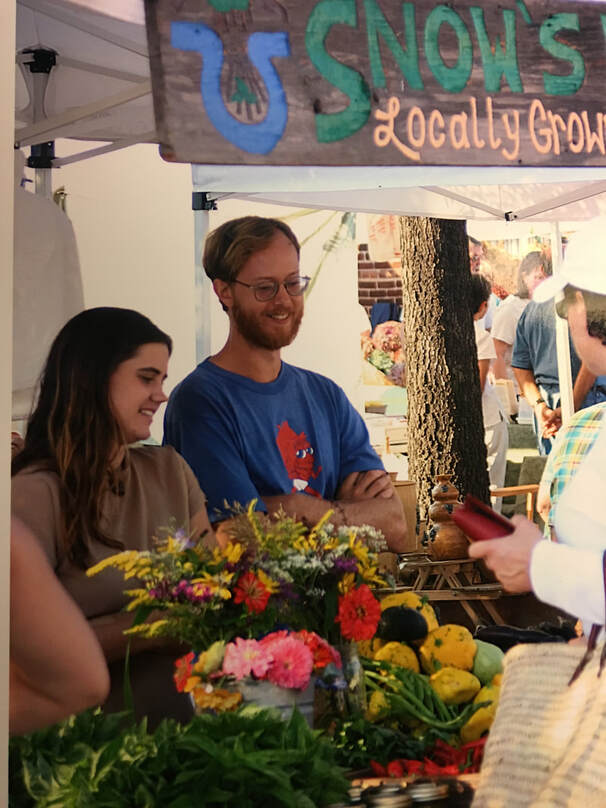 Farmer’s markets are like heaven to me. Being surrounded by real food and the people that produced it, everyone seems happy there. All morning long we talk about food, what we are cooking, what is being harvested for next week, how is the rain or lack thereof effecting things, how is your cat? Over our 16 years of attending farmer’s markets, David and I have watched children grow up one Saturday at a time, we have watched couples get married and grow families of their own, and we have made the strong friendships that began with a ‘Good morning’ shared over a pile of radishes or box of cucumbers. When the market bell rings again at noon, signaling its close, there is a rush to pack up. When we push the four corners of the white market tent together, a feeling of contentment washes over us. We smile. There is a strong camaraderie among farmers. It is a challenging occupation and one that leaves us spread far and wide with little time for socializing. Saturdays at noon we are gathered in one place and have the opportunity to catch up over a beer and lunch, if we are not already all talked out and completely exhausted. We discuss the market, how our crops are doing, our success and our struggles. Just as I feel we have the best customers; I also know that we have the best colleagues. 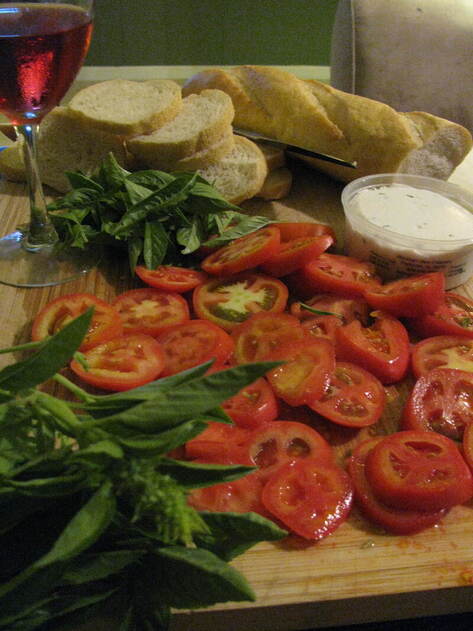 my favorite post-market meal The moment I am packed back up and on the return trip to the farm, whatever energy I thought that I had, vanishes. All day long I have talked about cooking and eating and dreamed up lavish dishes to prepare that evening. However, by the time the truck is unloaded and everything put away, it is well into the afternoon and I have bottomed out. I opt for slices of fresh baguette spread with local goat cheese, topped with leaves of basil, slices of tomato, and sprinkled with salt. I wash this down with a cool glass of Rose and escape into a movie, falling asleep before 8 pm. This continues to be our Saturday after-market ritual, but our movie choices now are in the G-rated category and we have our children snuggled up with us. 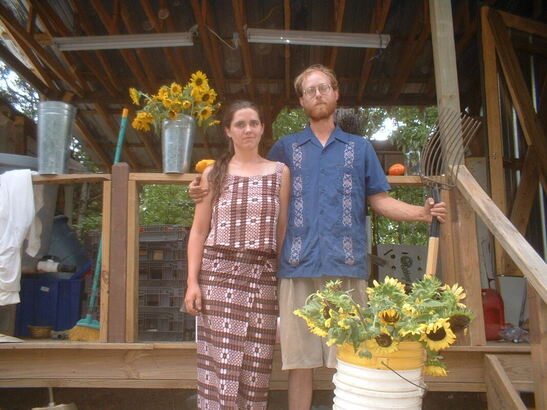 Post-market 'American Gothic' circa 2006 Eight years ago, Tuscaloosa built a beautiful new facility to house the Tuscaloosa River Market and we have been there every Saturday since.
There is so much more to the farmer's market than the produce. Come and see for yourself, and be sure you take home a tomato! Tuscaloosa River Market The Market at Pepper Place 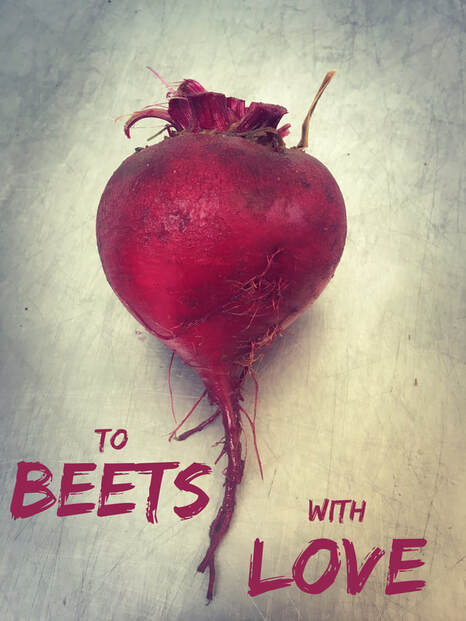 I fell in love with beets in Morocco. A bowl of these gems would adorn the table at our evening meals. They were simply prepared, steamed and seasoned with salt, lemon juice, and cumin. My love grew deeper during our farm internship in Washington, when David and I would roast them whole, peel them, then toss them with balsamic vinegar and fresh thyme. Often, we would eat them just like that, but sometimes we would add them to salad greens with goat cheese. They were top of the list of crops we wanted to grow when we began farming on Snow's Bend.
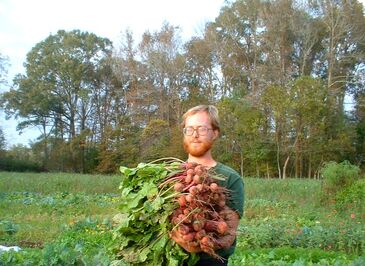
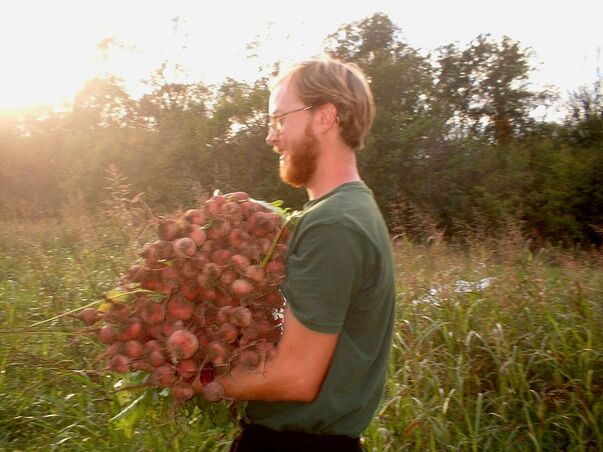
David in our garden in 2005 As with many vegetables, some people declare that they do not like beets. I counter with questions about when, where, and how they have eaten them in the past. My dad was one of these people. One day when he was visiting us on the farm, we prepared a feast of farm food. He devoured the salad and then asked "What were the pink things in the salad?" I told him that he had just eaten a plate full of beets! 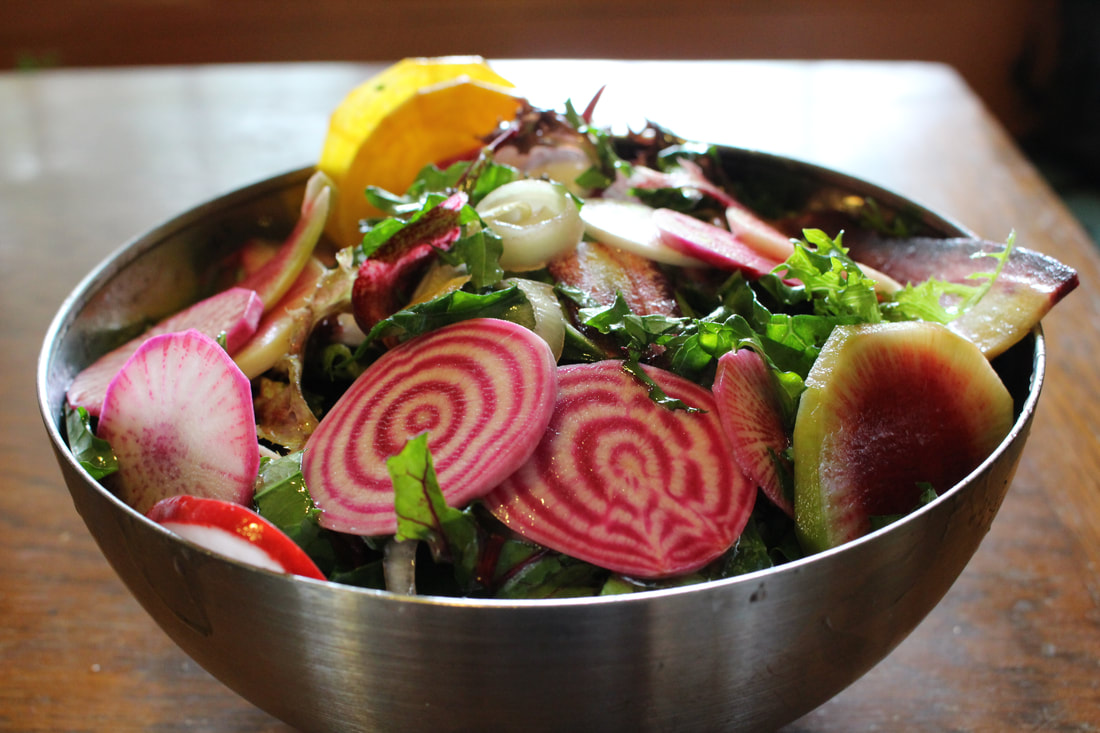 Chioggia beets are perfect for thinly slicing raw in salads or as addition to a crudite platter. Their concentric circles of pink and white are entrancing. Gold beets have the mildest flavor and will not 'bleed', turning everything their shade, as the red beets do. Personally, I relish the full flavor of the red beets and enjoy highlighting their bold color, as in this beet hummus. 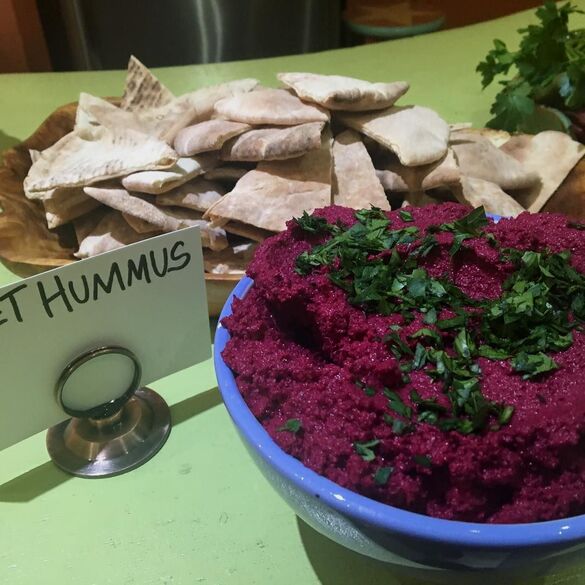  Beet Red Velvet Cake with Fresh Chevre Frosting (recipe included below) I write a weekly newsletter for our CSA members which always includes a few recipes. It can be a challenge and I often find myself searching through the latest cookbooks for inspiration. As I was perusing beet recipes one day, I came upon Beets & Berries in On Vegetables by Jeremy Fox. The ingredients list included Beet Soil, with a separate recipe for that. Intrigued, I looked it up. Juicing, dehydrating, a mortar and pestle...who has the time for that? Certainly not a farmer and mother of two young children. I closed the book and moved on to a simpler beet recipe. Over the next couple of weeks I could not forget about beet soil. It sounded so different from the typical beet recipes I am accustomed to. Plus, I am a little obsessed with all things soil. And so, one Sunday morning I woke up determined to make it. I planned on accomplishing nothing else and so it seemed obtainable. 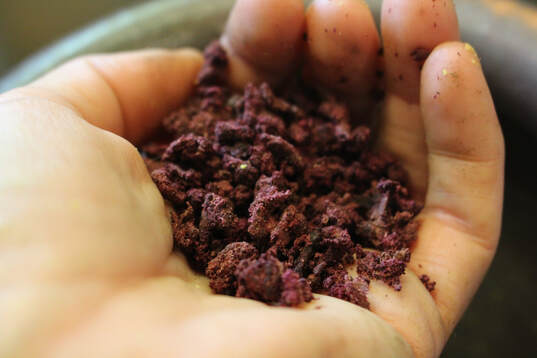 I juiced the beets and then dehydrated the pulp. The dehydrated pulp was then ground with pistachios, salt, and sugar for a crumbly topping. 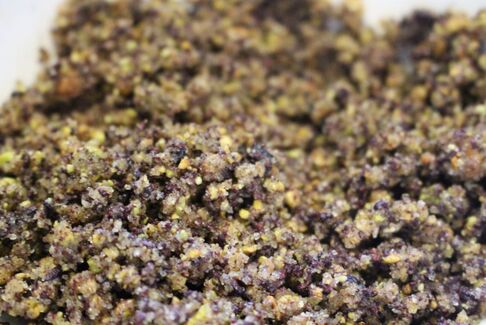 beet soil The beet juice was turned into savory-sweet molasses. 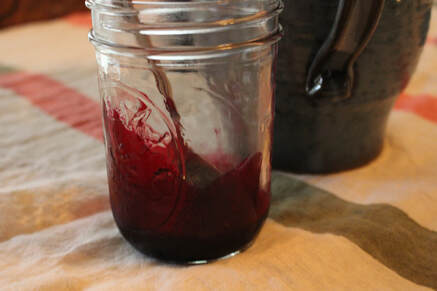 I used our own Snow's Bend strawberries, foraged for wild blackberries, and visited my secret mulberry spot (which is loaded this time of year) to garnish our plates of Beets & Berries. 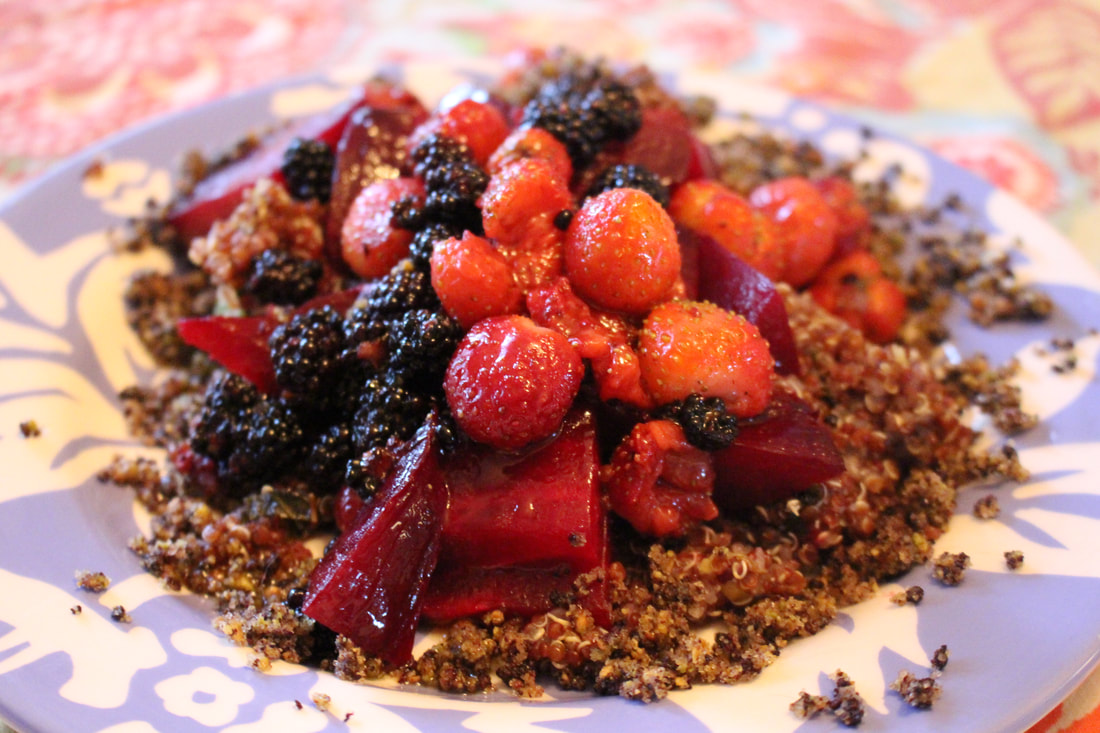 After we devoured this bright and refreshing main course, we moved on to a richer one; vanilla ice cream drizzled with beet molasses and topped with a sprinkling of beet soil. It was incredible and unlike anything I have eaten before. 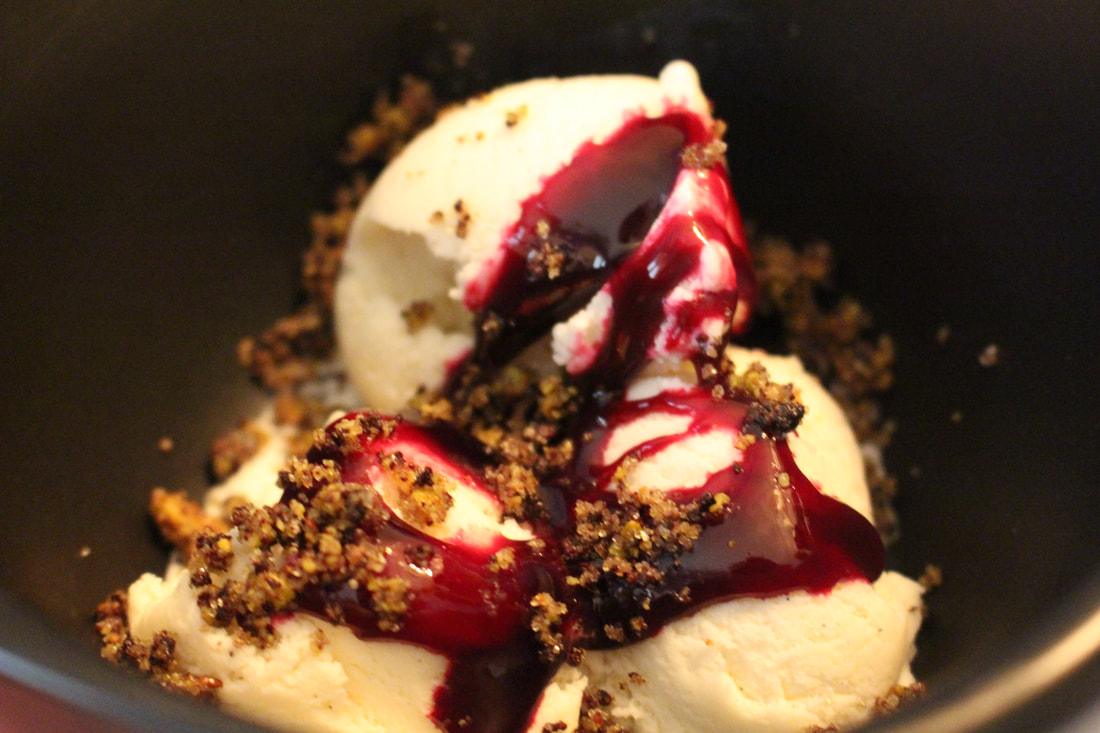 CSA members will be finding beets in their boxes with some regularity now and they will be available at farmer's markets every Saturday morning for several weeks. 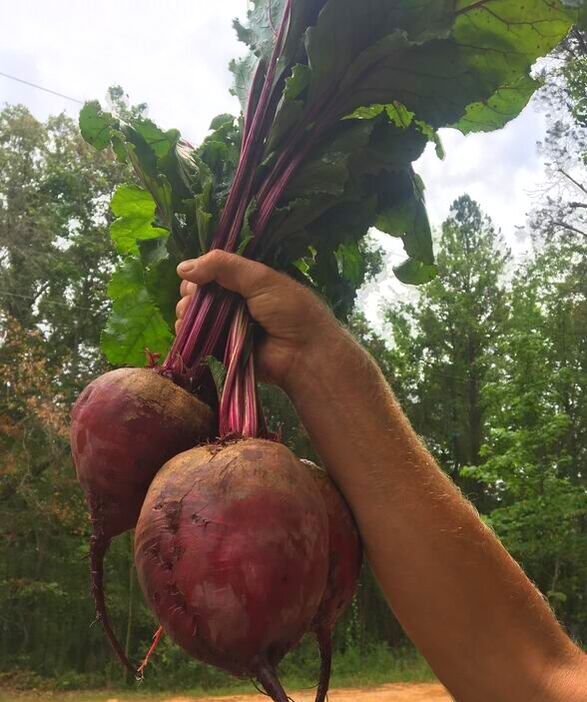 To the beet, y'all! recipesBeet Red Velvet Cake with Fresh Chevre Frosting
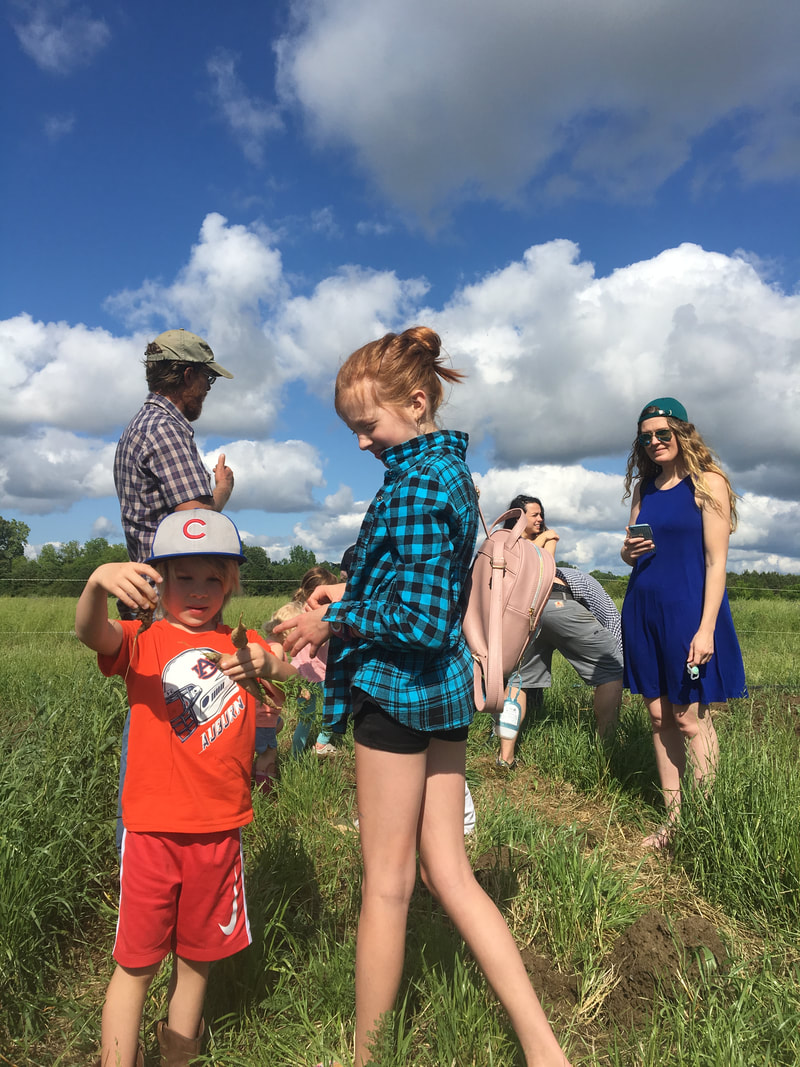
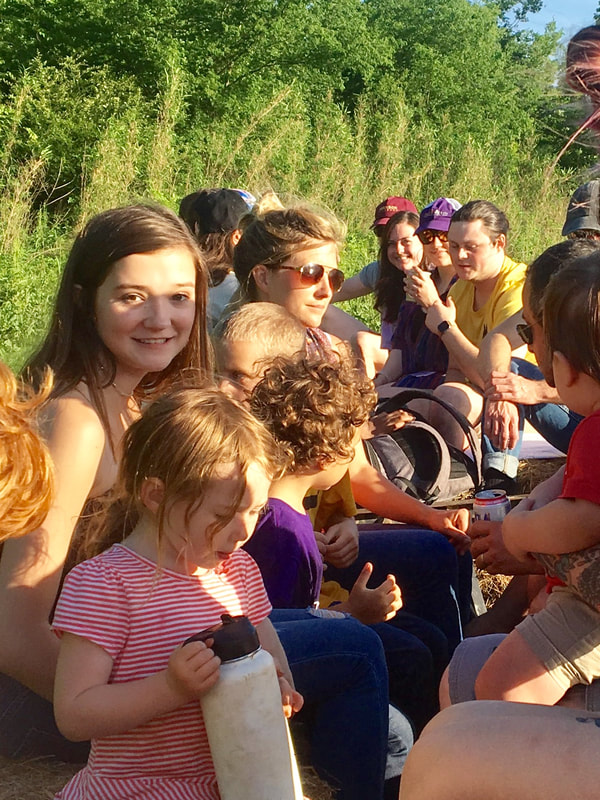
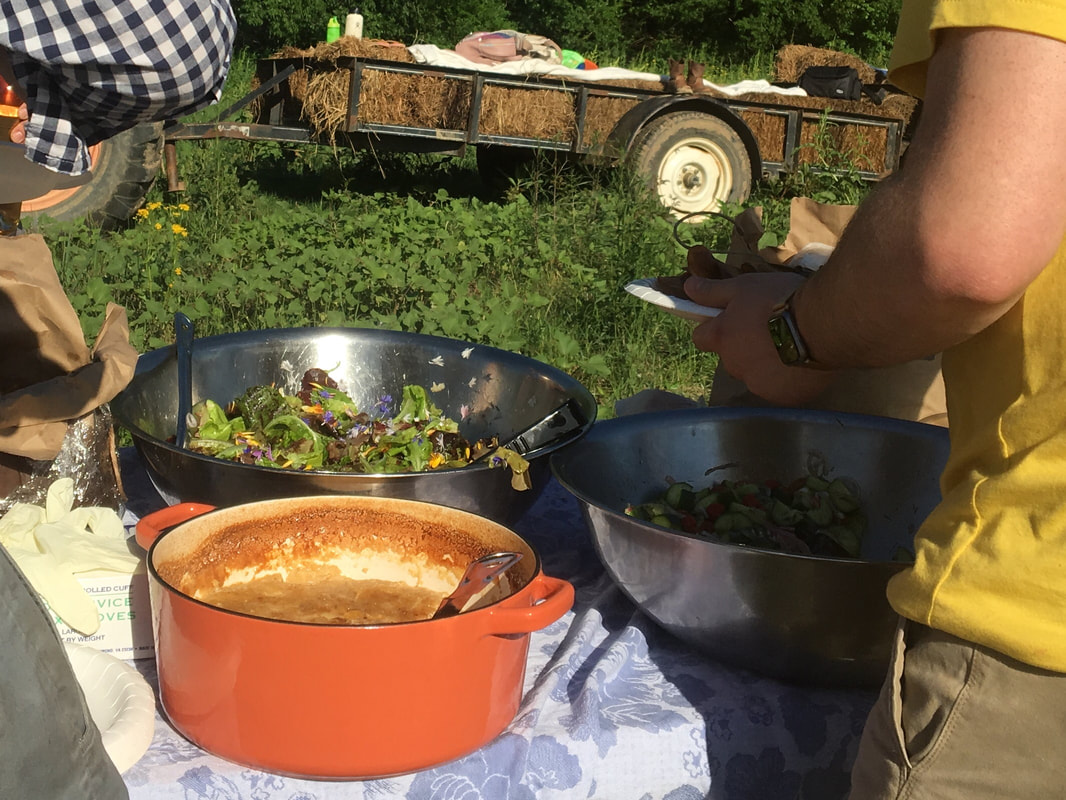
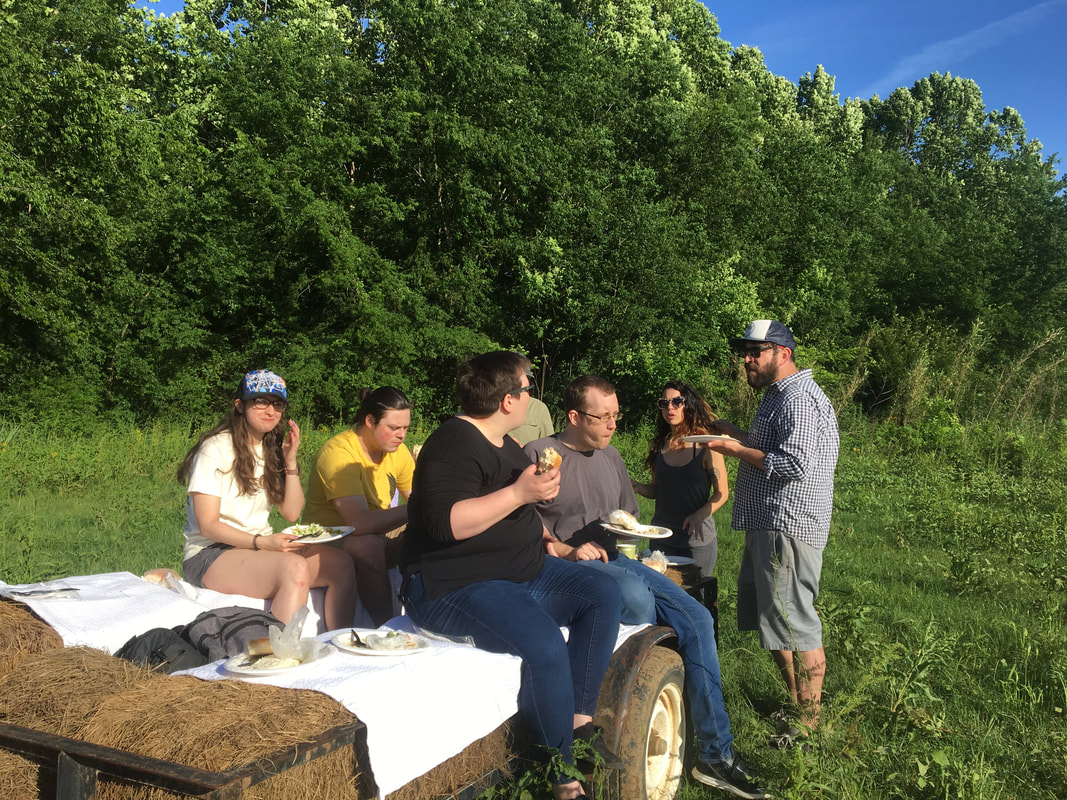
From Root to Leaf by Steven Satterfield Makes a 2-layer, 9-inch cake 3 medium beets, tops and taproots removed 12 tablespoons (1 ½ sticks) unsalted butter, room temperature, plus more for greasing the pans ¾ cup buttermilk Juice of 1 large lemon 2 teaspoons distilled white vinegar 1 ½ teaspoons vanilla extract 2 cups sifted cake flour 3 tablespoons cocoa powder ½ teaspoon baking soda 1 ¾ cups granulated sugar 3 large eggs Fresh Chevre Frosting (recipe below) Heat the oven to 400 degrees. Wash the beets and place on a sheet of parchment. Fold the parchment around the beets. Place the parchment on a sheet of aluminum foil and wrap the foil tightly around the parchment to make a packet. Bake until the tip of a knife slides easily into the largest beet. Cool until the beets can be handled, then peel. Butter two 9-inch round cake pans. Line the bottoms of the pans with parchment, and butter the parchment. Set aside. Lower the oven temperature to 350 degrees. Place the beets in a food processor and process until finely chopped. Remove the beet mixture from the processor and measure out 1 cup. Reserve any remaining chopped beets for another use. Return the measured 1 cup beets to the food processor. Add the buttermilk, lemon juice, vinegar, and vanilla, and process until smooth. Into a medium bowl, sift together the flour, cocoa, salt, baking powder, and baking soda. Set aside. In the bowl of a stand mixer, beat the 12 tablespoons butter until soft. Slowly add the sugar, and beat until creamy. Beat in the eggs one at a time. After each addition, stop the motor and scrape down the sides of the bowl. Alternate adding dry and wet ingredients to the butter mixture, beginning and ending with the dry ingredients. After each addition, beat for 10 seconds, and then scrape the bowl. Divide the batter between the prepared cake pans, smoothing the tops. Bake until a cake tester inserted in the cake comes out clean, about 20 minutes. Cool completely in the pans on a wire rack. To assemble, place a serving platter upside down on top of one of the pans. While holding the pan and the plate, invert the pan, allowing the cake to drop out onto the plate. Lift off the pan, and peel away the parchment. Put 1 cup Fresh Chevre Frosting on the center of the cake. Using a flat spatula, spread the frosting evenly over the top. Invert the second cake onto a plate, remove the parchment, then invert again onto a flat plate. Carefully ease the second cake, flat side down, centered on top of the frosted layer. Cover the top and sides of the cake with the remaining frosting. Serve immediately or store covered at room temperature for 2 to 3 days. Fresh Chevre Frosting Enough for one 2-layer cake 6 tablespoons unsalted butter, room temperature 1 ½ cups sifted confectioners’ sugar Pinch salt ½ teaspoon vanilla extract 8 ounces cream cheese, room temperature 8 ounces creamy goat cheese (chevre), room temperature In the bowl of a stand mixer, beat the butter until soft. Beat in the confectioners’ sugar, salt, and vanilla, and continue beating until creamy. With the motor running on low, add pieces of the cream cheese one at a time. Stop the motor and scrape down the sides of the bowl. With the motor running, add pieces of goat cheese, and beat until creamy. Store at room temperature until ready to frost the cake layers. The following recipes are all from the cookbook On Vegetables by Jeremy Fox. Beets & Berries Serves 4 Roasted beets 10 small beets, greens removed and reserved for another use 2 tablespoons extra-virgin olive oil 1 tablespoon red wine vinegar Kosher salt Red quinoa 2/3 cup red quinoa 3 tablespoons chopped fresh spearmint leaves Finely grated zest and juice of 1 lemon, plus more as needed Kosher salt 1 cup mixed berries To serve 1 medium avocado 2 tablespoons extra-virgin olive oil Kosher salt Freshly cracked black pepper 4 tablespoons Beet Soil (recipe follows) A handful of each; whole mulberries, halved strawberries, and halved blackberries, to garnish Make the roasted beets Follow the instructions for roasting and peeling beets on page 40. Cut the peeled beets into whatever size and shape you like and toss them with the olive oil, red wine vinegar, and salt to taste. Set the beets aside to cool until plating. Make the red quinoa Rinse the quinoa under cold running water. In a pot, combine the quinoa and 1 1/3 cups cool water. Bring to a boil over medium heat. Cover, reduce the heat to a simmer, and cook until all the water is absorbed, 15 to 20 minutes. Remove from the heat, fluff the quinoa with a fork, and toss it with the 2 teaspoons of the olive oil, the mint, lemon zest and juice, and salt to taste. Cool the quinoa to room temperature or cooler before serving. In a bowl, toss the berries with the remaining 3 tablespoons olive oil, season lightly with salt, and mash them up with a fork until the oil and the juices combine. Right before serving, halve and pit the avocado, then scoop the avocado flesh into a bowl. Add the olive oil, salt to taste, and a healthy dose of black pepper. Mash it with a fork until well combined. To serve To serve, either portion onto 4 individual plates or bowls or onto 1 large platter and serve family-style. Lay a dollop of the avocado first, and follow with some quinoa. Arrange the beets over the avocado and quinoa, then spoon the berry mixture on top. Garnish with beet soil and finish with the fresh berries. Beet soil Makes about 1 ½ cups “These dehydrated beet solids can be ground in a food processor, but I prefer the texture you get from a mortar and pestle. The addition of olive oil changes the color from reddish maroon to a brown, and the green bits of pulverized pistachio make it really look like soil. In addition to the Beets & Berries, beet soil is also great sprinkled over ice cream that’s been drizzled with Beet Molasses (recipe follows).” 3.5 ounces shelled pistachios, toasted 4 ounces dehydrated red beet pulp (dehydrated at 135 degrees for 12 hours or overnight) 2 ounces granulated sugar ½ teaspoon kosher salt 5 tablespoons extra-virgin olive oil Grind the toasted pistachios in a mortar and pestle until it looks somewhat like dirt with bits of minerals mixed in. The result should not be a uniform powder, but, rather chunks of various sizes. Set aside. Place the beet pulp in a mortar and pestle or grind in a food processor (a blender will make it much too fine) and process until it is fairly broken down. There should not be any big pieces of beet pulp. A lot of the pulp will turn into a powder, which is fine. Transfer the pulp to a bowl and fold in the ground pistachios, sugar, and salt. Using your hands (wear gloves if you do not want it to stain your hands), mix the ingredients thoroughly. (You want to use your hands to make sure that there are no clumps, which would throw off the ratio.) Slowly, and in stages, gradually add the olive oil and work it into the mixture. Use less than you need to start, as you can always add more, but removing it is difficult. Work it into your palms and between your fingers. You want it to crumble without getting clumpy; it should be the texture of healthy soil. The color will change from purple burgundy to a dark color of dirt. Keep agitating it with your fingers, so that the oil is evenly dispersed. You need to add enough oil so that the beet soil is not powdery and tastes luxurious, sweet, and nutty. Just don’t add too much oil, which will give you a texture like wet sand. (If you do add too much oil, lay the soil between layers of paper towels to absorb the excess oil. Repeat the process until enough of the excess oil has been absorbed, but try to avoid this, as it is a long and annoying process.) Store in an airtight container at room temperature for up to 1 month. Beet Molasses Makes 1 cup “It is a good thing to have on hand in place of things like pomegranate molasses or a reduced balsamico. It’s also great as a cassis replacement in a Kir Royale.” 1 quart red beet juice, finely strained 1 cup granulated sugar ½ cup rice vinegar 2 teaspoons kosher salt In a wide, heavy-bottomed pot, combine the beet juice, sugar, vinegar, and salt and bring to a slow simmer over medium heat. Cook, maintaining a bare simmer, until the liquid is reduced by 75 to 80 percent of its original volume, about 4 hours. As the liquid reduces, brush down the inside of the pot with a pastry brush. To test for doneness, drizzle a little of the molasses on a plate and let it cool. It should have the consistency of aged balsamic vinegar. Once the molasses is ready, strain it through a fine-mesh sieve and allow it to come down to room temperature. Cover and refrigerate for up to 3 months. *you can halve this recipe if you like 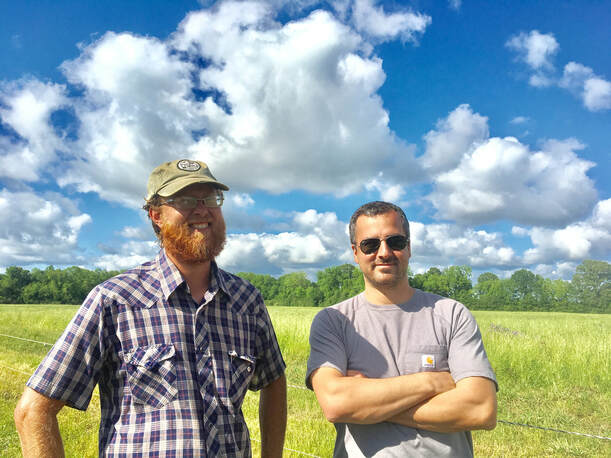 The roots of this friendship run back to 1997 when David and Mauricio Papapietro, owner of Brick and Tin, met in college at Sewanee. In 2004, when David and I returned to Alabama following our internship in Washington state and set out to begin our farming career in earnest, Mauricio was beginning his career as a chef. We have attended each other’s weddings and watched our families grow together. When he opened Brick and Tin, we already had a great relationship. 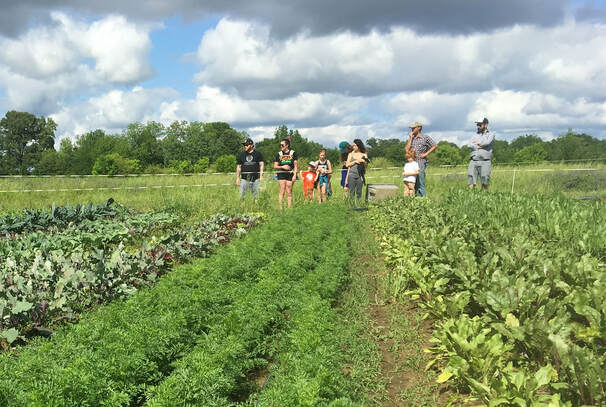 Mauricio has been to the farm several times over the years. On Sunday, he was joined by his family and the crew from Brick and Tin. 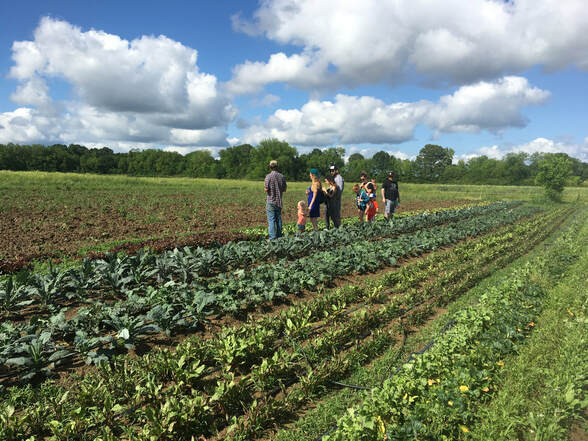
As we walked the fields and shared a picnic by the river, we talked about farming and how we can continue to cultivate this already strong partnership.
It is clear that Mauricio and everyone at Brick and Tin care deeply about sourcing the best quality produce and are committed to supporting local farms.
We had a blast and hope they will come back again soon!
In the meantime, I highly recommend you visit them at one of their two locations; in downtown Birmingham and Mountain Brook. https://www.brickandtin.com/ 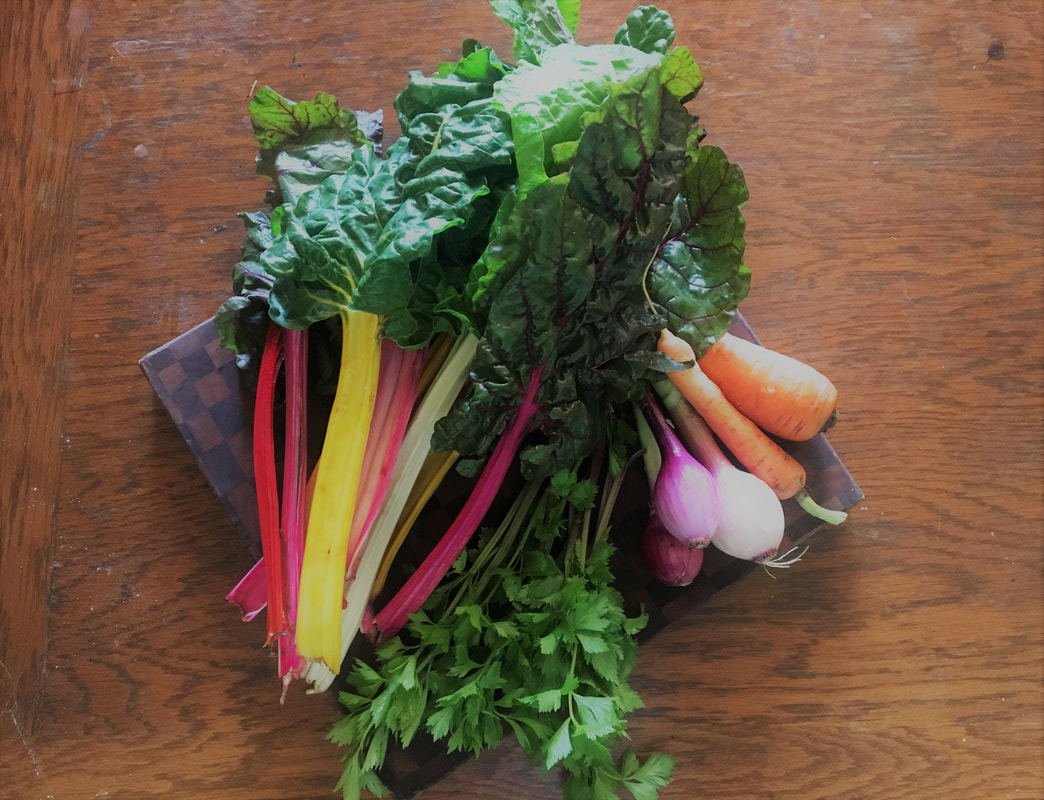 I recently made this for a sunset picnic on the farm. The original recipe calls for 4 individual pot pies baked in bowls, but it worked well as in large pie pan and was easier to take on the go. At home, the individual bowls are best. Half was eaten right away and the other half the following evening. After enjoying it for dinner two nights in a row, I still wanted more! 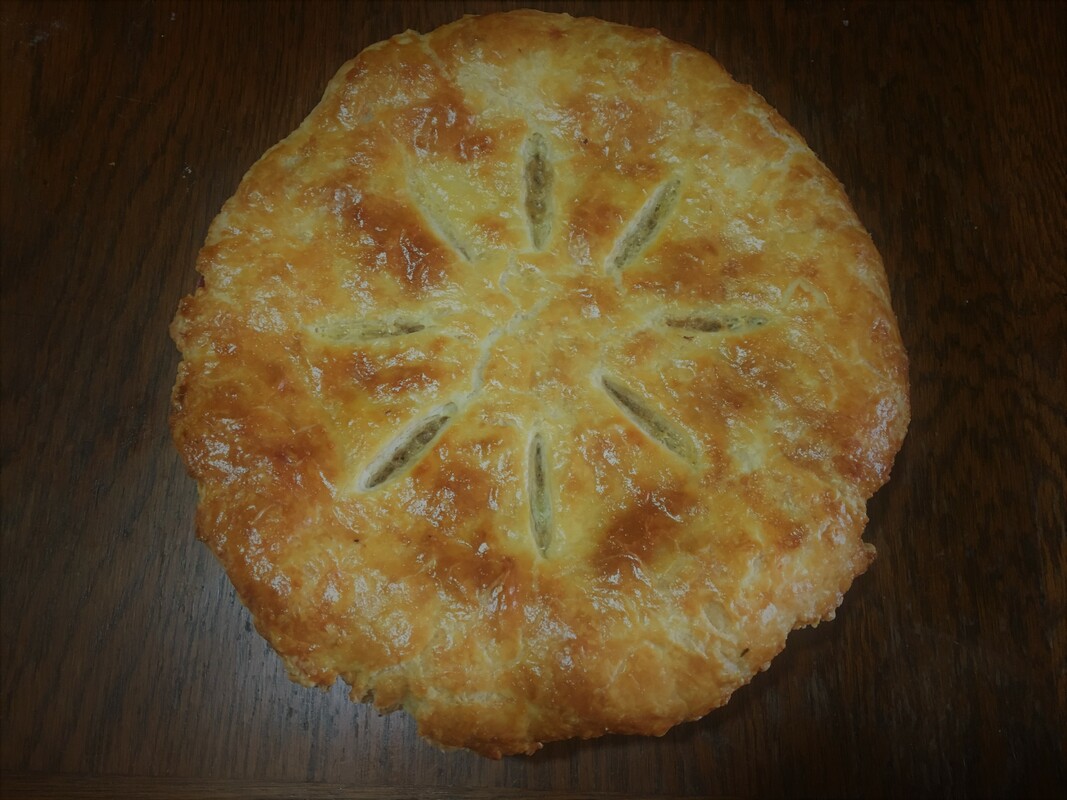 Adapted from The Smitten Kitchen Cookbook by Deb Perelman
Serves 4 to 6 “The crust and stews can be made up to 24 hours in advance, and need only to be baked to come to the table;…” Lid 2 cups all-purpose flour ½ teaspoon table salt 13 tablespoons unsalted butter 6 tablespoons sour cream or whole Greek yogurt 1 tablespoon white wine vinegar ¼ cup ice water 1 egg, beaten with 1 tablespoon water, for egg wash Filling 2 tablespoons olive oil 4 ounces bacon 1 large or 2 small onions, finely chopped 1 large carrot, finely chopped 2 to 3 small celery stalks or 1 large, finely chopped Pinch of red pepper flakes Salt and freshly ground black pepper 2 garlic cloves, minced 1 bunch of chard, stalks chopped to ¼-inch and leaves chiffonaded 3 ½ tablespoons butter 3 ½ tablespoons all-purpose flour 3 ¼ cups low-sodium chicken or vegetable broth 2 cups white beans, cooked and drained, or from one and a third 15.5-ounce cans Make lids In a large, wide bowl (preferably one that you can get your hands into), combine the flour and salt. Add the butter and, using a pastry blender, cut it up and into the flour mixture until it resembles little pebbles. Keep breaking up the bits of butter until the texture is like uncooked couscous. In a small dish, whisk together the sour cream, vinegar, and water, and combine it with the butter-flour mixture. Using a flexible spatula, stir the wet and the dry together until a craggy dough forms. If needed, get your hands into the bowl to knead it a few times into one big ball. Pat it into a flattish ball, wrap it in plastic wrap, and chill in the fridge for 1 hour or up to 2 days. Make filling Heat a large, wide saucepan over medium-heat and brown the bacon. Drain on paper towels and chop when cool. Leave the heat on and the renderings in the pan. Add onions, carrot, celery, chard stalks, red pepper flakes, and a few pinches of salt, and cook over medium heat until the vegetables are softened and begin to take on color, about 7 to 8 minutes. Add the garlic, and cook for 1 minute more. Add the greens and cook until wilted, about 2 to 3 minutes. Season with the additional salt and freshly ground black pepper to taste. Transfer all of the cooked vegetables to the bowl with the back, and set aside. Make sauce Wipe out the large saucepan; don’t worry if any bits remain stuck to the bottom. Then melt the butter in the saucepan over medium-low heat. Add the flour, and stir with a whisk until combined. Continue cooking for 2 minutes, stirring the whole time, until it begins to take on a little color. Whisk in the broth, one ladleful at a time, mixing completely between additions. Once you’ve added one-third of the broth, you can begin to add the rest more quickly, two or three ladlefuls at a time, at this point you can scrape up any bits that were stuck to the bottom – they’ll add great flavor. Once all of the broth is added, stirring the whole time, bring the mixture to a boil and reduce it to a simmer. Cook the sauce until it is thickened and graveylike, about 10 minutes. Season with salt and pepper. Stir the white beans and reserved vegetables into the sauce. Preheat your oven to 375 degrees. Assemble and cook pot pies Pour filling into a deep-dish pie pan and place on a baking sheet. Roll out the dough so that it will cover your pan with an overhang, or about 1 inch wider in diameter than your pan. Whisk the egg was and brush it lightly around the top rim of your bowls (to keep the lid glued on; nobody likes losing their lid!) and drape the pastry over, pressing gently to adhere it. Brush the lid with egg wash, then cut decorative vents in each to help steam escape. Bake until crust is lightly bronzed and filling is bubbling, about 30 to 35 minutes. 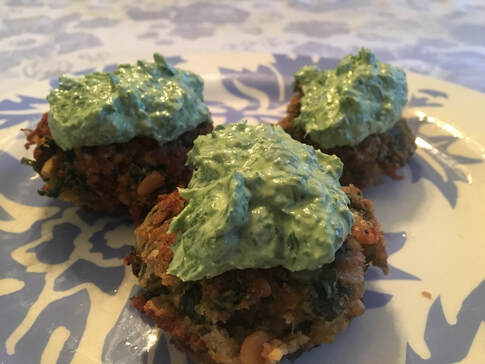 Typically, when I prepare vegetables, I want my children to eat them. Not the case with these. I want them all to myself! Chard Cakes with Sorrel Sauce
from Plenty by Yotam Ottolenghi Serves 4 as a starter “You don’t necessarily have to make the sauce as the cakes work perfectly well accompanied with just a wedge of lemon. Still, if you choose to make it (and I can’t recommend it enough) you’ll be able to keep it in the fridge for a day or two and serve it with a million other things – roasted root vegetables, hearty lentils, red meat, and oil fish." Sauce 3 cups sorrel leaves, washed ½ cup Greek yogurt 1 garlic clove, crushed 2 tbsp olive oil ½ tsp Dijon mustard Salt 1 ¼ lbs Rainbow chard 1/3 cup pine nuts 1 tbsp olive oil 4 oz kashkaval cheese (sub. Pecorino or Parmagiano), coarsely grated 1 egg 6 tbsp dried white breadcrumbs ¼ tsp salt Black pepper Half-and-half vegetable oil and olive oil for frying To make the sauce. Place all the ingredients in a food processor or a blender and blitz to a fine bright-green sauce. Taste and adjust the amount of salt. Keep in the fridge until needed. Cut the stalks from the green chard leaves. Bring a large pan of water to the boil. Add the stalks and simmer for 4 minutes. Then add the leaves, stir and continue simmering for 3 minutes. Drain the chard and allow to cool down slightly. Once cool enough to handle, squeeze as much water out of the chard as possible. You need to use both hands and be quite forceful to do this. Next, chop the leaves and stalks roughly and put in a mixing bowl. In a small pan fry the pine nuts in the tablespoon of olive oil for 1 minute, or until light brown (watch out; they darken in seconds). Add the nuts and oil to the chard, followed by the cheese, egg, breadcrumbs, salt, and some pepper. If the mix is very soft and sticky you might need to add more crumbs. Pour enough frying oil into a frying pan to come ¼ inch up the sides. Shape the chard mix into eight patties that are roughly 2 inches in diameter and 5/8 inch thick. Fry them for about 3 minutes on each side, or until golden brown. Transfer onto paper towels to absorb the oil. Serve warm or at room temperature, with the sauce on the side. 
My typical commute to work involves dropping a kid, or three, off at school and beginning my half-hour drive to the farm. I relish that time with my coffee and thoughts, transitioning from mother to farmer. In the winter and spring we often see the river rise. This can add layers to our commute.

Last Wednesday I found a tree laying across the dirt road on my way in. I was forced to go around, meaning back to the highway and in through Coker.
Once I was finally through the yellow gate and onto the farm property, I found the river in the road. On this day, I was able to walk the rest of the way to the garden.
On Thursday, the river has risen higher. We are grateful that the garden is spared and only the roads and lower fields we do not use are under water, but we are forced to add a canoe to our commute.
Because there are two farmer’s markets on Saturday and Friday the water will be even higher, we decide it is best to go ahead and harvest for them. Totes are filled with bunches of collards, kale, chard, and carrots, along with heads of lettuce and pounds of salad, arugula, and spinach. The tractor with a trailer is able to drive a good bit of the way back. 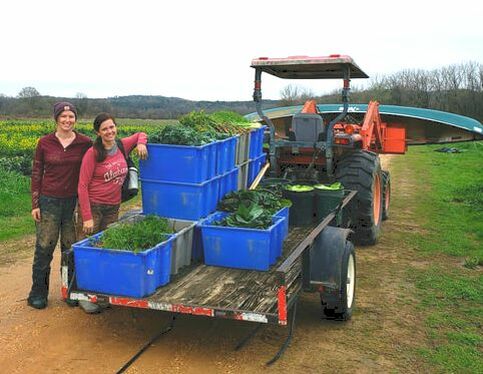
It requires three canoe trips to move the harvest from one spot on the farm to the other side of the high water. On trip number two I spot a group of large, bright white birds gliding along the water covering the field. It turns out to be white pelicans. They are breath-taking and we forget about the work for a moment and revel in the beauty of nature that surrounds us.
It continues to rain every night, so there is really no hope for driving to the garden for a while. On Friday David, JC, and Victoria travel in the canoe and I follow later in a kayak. Although this is inconvenient, I do not mind the forced peace in a world of constant noise and information. It is absolutely quiet, with an occasional hoot from an owl and the soft rhythm of the paddle. The pelicans are still there, drifting regally.
Saturday and Sunday David goes out alone. Our greenhouse is on the other side of the water and must be watered. He also places some row cover for protection as the temperature falls.
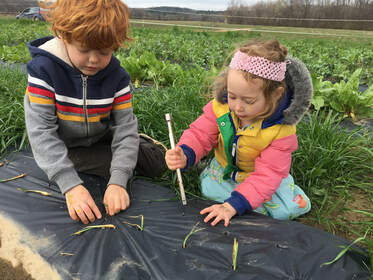
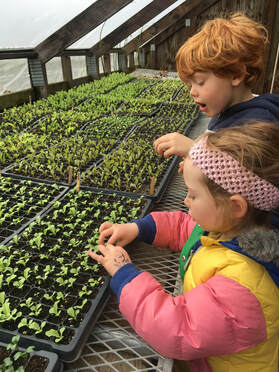
Monday I kayak again. I am beginning to get use to this. When I come through the woods and enter into the open space of the fields, startled ducks fly off in pairs. The pelicans are gone. By Wednesday we hope to be able to drive to the garden again. That will be nice. And if it doesn’t flood again until next winter, that would be nice, too. 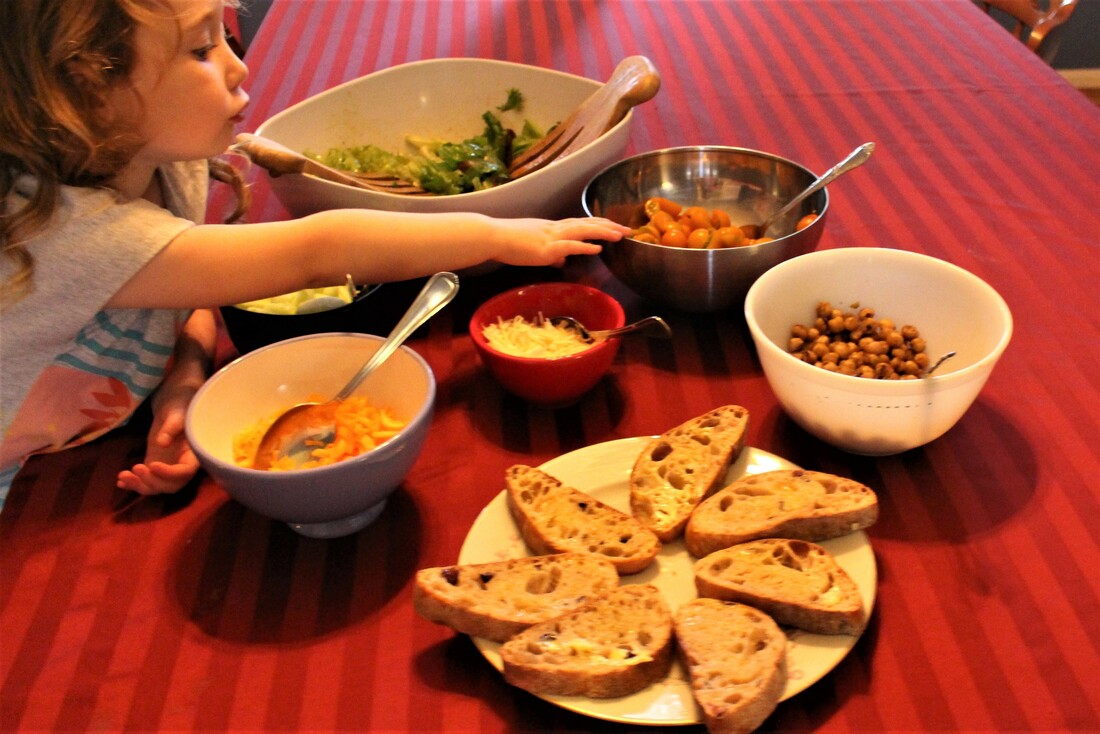 Reason #1 Enjoy the good (tasting) things in life; such as freshly prepared meals, enjoyed around your table with family and friends  Reason #2 Go on food adventures! Try new foods and find produce not available in grocery stores. Don’t worry…each week we include recipes in our newsletter using ingredients in your box Email margaretann@snowsbendfarm.com to receive a sample newsletter. Reason #3 Attend special CSA events!  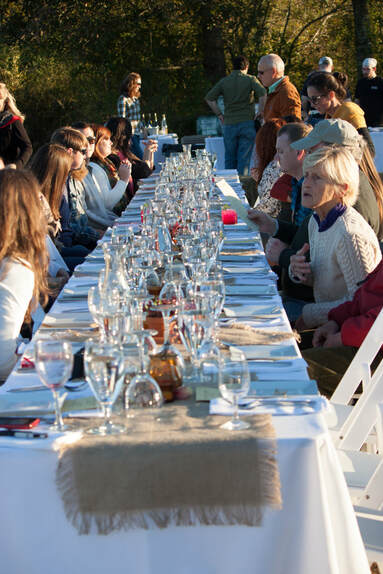 Reason #4 CLEAN FOOD - we let our kids eat straight from the source with the comfort of knowing that it is as clean as it gets! 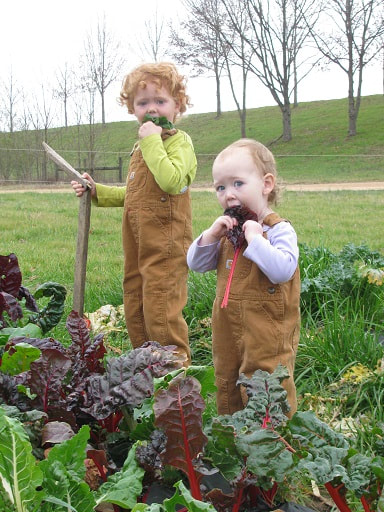 Reason #5 Snow's Bend is the only 16 year and counting Certified Organic CSA in Alabama. All of the produce you will receive is grown by us on our farm. 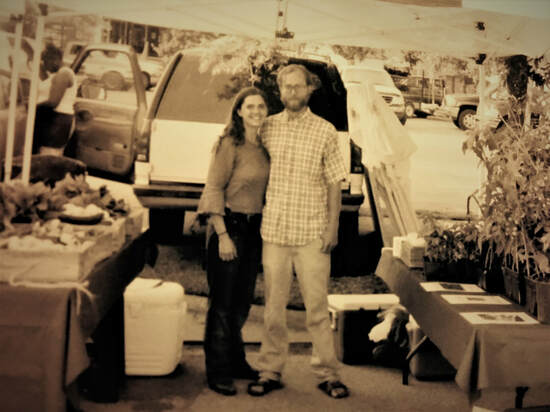 (who are these kids?) Reason #6 Local, and not just the food. Both David and I were born and raised in Tuscaloosa and we are raising our children here. We are committed to you and we are committed to this community.
|
NEWS FROM THE BENDFrom planting time to the growing and harvesting seasons, Archives
January 2024
Categories |
||||||||||||


 RSS Feed
|
|
Snow's Bend Farm ~ Coker, Alabama ~ 205-394-3561
|
|
|

|