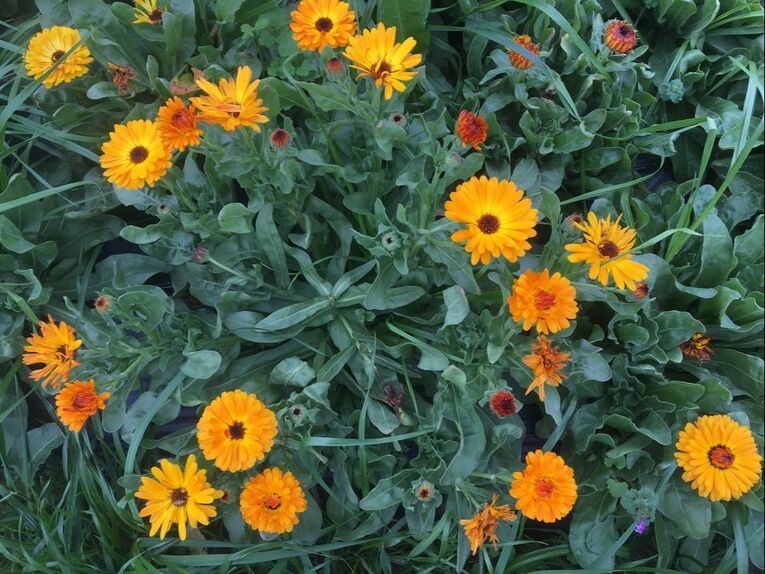
 Lately, spring starts with a sneeze for me. My first hint was the pollen sheen on the surface of the water in our dunk tank full of freshly harvested kale. I saw that and knew that spring was fast approaching.
This year it comes the first week of February, following a week of polar vortex in the Midwest and our coldest temperatures thus far this winter. Yesterday felt much like a spring day, as I sat on the tractor looking at the electric green grass pulsing with life and the multitude of yellow flowers of over-wintered brassicas in the first stages of seed formation. As is typical of an early spring day, we were trying to cram in as much soil work as possible before a predicted overnight rain. David even direct seeded the first beds of 2019! I was able to stay later than usual, or allowed myself to, pushing the limits of preschool and extended day hours. I couldn’t deny myself. The best part of a day on the farm is when the sun begins to fall just a bit lower in the sky and you can already feel the pride of accomplishment but just want to feel it a little bit more. Walking across the farm I see wildflowers (read ‘weeds’) beginning to bloom in purples, pinks, and whites mingled with the greenest of green grass that you only see in spring. The ability to spend our days walking through that, as opposed to fluorescent lighted hallways, is one of a multitude of reasons we continue persisting through the evolving challenges we face each year as a small farm.
0 Comments
 This pie is worth every second you put into making it! Each vegetable is paired with its own seasonings then layered and wrapped in a butter and thyme flavored crust. A feast for your eyes, body, and soul. It is just the kind of dish you serve to people you love during the holiday season.
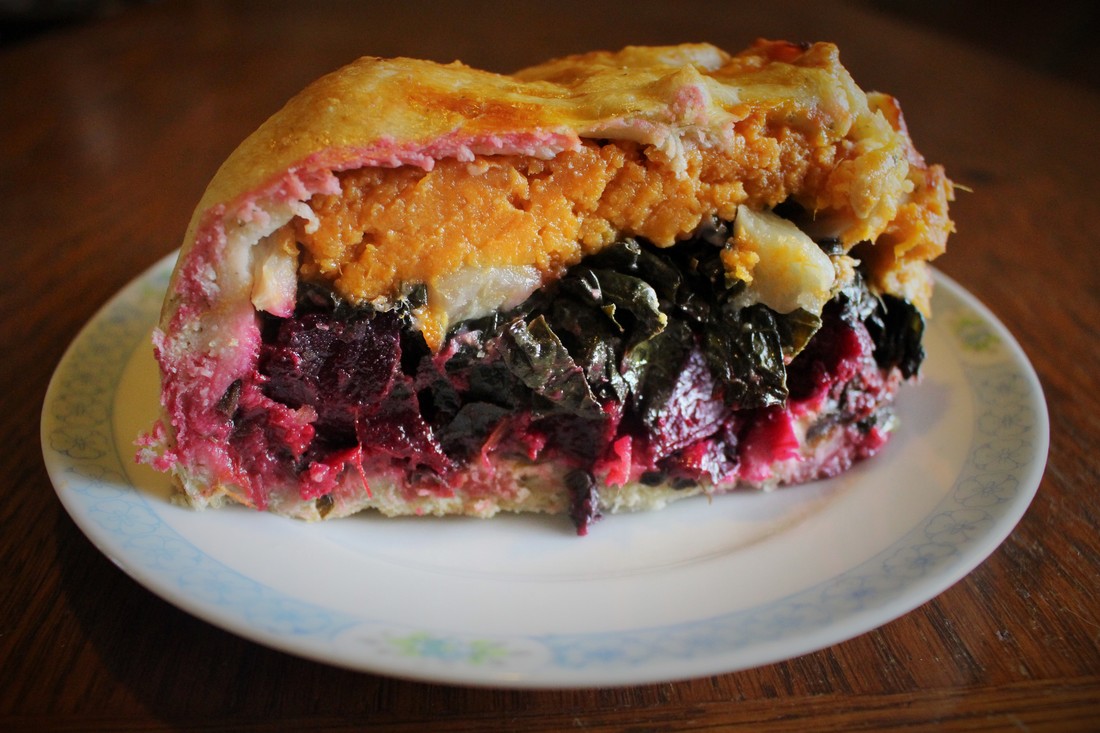
Goodwill Rainbow Pie From A Modern Way to Eat by Anna Jones Serves 8 to 10 “It may seem like there’s a lot to do, but everything can happen at once – all the roasting can be done while you make the leeks and greens.” 7 ounces Lancashire or white cheddar cheese 1 organic or free-range egg, beaten, or soy milk for brushing FOR THE PASTRY 3 ¾ cups all-purpose flour, plus extra for rolling 1 teaspoon fine sea salt ½ teaspoon baking powder A small bunch of fresh thyme, leaves picked and very finely chopped 13 tablespoons butter or vegetable shortening Up to 1 generous cup ice-cold water FOR THE SWEET POTATOES 3 sweet potatoes, scrubbed clean A little butter or olive oil A good few grating of fresh nutmeg FOR THE BEETS 5 medium beets, peeled and cut into rough cubes Olive oil Splash of red wine vinegar 2 sprigs of fresh marjoram or oregano, leaves picked Sea salt and freshly ground black pepper FOR THE TURNIPS 5 to 6 turnips, peeled and cut into little fingers A couple of sprigs of fresh sage, leaves picked Zest of 1 unwaxed orange 1 tablespoon honey Olive oil FOR THE LEEKS 2 tablespoons butter or olive oil 2 good-sized leeks, washed, trimmed, and sliced 3 sprigs of fresh thyme, leaves picked FOR THE GREENS 1 bunch of chard, stalks removed, roughly shredded Grated zest and juice of ½ an unwaxed lemon 1 red chile, finely chopped First make the pastry. Sift the flour, salt, and baking powder into a bowl and add the chopped thyme. Cut the butter or shortening into small bits and rub these into the dry ingredients until you have a breadcrumb-like mix. Add the water and knead until you have a smooth dough, but don’t overwork it. You could also use a food processor: pulse to breadcrumbs, then add the water and pulse until it just comes together. Wrap the pastry in plastic wrap and chill while you make everything else. Preheat the oven to 425 degrees. Roast the sweet potatoes for 1 hour until soft. Meanwhile, prepare the beets and turnips. Place the beets into a roasting pan with a splash of olive oil and the vinegar, add the marjoram or oregano, and season. Cover with foil and roast alongside the sweet potatoes for 1 hour, removing the foil for the last 15 minutes. Put the turnips into a roasting dish with the sage, orange zest, honey, and a drizzle of olive oil, mix to coat, then cover with foil. Roast with the other vegetables for 45 minutes, until golden, removing the foil for the last 5 to 10 minutes. When all the vegetables are cooked, remove from the oven and turn the temperature down to 400 degrees. Meanwhile, cook the leeks. Heat the butter or oil in a large nonstick frying pan. Add the leeks and thyme and cook over low heat for 20 minutes, until sweet and softened, then set aside. Add a little more olive oil to the pan, add the greens, and cook over low heat for a few minutes, until just wilted. Season, then add the lemon zest and chili. Set aside. Once the sweet potatoes are cool enough to handle, scoop out the flesh and mash with a pat of butter or 1 tablespoon of olive oil and a good grating of nutmeg. Adjust the seasoning for all the vegetable mixtures, if needed. Take your pastry from the fridge and let it sit for a few minutes. Then roll it out on a lightly floured surface to 1/8 inch thick and use it to line an 8-inch spring form pan, leaving the excess hanging over the edges. Now it’s time to start layering the pie. Start with all the leeks, then a grating of Lancashire or cheddar cheese, then the beets, the greens, and another layer of cheese, then the turnips, and finally the sweet potato mash. Finish by bringing the excess pastry over the top of the sweet potatoes, twisting the ends, and laying them on top in a haphazard fashion – the little rough bits of pastry will crisp up and look beautiful. The pastry may not cover the whole top, but a little vivid orange sweet potato poking through is okay. Brush with the beaten egg or some soy milk. Bake the pie on the bottom rack of the oven for 35 to 40 minutes, until golden brown. Let cool for 15 to 20 minutes, then remove from the pan and place in the middle of the table. 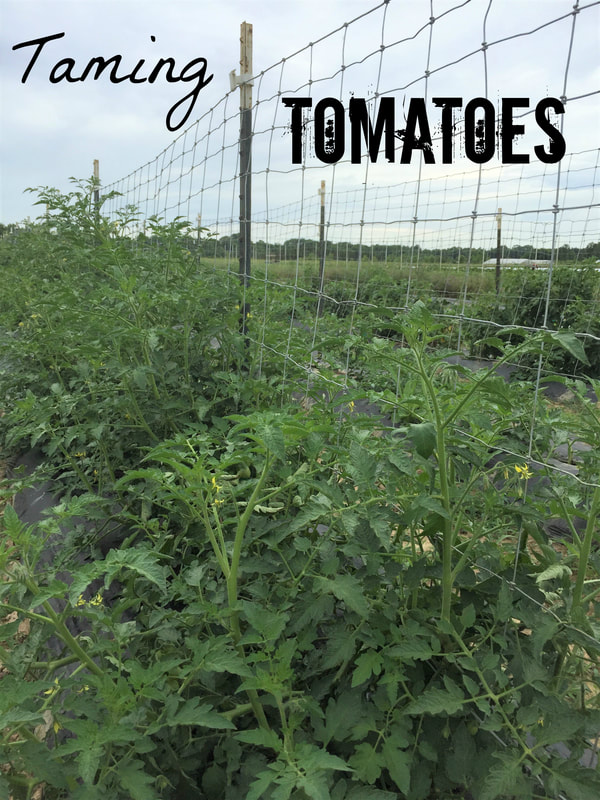 An iconic summer food. The mascot of farmer’s markets. The pride of home gardeners. Tomatoes begin to ripen at the end of May here and we’ll soon be tasting a rainbow of varieties; Red Zebra, Valencia, Persimmon, Sungold, Aunt Ruby’s German Green, Cherokee Purple, Indigo Blue Beauty, and many more. Before we can eat them, a lot of work goes into growing and maintaining these precious plants.  The term ‘vine-ripened’ alludes to the fact that tomatoes are vines. Indeed they are, if left to their own devices. Our job as farmers is to attempt to tame these vines so that they will produce larger fruit for a longer period of time and also so that we can find them amongst the tangled jungle of leaves and branches. Before a single plant is tucked into the soil, the trellising system must be in place. Our field system is created by unrolling field fence and attaching it to T-posts that have been hammered into the ground every 10 feet. The field fence gives us something to tie the tomato branches to allowing them to grow straight up. The T-posts have the added benefit of offering the blackbirds a place to perch above us and whistle their opinions as we work. 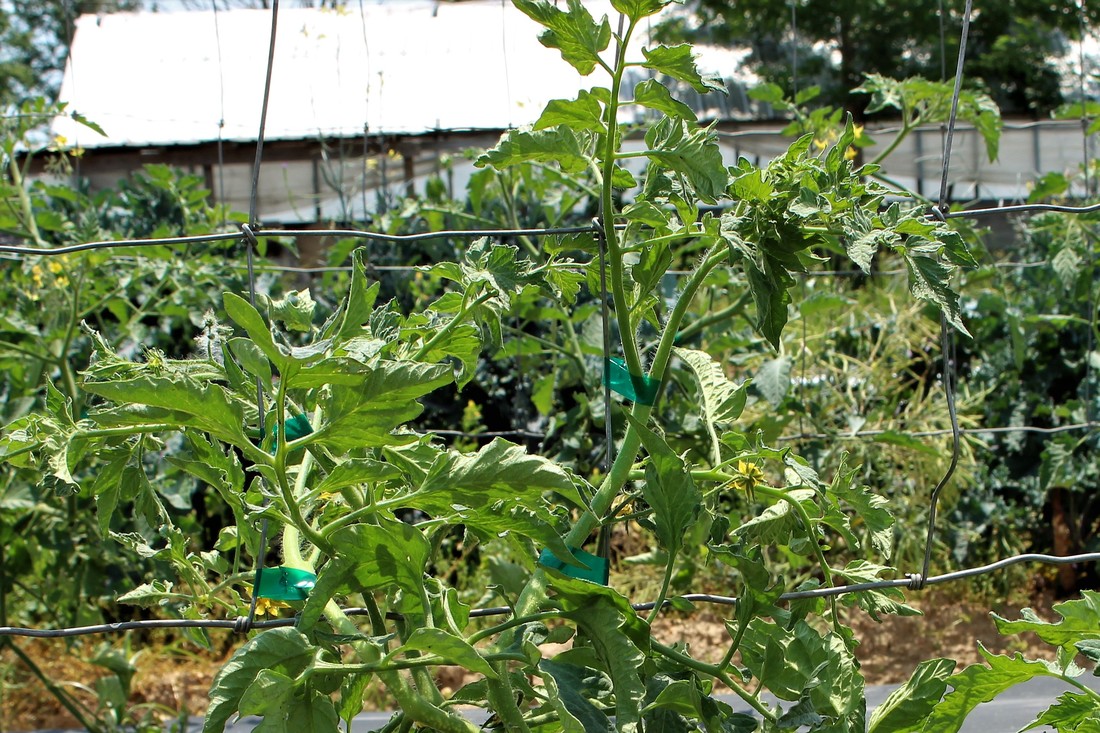 Pruning tomatoes, like many repetitive jobs on the farm, can be meditative for me. Looking at a tomato plant, I see only the suckers as I work my way up the plant, methodically pinching them off. A “sucker” begins to grow In-between each branch and the main stem. The term sucker refers to these additional branches that will sap energy the plant should be putting towards producing fruit and put it towards growing more branches and vining out. Pruning also allows for more airflow which helps reduce the possibility of disease. 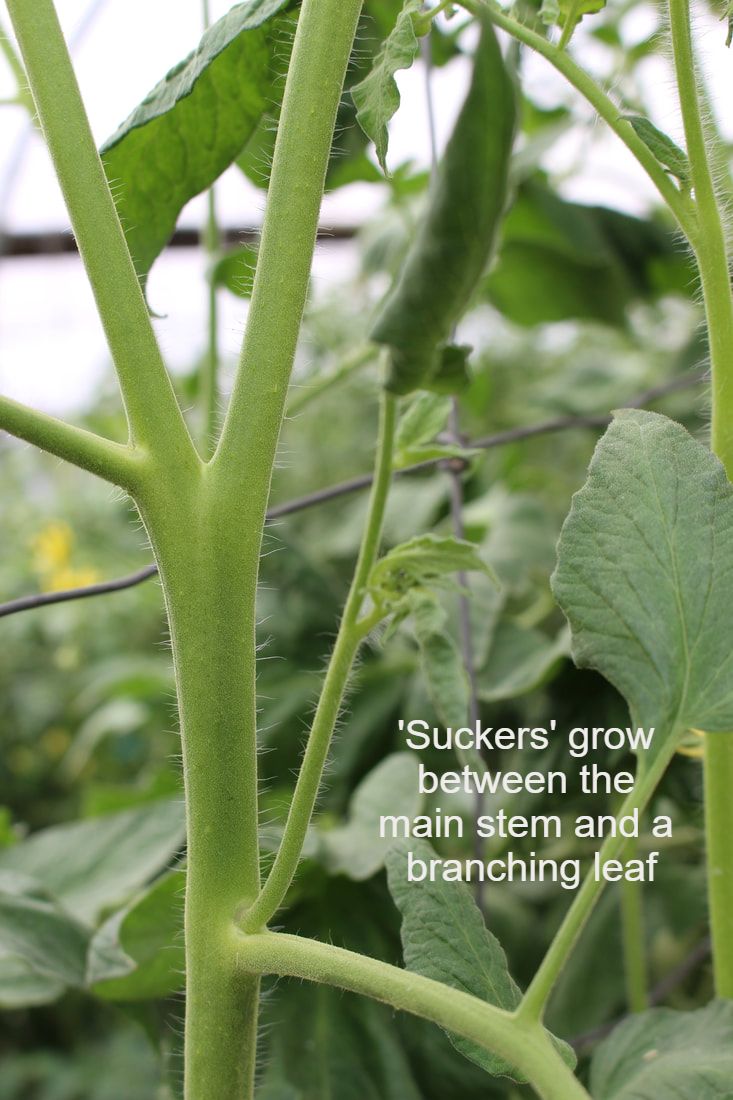 At the end of one of these sessions my thumb and fingers will have a thick layer of a hard, scaly, black substance attached to them. “Tomato tar”, as some people call it, begins as a yellow powder that sticks to your skin when you touch a tomato plant or brush up against one. It is actually essential oils emitted from the glandular trichomes, or tiny hairs, on the stem and leaves of tomato plants. The oils are thought to defend the plant from pests and infections, and also to reduce evaporation. Each plant has many suckers and our farm has thousands of tomato plants. As I pinch the suckers off one by one, a little bit of that yellow powder rubs off each time, turning green and building up to eventually create a thick, dark, second layer of skin. Later, at home, I’ll have to use a pumice stone to scrape this alligator-like skin off. After a few weeks of this, there will be cracks in my skin on these fingers, a mark of pride for any farmer. These oils contribute to the unique smell of tomato plants. 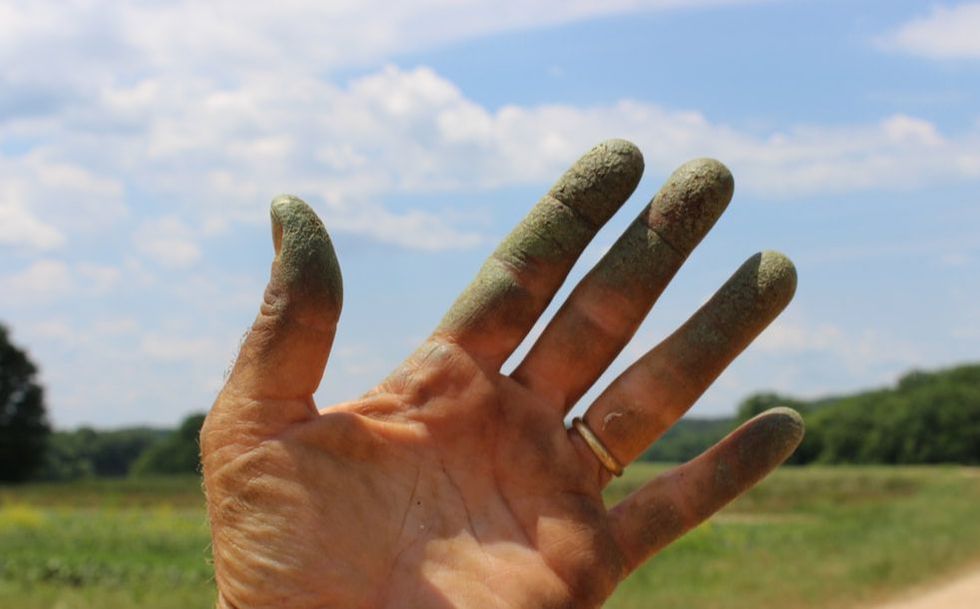 Gazing upon freshly trellised and pruned tomatoes is satisfying. The plants stand straight and tall, there is plenty of room to walk through the rows, and most importantly, they look happy. It looks like hedgerows, tall and thick, despite all of our pruning, so that the large green leaves fill all of the space. When I enter a plot with row after row of tomatoes it is like entering the secret garden that I’ve long for ever since I was a child. I'm at home. 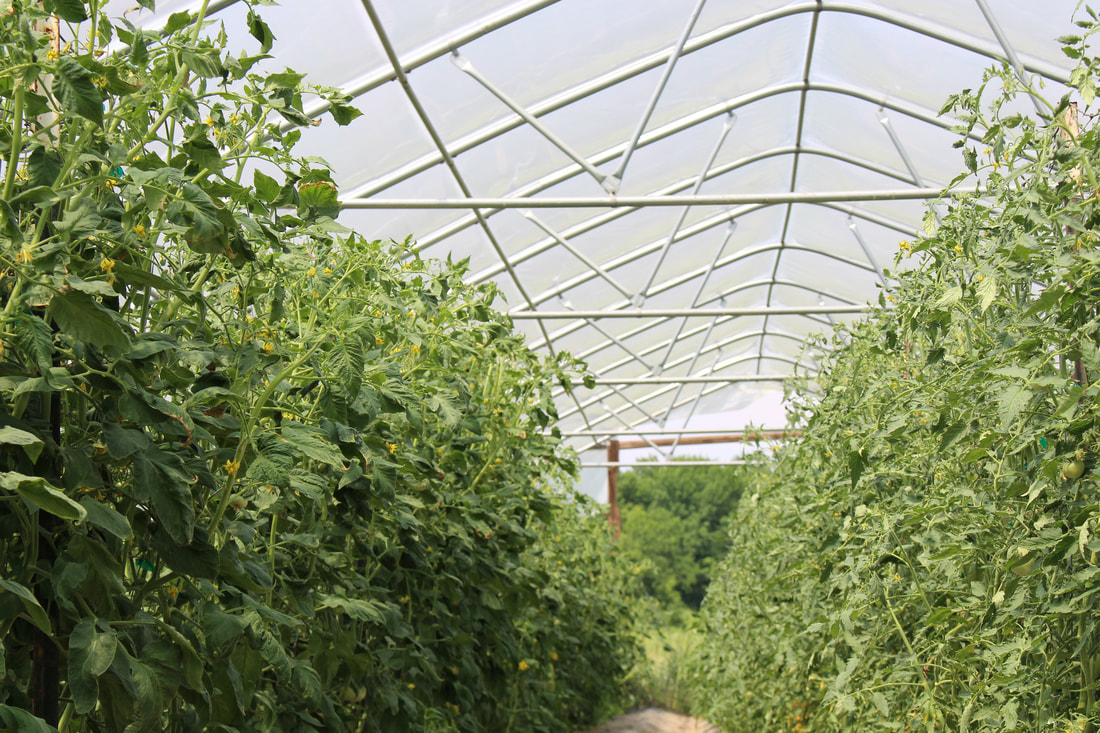 Each week we begin to trellis and prune and by the end of the week it is time to start again at the beginning. One of our staff members asked when we might be done with that job and I answered “never”. He laughed and replied with “when the tomatoes are gone”? I said yes and we went back to work, because when we have that first juicy bite and every one that follows throughout the summer, it will be worth every minute. 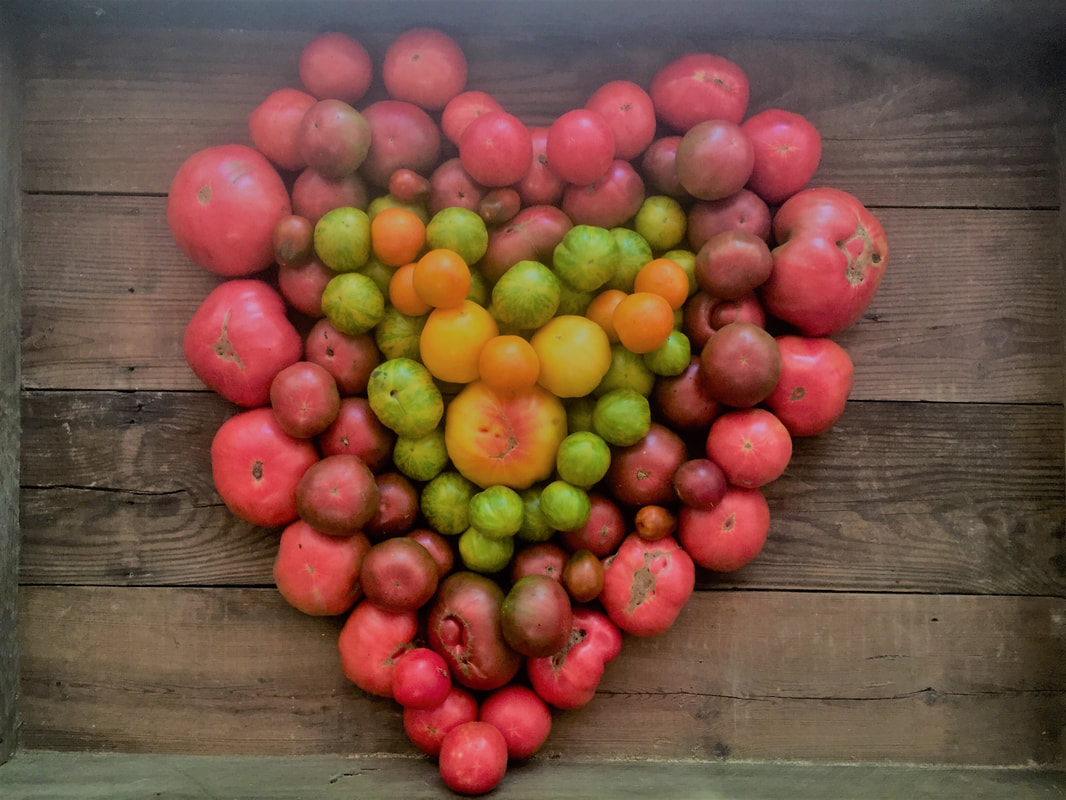 Happy and Healthy Eating! Note: Since writing this, we have implemented a 'lower and lean' trellis system in our high tunnels. We are only in year two, but so far we like it.
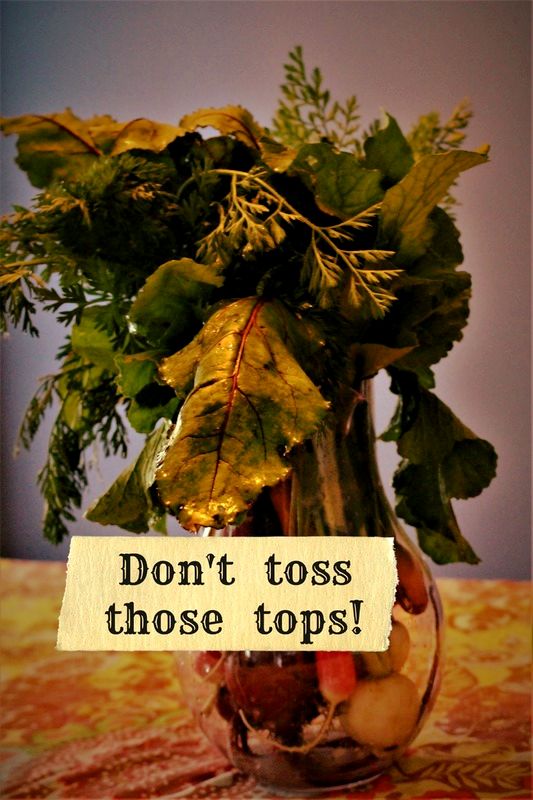 When a seed germinates, it begins to grow in two parts; the leaves we see above ground and the roots hidden below. With root vegetables, for a while all we can see are the heart shaped cotyledons of turnips and radishes, the colorful ones of the beets, and the feathery carrot greens. 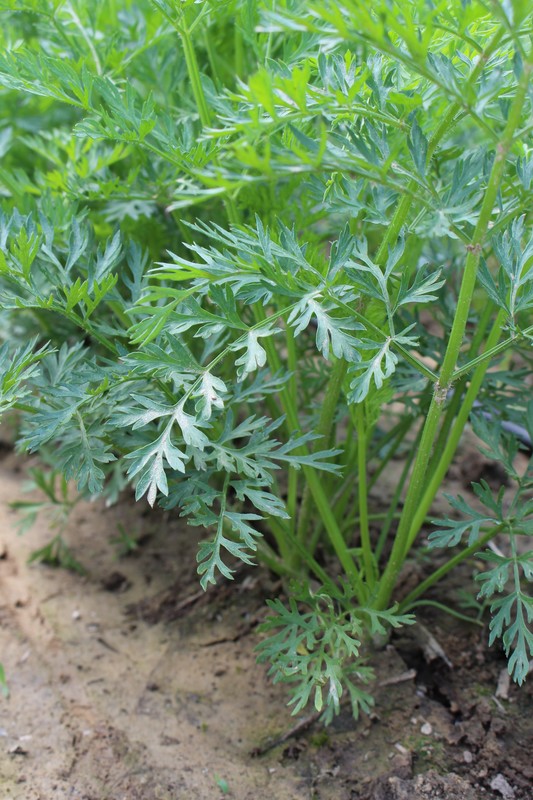 Then one day the surface begins to crack along the row, just where the stems meet the soil. Later we’ll find the top of the root bulging up from the soil horizon. 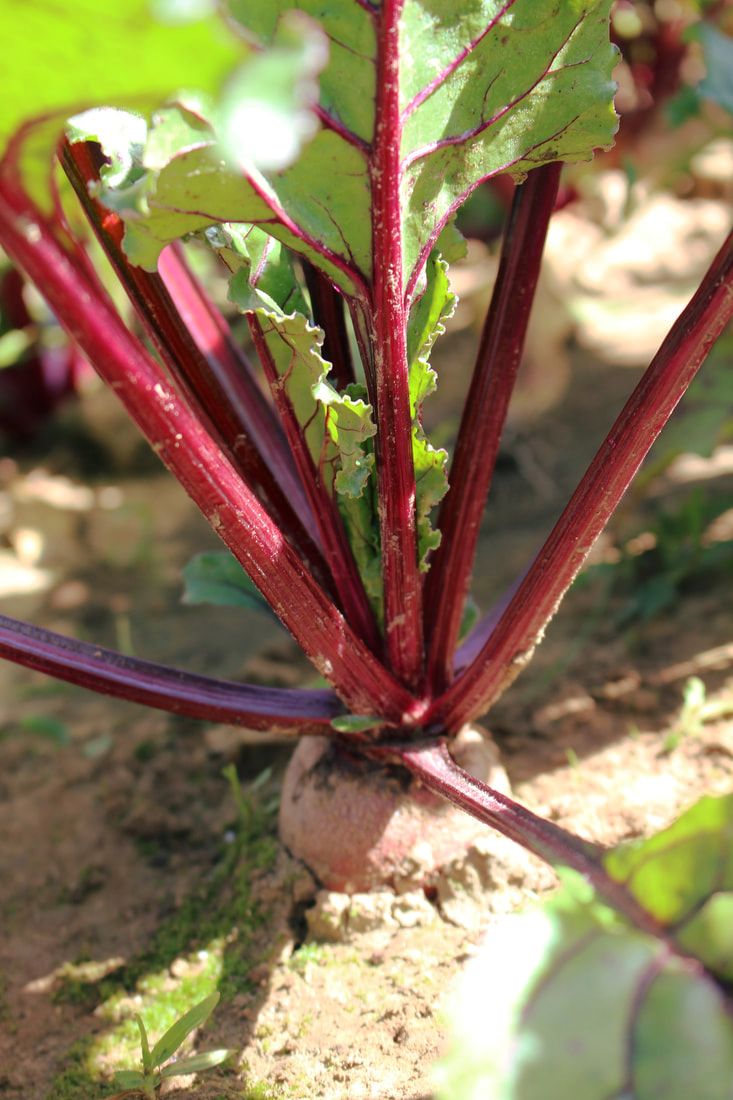 All the while, the greens above ground are working hard as well. These tops are often relegated to the compost heap, but don’t do that! They are edible, nutritious, and delicious. 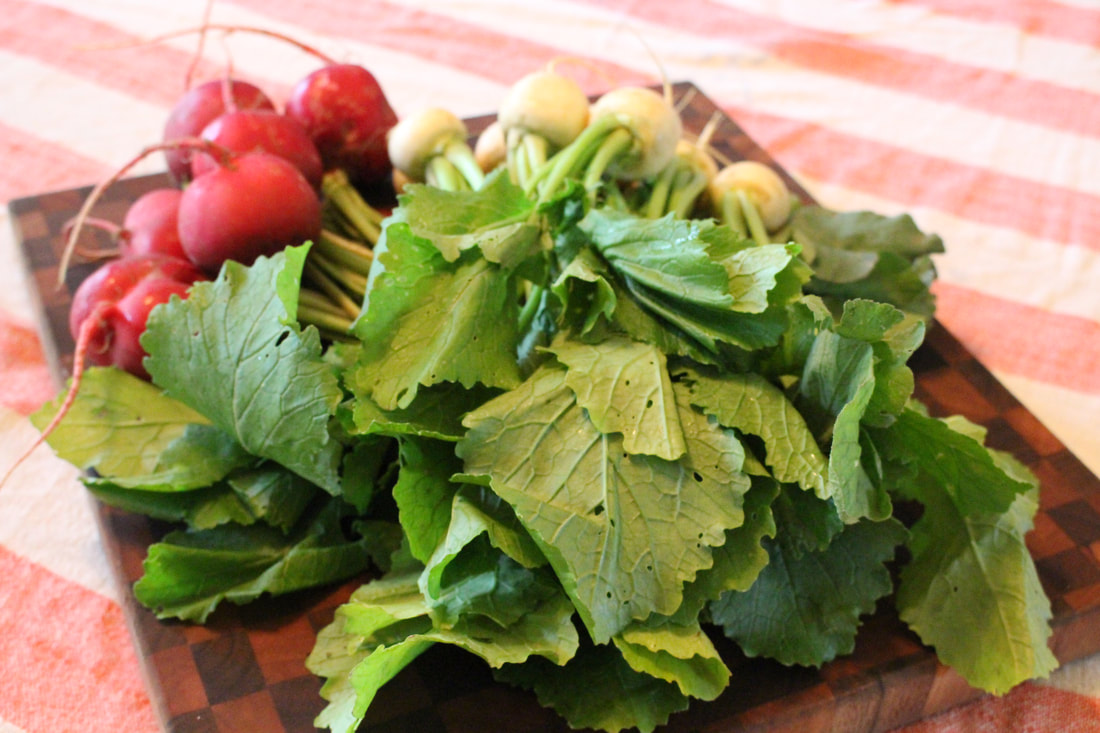 When I bring home a bunch of carrots, beets, radishes, or turnips, the first thing I do is cut the tops off. Instead of composting them, I store them in the crisper to prepare and eat. If left attached, the greens will leech water from the roots and neither will store as long. On their own, the roots store for weeks, even months. The tops will not last as long. 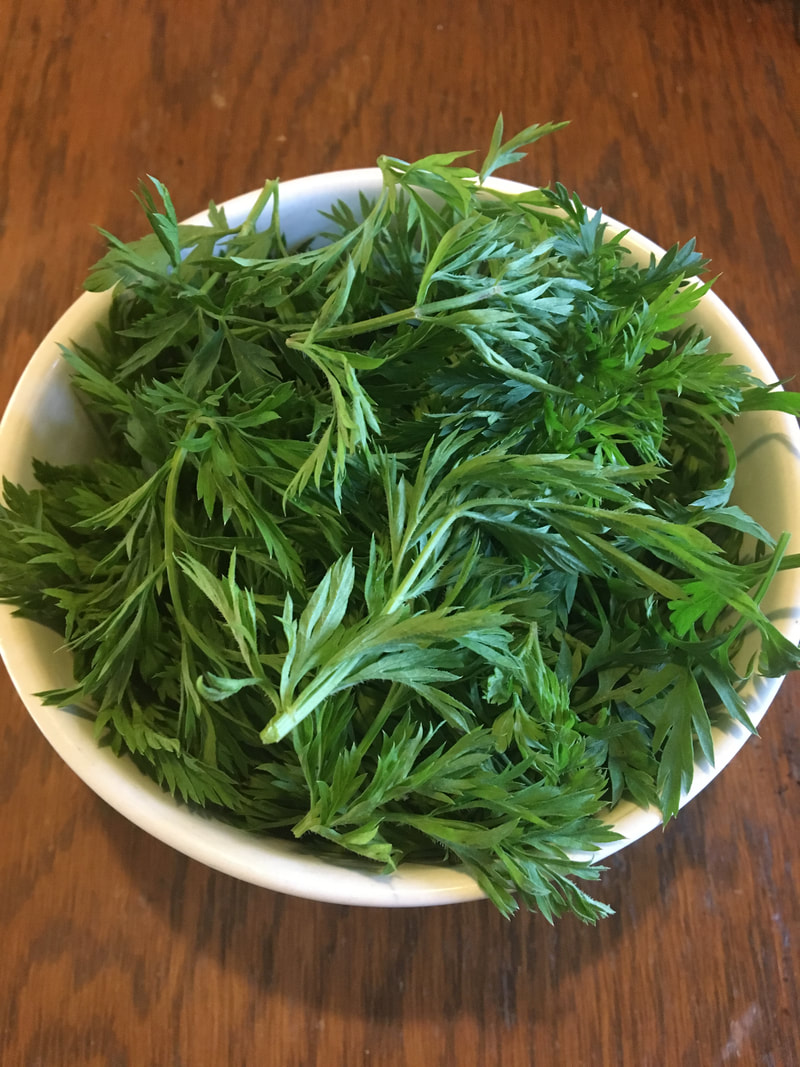 Here are a few recipes highlighting the underused portion of your root bunches! 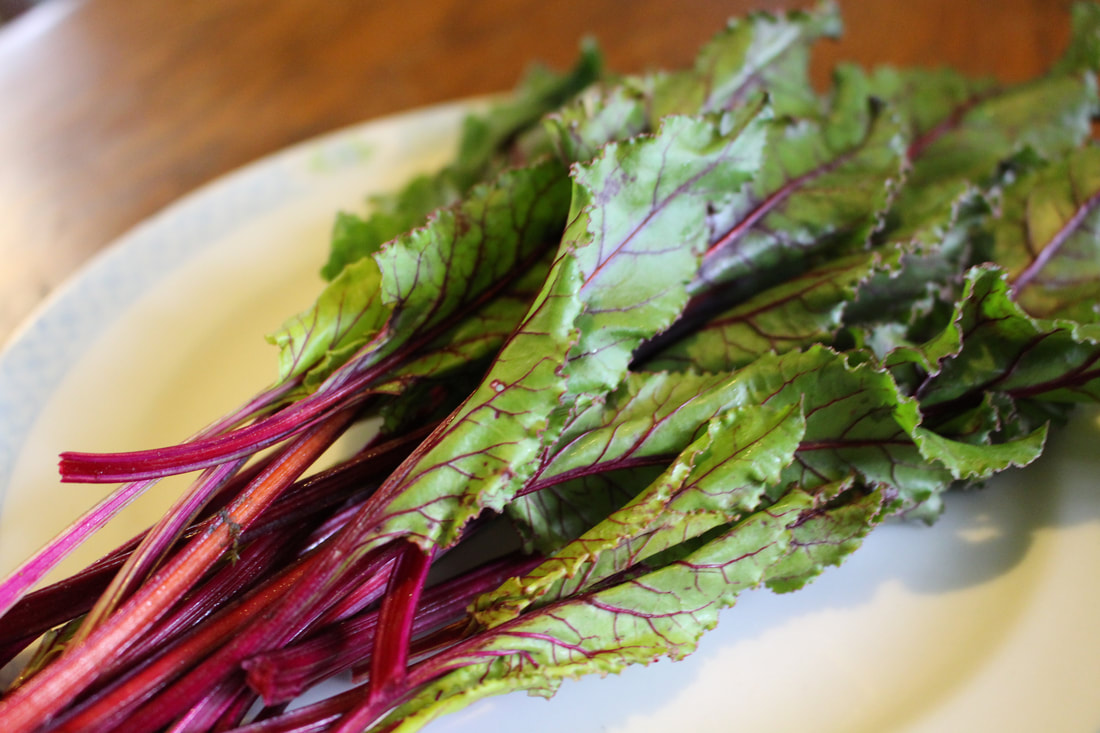 Beet Green Pasta From Chez Panisse Vegetables by Alice Waters Serves 4 to 5 “Beet greens cooked this way can also be served as a side dish, without the pasta.” ½ cup currants 3 to 4 bunches of beet greens 1 small bunch fresh mint 2 medium red onions 2 to 3 cloves garlic 1 bay leaf ½ cup extra-virgin olive oil 1 pound dried fedelini pasta Salt and pepper Cover the currants with boiling water, let them soak for 15 minutes, and drain them. While they are soaking, wash the beet greens, strip the leaves from the stems, and cut the leaves into chiffonade. Chop the stems into 2-inch lengths. Stem the mint (use a smooth-leaved variety, if possible), wash the leaves, and chop them into chiffonade. Put on a pot of salted water for the pasta. Peel the onions and the garlic and chop them both fine. Sauté them with the bay leaf over medium heat in ¼ cup of the olive oil for about 5 minutes or until they are translucent. Add the beet leaves and stems and the currants and cook 5 minutes more, covered. Meanwhile, when the water has come to a boil, add the mint leaves. When the pasta is cooked, drain it and toss well with the sauce, moistening it with a ladle of the pasta water and the rest of the olive oil. Serve immediately. Note: for a slightly more piquant dish, add a splash of vinegar and a pinch of cayenne. 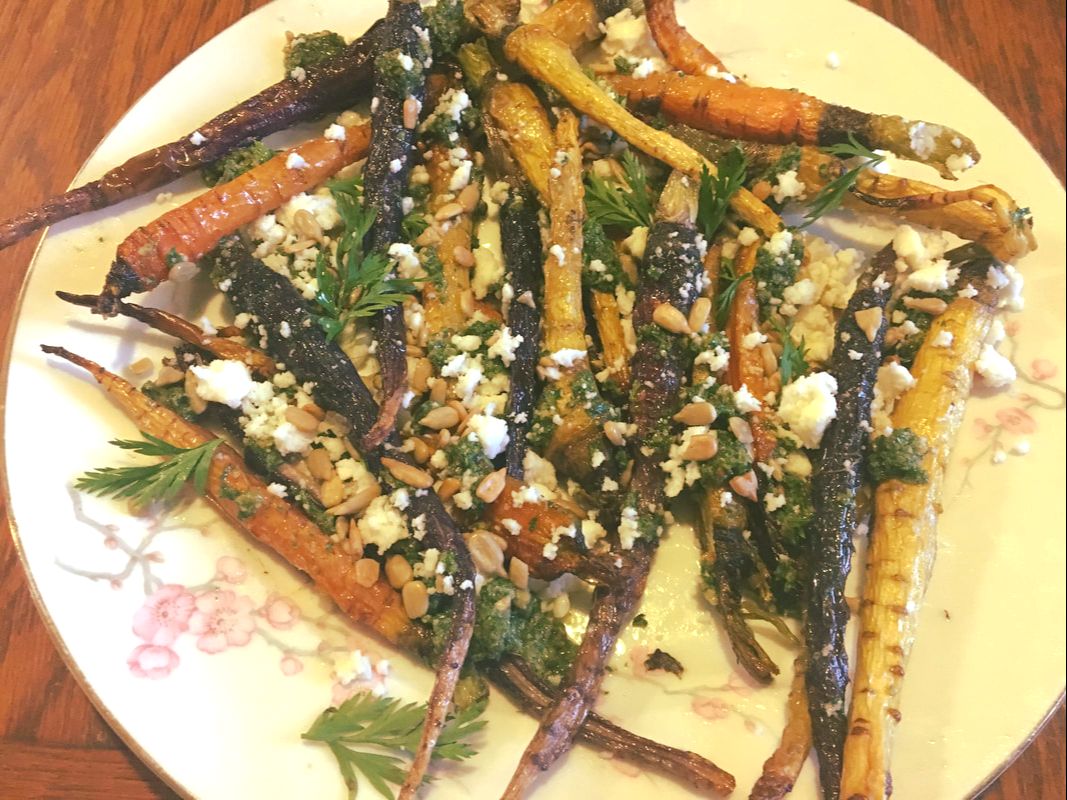 Baby Carrots with Carrot-Top Pesto From Saladish by Ilene Rosen Serves 4 2 bunches of baby carrots, scrubbed, tops attached 2 to 3 tablespoons flavorless vegetable oil Kosher salt and freshly ground black pepper Carrot-Top Pesto About 2 cups loosely packed green carrot tops (stems discarded), from carrots above ¼ cup sunflower seeds, toasted 1 small garlic clove 1 ½ teaspoons Dijon mustard 1 ½ tablespoons white wine vinegar or fresh lemon juice 1 ½ teaspoons honey ½ cup plus 2 tablespoons flavorless vegetable oil Kosher salt and freshly ground black pepper Fruity olive oil for thinning pesto 3 tablespoons queso fresco, crumbled 2 tablespoons canned or jarred pickled jalapenos, minced Preheat the oven to 400 degrees. Trim the carrots, leaving ½ inch of the green tops attached. Reserve about 2 cups of the remaining frilly tops for the pesto, plus several of the nicest-looking tops for garnish. Cut any fatter carrots lengthwise in half so they are all about the same thickness and place on a sheet pan. Toss with enough oil to coat, spread them out on the pan, and season with salt and pepper. Roast the carrots for 18 to 25 minutes (depending on the size), turning occasionally, until nicely browned and tender. Meanwhile, make the pesto: Put the carrot tops, 3 tablespoons of the sunflower seeds, and the garlic in the bowl of a food processor or in a blender and grind to a paste. Add the mustard, vinegar, and honey and blend thoroughly. With the motor running, slowly drizzle in the oil and process until the pesto is thick but still retains some texture. Season to taste with salt and pepper. You’ll have some pesto left over; store it tightly covered in the refrigerator, and use it within the next day or two, while the color is still bright.) Arrange the carrots on a serving dish. Thin the pesto with olive oil until it can be drizzled. Spoon some pesto lightly over the carrots, and transfer the remaining pesto to a small serving bowl. Top the carrots with the cheese, followed by the jalapenos, and finally the remaining 1 tablespoon sunflower seeds. Serve the remaining pesto on the side. More uses for carrot-top pesto:
Radish Top Soup with Lemon and Yogurt From Vegetable Literacy by Deborah Madison Serves 6 or more “Although they may have a coarse appearance and a rough texture, radish greens turn this potato-based soup a delicate green, and the flavor is equally soft.” 4 to 8 cups radish tops 1 tablespoon butter or olive oil 1 bunch spring onions, thinly sliced 1 large russet potato (about 1 pound), scrubbed, quartered, and thinly sliced Sea salt 4 cups water or chicken stock Finishing touches: Juice of 1 lemon Sea salt and freshly ground pepper Yogurt Few tablespoons of thinly julienned radishes Sort through the radish tops, tearing off and discarding the thick stems that don’t have much leafy material and discarding any leaves that are less than vibrant. Melt the butter in a wide soup pot over medium heat. Add the onion slices, lay the potato slices over them, and cook them for several minutes without disturbing them while the pan warms up. Then give the onion and potato slices a stir, cover the pan, and cook over low heat for 10 to 15 minutes, giving the vegetables an occasional shove around the pan. The pan should take on a nice brown glaze from the onions. Add 2 teaspoons salt and the water and bring to a boil, scraping the pan bottom to dislodge any of the glaze. Lower the heat to a simmer, cover, and cook until the potatoes are tender and falling apart, about 15 minutes. Add the radish greens to the pot and cook long enough for them to wilt and go from bright to darker green, which will take just a few minutes. Let the soup cool slightly, then puree it, greens and all, leaving it a bit rough if you like some texture or making it smooth if you prefer, then return the soup to the pot. To finish, add the lemon juice, season with salt (potatoes can take a lot of salt) and pepper. Ladle the soup into shallow bowls and stir a spoonful of yogurt into each bowl. Scatter the julienned radishes over the top and serve. Turnip Root and Green Gratin From Deep Run Roots by Vivian Howard Serves 6 to 8 2 tablespoons butter, divided 3 medium onions, halved and sliced with the grain 1 ½ teaspoons salt, divided 2 cups turnip roots, peeled and cut into ½-inch dice 2 cups heavy cream 5 garlic cloves, sliced thin ½ teaspoon dried thyme 8 ounces greens (4 cups), wilted to 1 cup 1 egg 1 cup Parmigiano-Reggiano, grated on a Microplane 1 cup Fontina, grated on a box grater 10 turns of the pepper mill or a scant ¼ teaspoon black pepper 3 cups stale crusty bread cut into ½-inch cubes Preheat your oven to 375 degrees and rub the inside of a 2-to3-quart baking dish with 2 teaspoons of butter. Melt 1 tablespoon butter in an n 8-to10-inch sauté pan or skillet and add the onions plus ½ teaspoon salt. Cook over medium heat, stirring frequently, until the onions are caramelized and chestnut brown, about 30 minutes. If the onions stick and the bottom of the pan looks dangerous, add 1/3 cup water. You should end up with about 2/3 cup caramelized onions. Bring a 6-quart pot of heavily salted water up to a rolling boil and set up an ice bath nearby. Add the turnip roots and cook them for 2 to 3 minutes. Transfer them to the ice bath to stop the cooking. Once they’re cool, drain and dry the turnips. Meanwhile, in a 2-quart saucepan, gently heat the cream with the garlic and the thyme to just under a simmer. The goal is to let the cream steep, not boil, for about 30 minutes. Once it’s done, set it aside and let it cool slightly. If you want to wash as few dishes as possible, like I do, melt the remaining butter in the same sauté pan you used for your onions. Add the turnip greens and ½ teaspoon salt. Let them wilt down for about two minutes. Transfer the greens to a colander and press as much liquid out as you can. Transfer the greens to your cutting board and run your knife though them. In a large bowl, whisk together the egg, cooled cream, cheeses, remaining salt, black pepper, and onions. Stir in the roots, greens, and bread. Transfer the gloppy mess to your baking dish and let it rest for about 10 minutes (or overnight) before baking uncovered for 45 minutes. Serve warm. Radish-top pasta (making this one for dinner tonight!) From The French Market Cookbook by Clotilde Dusoulier Serves 2 Leaves from 2 bunches of radishes, turnips, or beets 8 ounces dried short pasta such as fusilli or orecchiette Olive oil for cooking 3 spring onions, finely chopped 2 head of spring garlic Freshly grated nutmeg Fine sea salt Extra-virgin olive oil Freshly ground black pepper Aged Parmesan or pecorino cheese, shaved with a vegetable peeler 12 walnut halves, toasted and roughly chopped Pick through the radish leaves and discard any that are wilted or discolored. Wash in cold water to remove all traces of sand or grit. Dry and chop roughly. Bring salted water to a boil in a medium saucepan. Add the pasta and cook according to package directions until al dente. While the pasta is cooking, heat a good swirl of cooking olive oil in a medium skillet over medium heat. Add the onions and garlic. Cook, stirring often to avoid coloring, until softened, about 2 minutes. Add the radish leaves to the skillet, sprinkle with a touch of nutmeg and some salt, stir, and let the leaves wilt briefly in the heat; they should become darker by a shade, but no more. Remove from the heat. When the pasta is al dente, drain (not too thoroughly; keeping a little of the starchy cooking water makes the pasta silkier) and add to the skillet. Add a gurgle of extra-virgin olive oil and toss to combine over low heat. Sprinkle with pepper and divide between 2 warm pasta bowls or soup plates. Top with the cheese and walnuts and serve immediately.  HAPPY EATING!
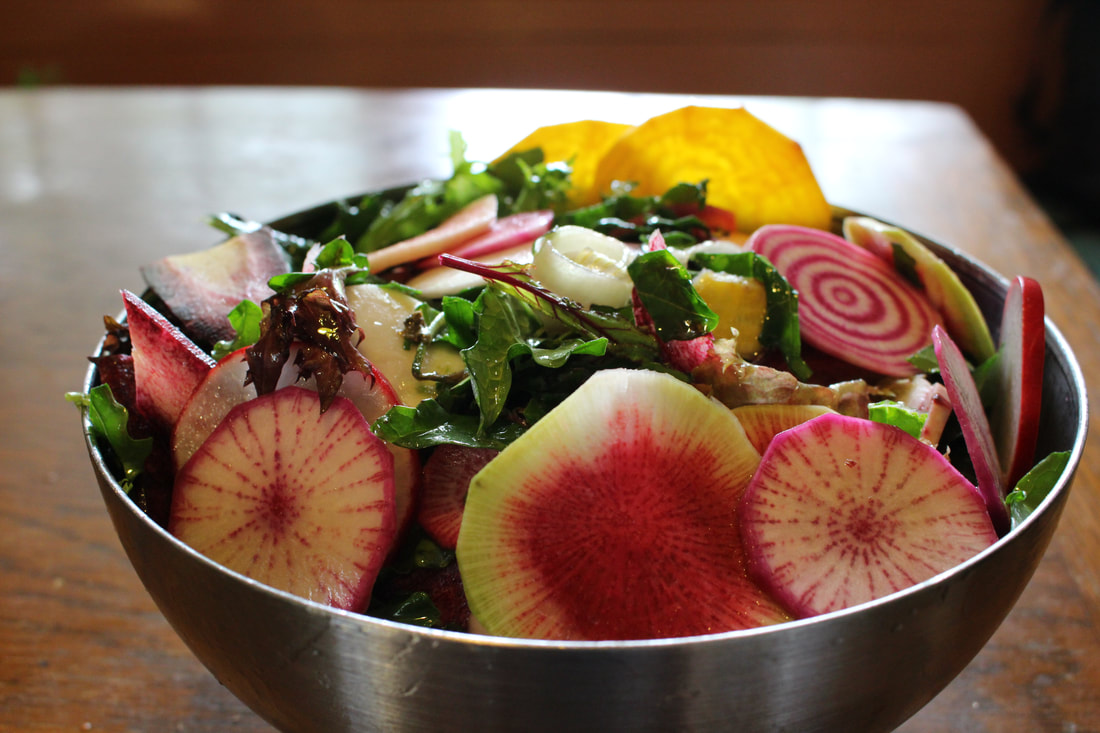 The only thing more satisfying than eating farm food is when it is as gorgeous as this salad. This recipe is from an exciting new cookbook, Saladish, by Ilene Rosen and I've included it below. Make one of your own, get creative, and share you pictures! #sbfrootsandleaveschallenge #snowsbendfarm #saladish 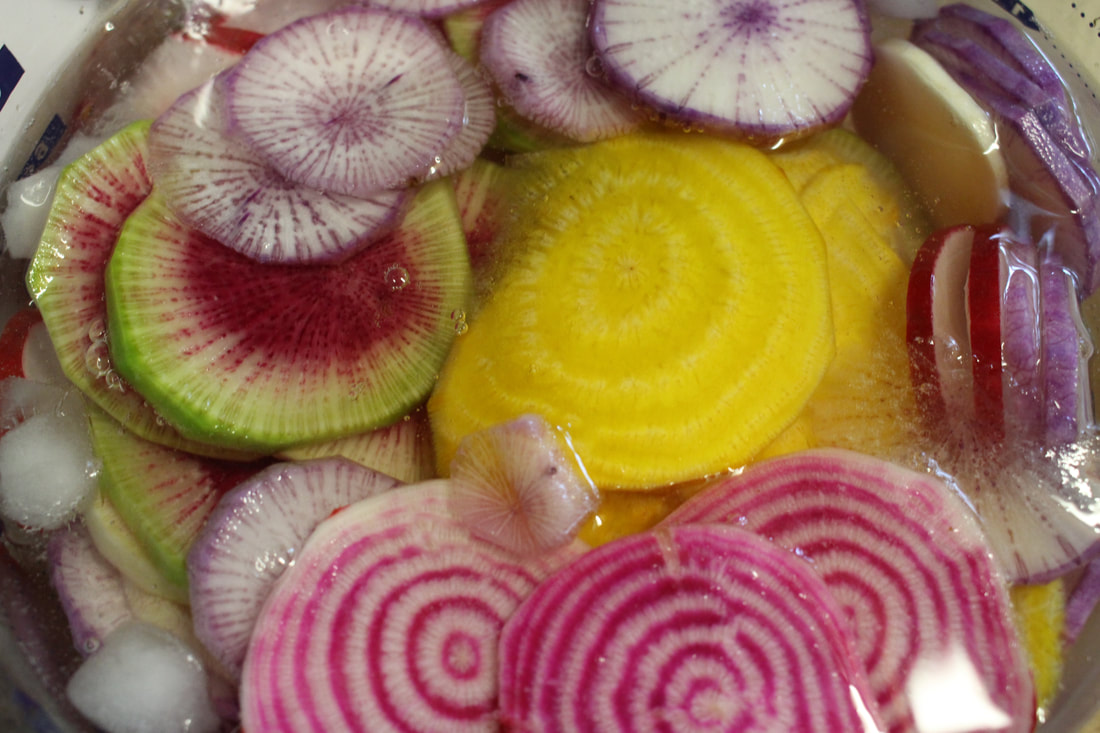 For roots, I used chioggia beets, gold beets, red radishes, watermelon radish, purple diakon radish, Hakurei turnips, and purple carrots. Use any and all roots you can! 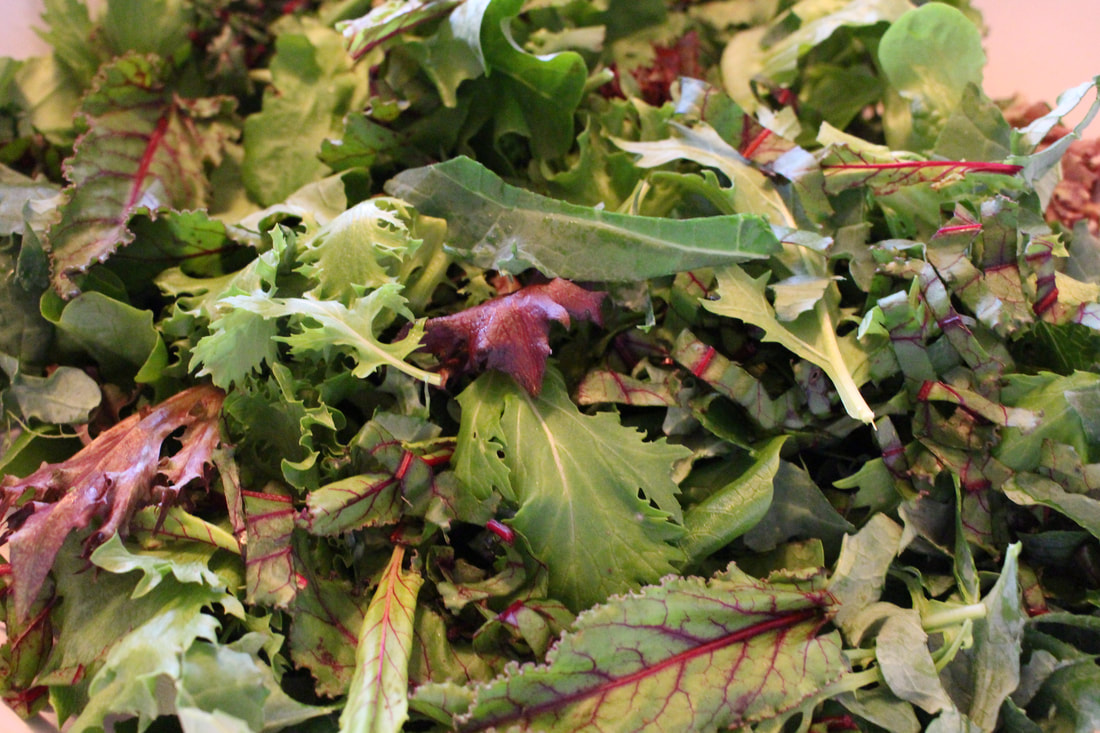 Our salad mix already contains a good variety of greens (lettuce, arugula, mizuna, and more), but I also used thinly sliced kale leaves and some beet greens. This recipe is highly adaptable, so use whatever roots and greens you find in your CSA box or at the farmer's market. Roots and Leaves From Saladish by Ilene Rosen Serves 4 2 small beets, different colors, trimmed and scrubbed 4 small radishes or 1 larger radish, trimmed and scrubbed 6 small white turnips, trimmed and scrubbed 2 purple carrots, trimmed and scrubbed 3 ounces greens, such as salad mix, spinach, mustard, bok choy, sorrel, radicchio, and small head lettuces ¼ cup extra-virgin olive oil, or more to taste 2 tablespoons sherry vinegar, or more to taste Kosher salt and freshly ground black pepper ½ cup pickled red onions (I used our spring onions, recipe follows) Thinly slice the beets, radishes, and turnips on a mandolin. Halve if large. Set aside in a small bowl of ice water. Thinly slice the carrots lengthwise on the mandolin and put in the bowl of ice water. Put the greens in a medium bowl and dress with 2 tablespoons of the olive oil and 1 tablespoon of the sherry vinegar. Season to taste with salt and pepper, and add more oil and/or vinegar if desired. Drain the carrots and beets and pat thoroughly dry. Put the turnips and radishes in a medium bowl, add the carrots and beets, and dress with the remaining 2 tablespoons olive oil and 1 tablespoon sherry vinegar. Season to taste with salt and pepper and add more oil and/or vinegar if desired. Combine the greens, pickled red onions, and vegetables in a wide shallow serving bowl and toss together very lightly. Look for especially beautiful slices of vegetables and leaves and pull them up toward the top so they can be seed. Serve. Pickling (red) onions
also from Saladish *I used 2 spring onions and red wine vinegar* “There’s hardly a salad, sandwich, plate of eggs, cheese and charcuterie board, or platter of meat that wouldn’t be happier joined by a heap of pickled onions." Here’s how to make them: Slice onion(s) 1/8 inch thick and place in a small heatproof bowl. Combine 1 cup white wine vinegar , 1 cup sugar, and a pinch of kosher salt in a small saucepan and bring to a boil over medium heat. Boil gently, stirring occasionally, for a minute or two, until the sugar is completely dissolved. Pour over the onions and let steep until cool. Use right away or store refrigerated in the brine in a tightly covered container for up to 2 weeks.” 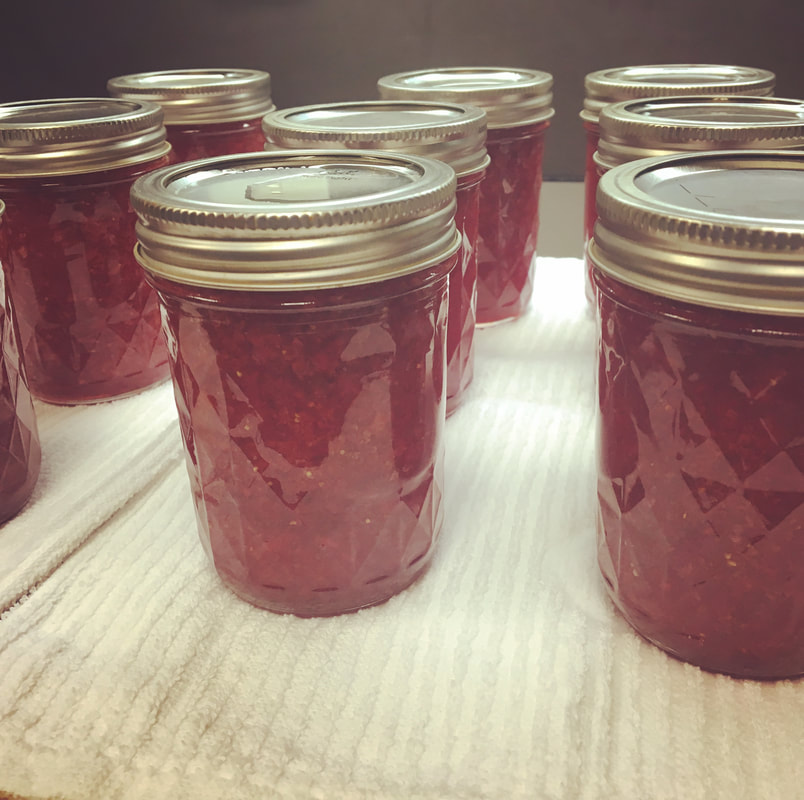 I learned a great deal at the strawberry jam canning class yesterday and am looking forward to a pickling class soon. Below is a recap, but to make the jam you should follow a recipe. There is one included at the end and a link to find more. 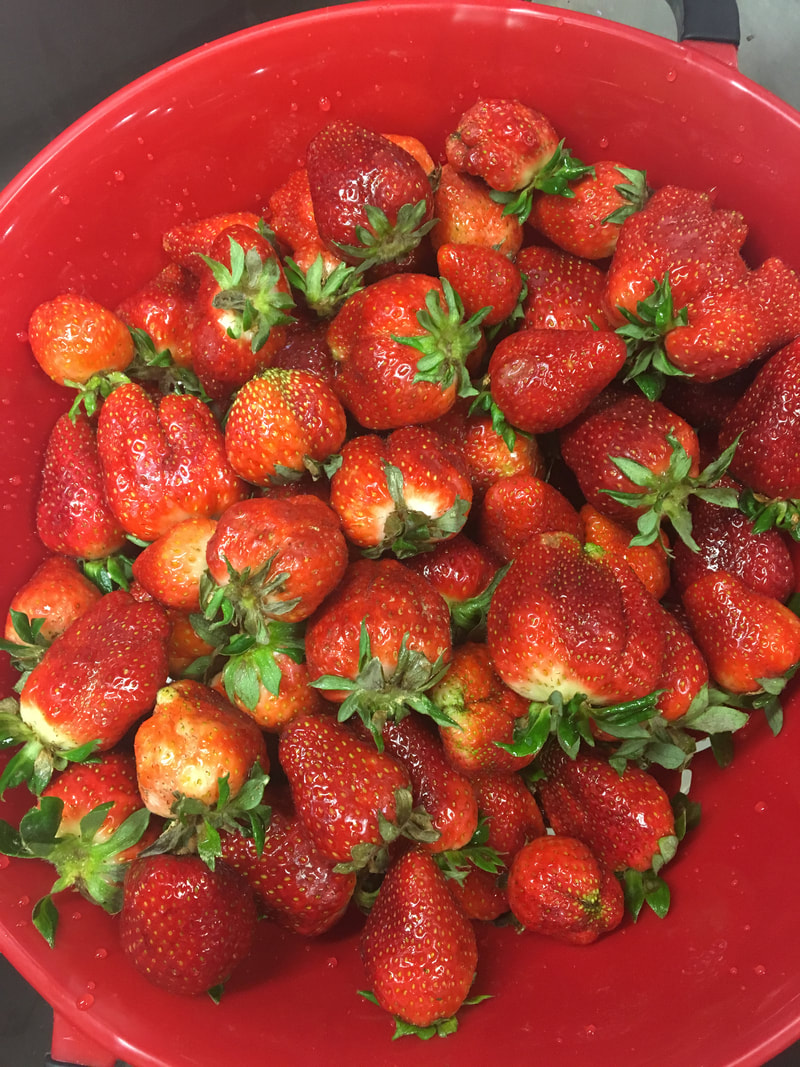 Begin with 3 1/2 quarts of fresh, washed strawberries. 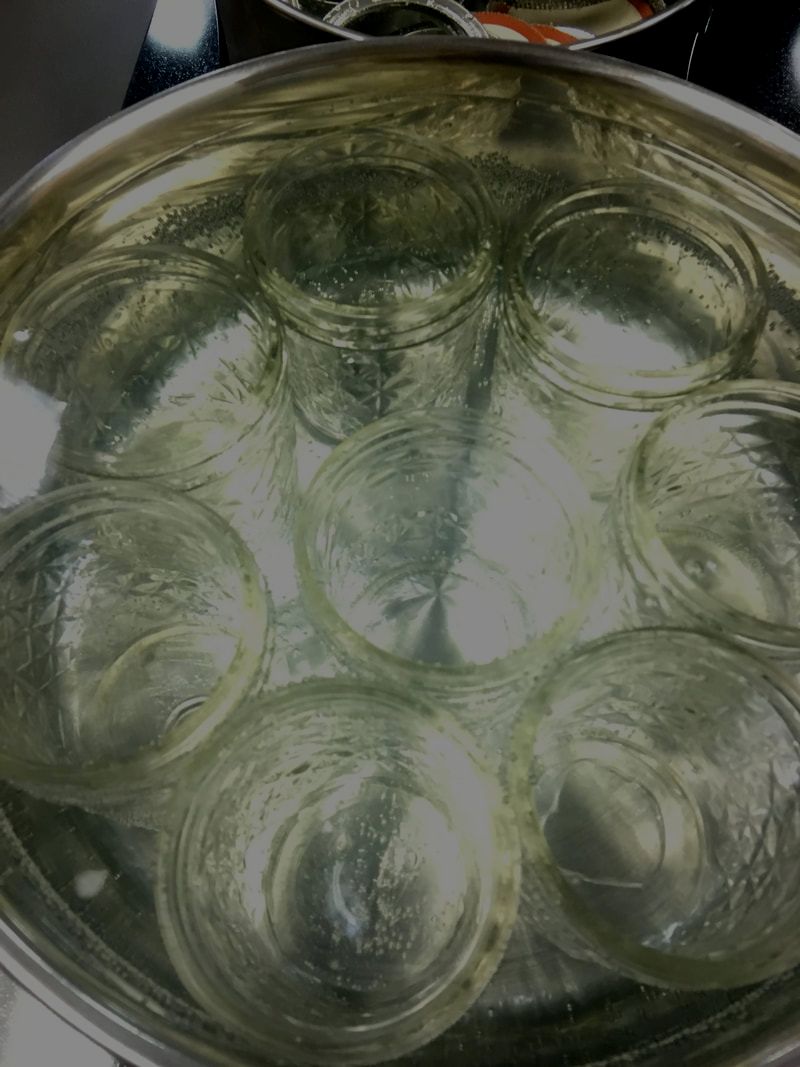 And 10 clean jars. 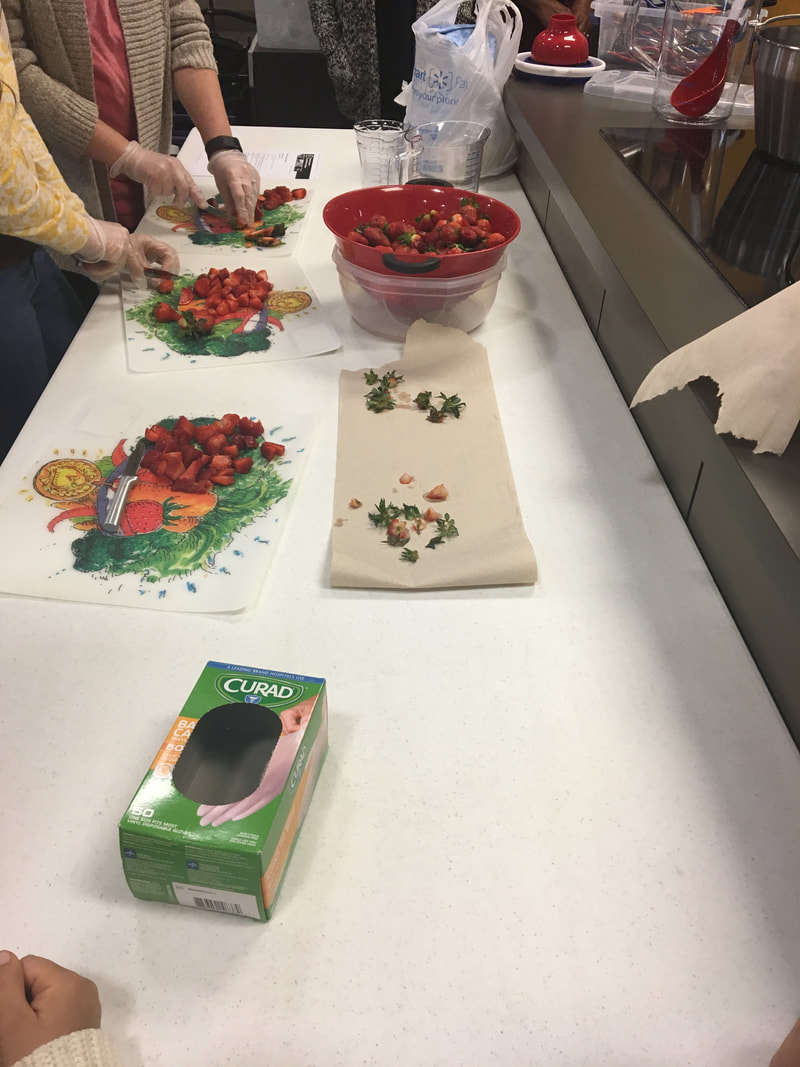 De-stem and cut the berries into large pieces. 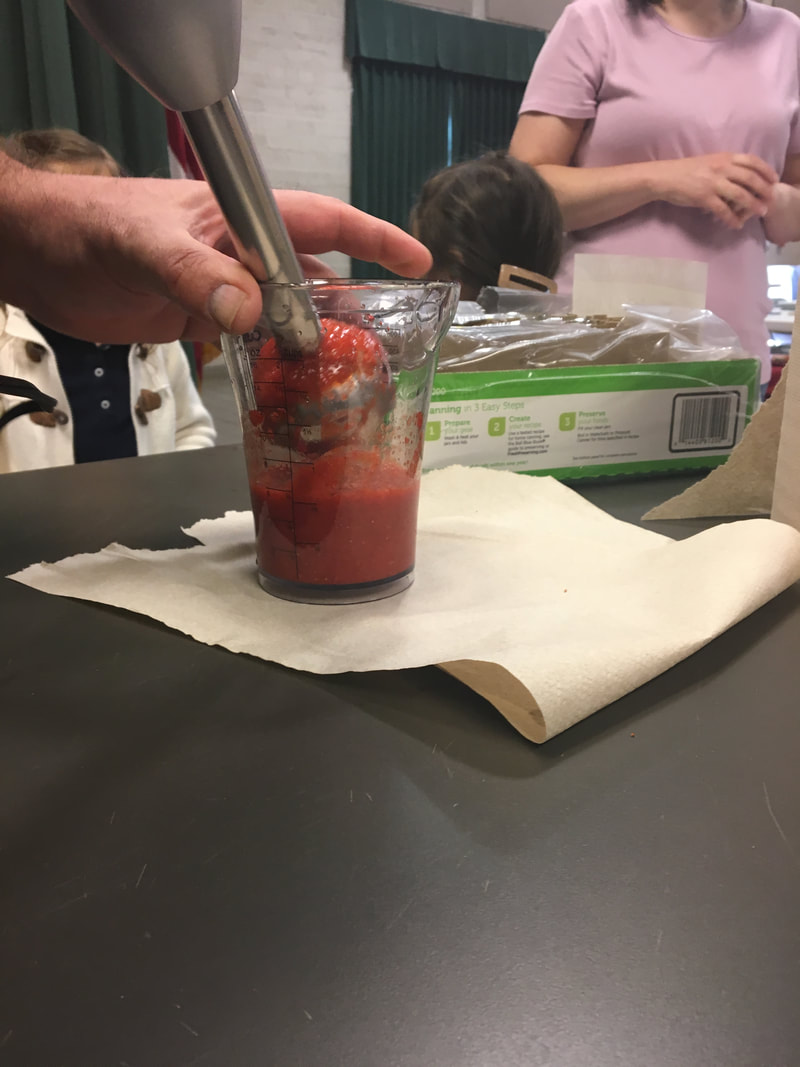 Puree the berries. We used an immersion blender for this. You should have 5 1/2 cups of blended berries. 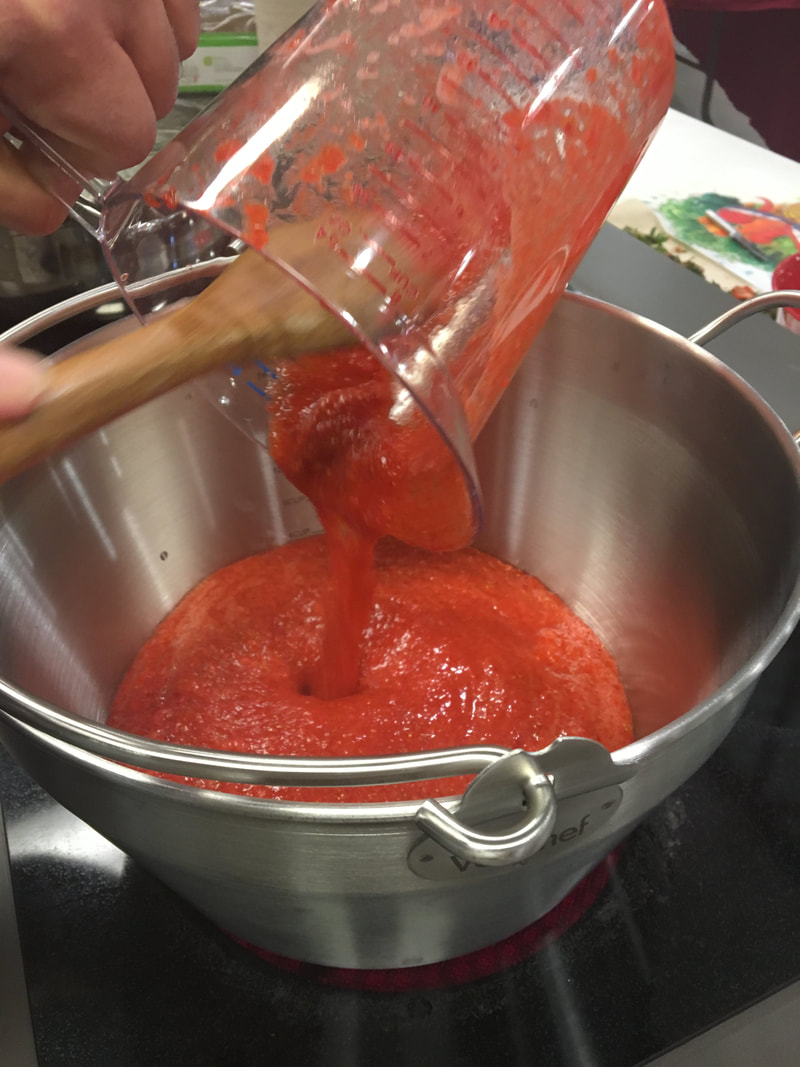 Add your strawberries to your pot (be sure it is a high gauge so that the fruit will not burn). Add pectin and stir well. 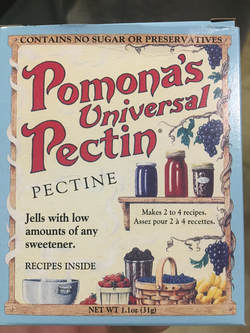 I found this pectin with no sugar or preservatives at Manna Grocery and Deli. Thanks, as always, Manna! 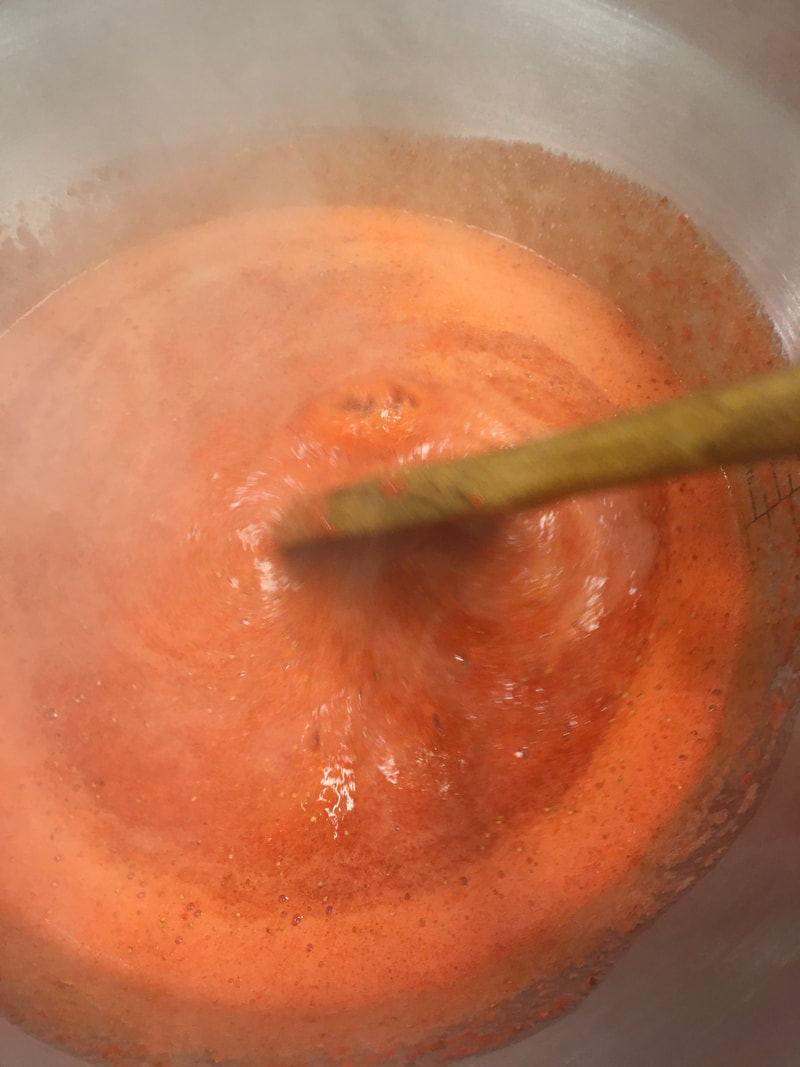 Set on high heat and bring to boil with bubbles over the entire surface, stirring constantly. Stir, stir, stir. 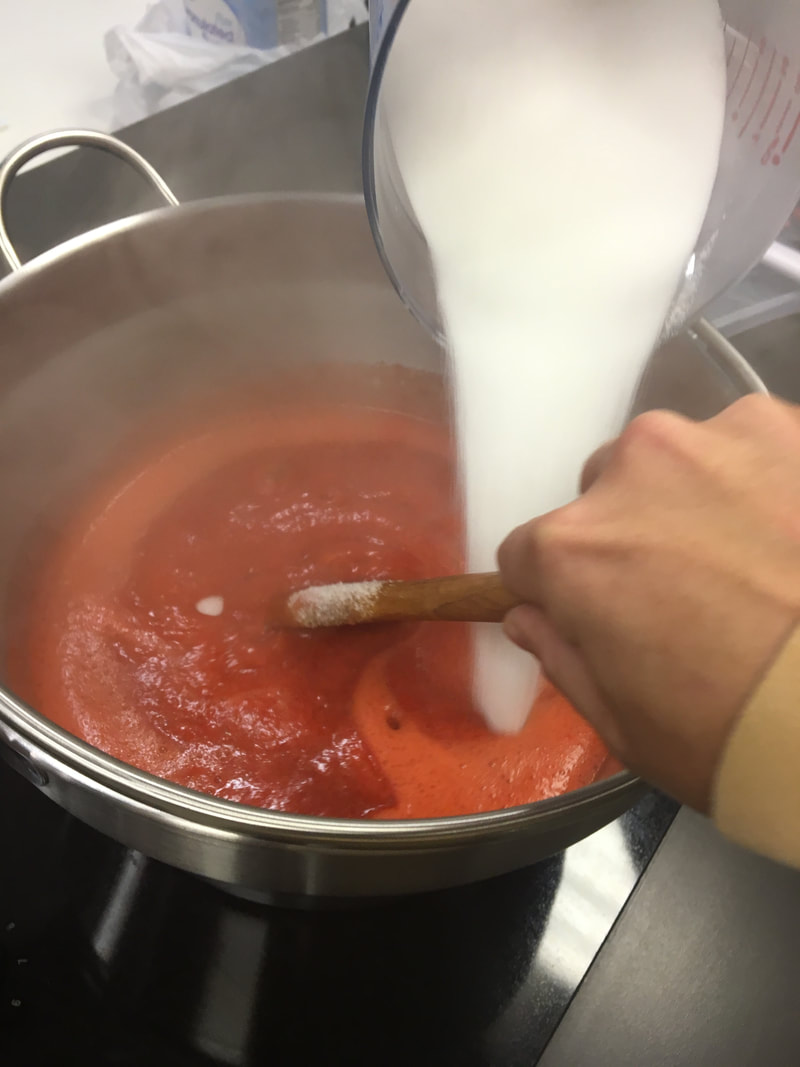 Add sugar, stirring. This recipe called for a lot of sugar (8 cups) and I am going to look around for one with less, possibly with honey as a substitute for some, and with a little lemon juice which I love to add to almost anything sweet with strawberries. Boil hard for 1 minute, continually stirring. 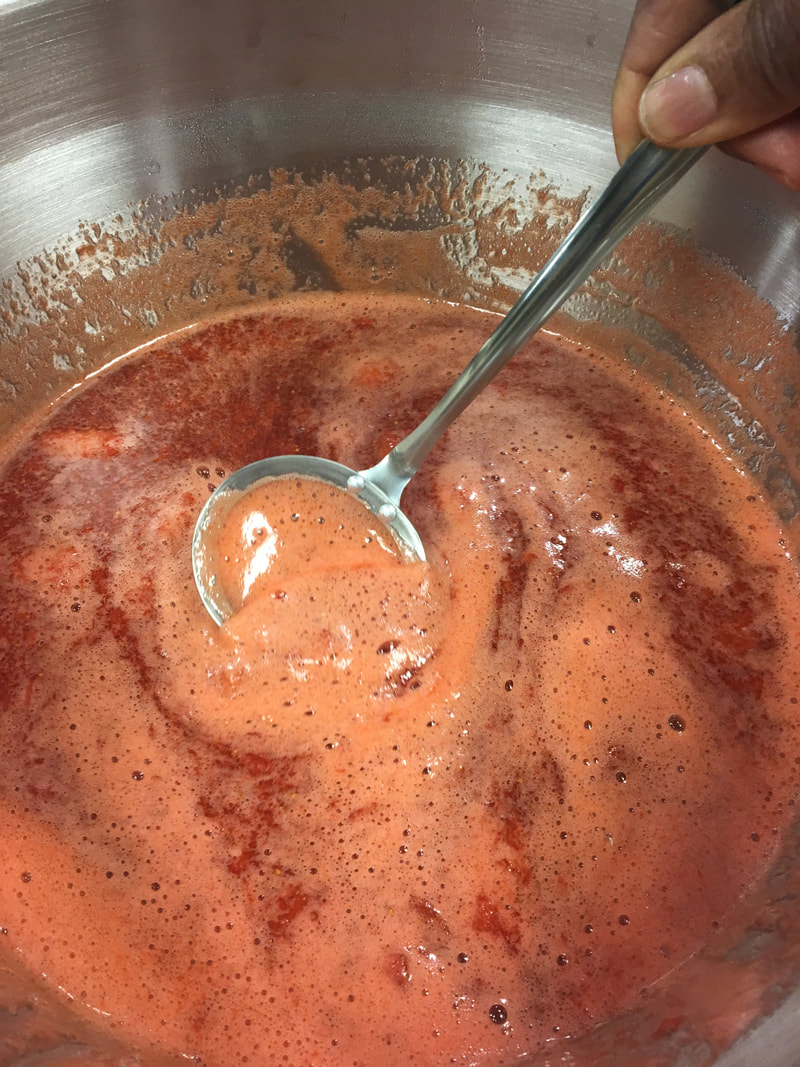 Remove from heat and skim. The skimming is for looks and if you don't mind it looking a little bubbly in your jar, you can skip this step. Also, we were told that a tablespoon of butter stirred in will eliminate this step. I am always in favor of butter! 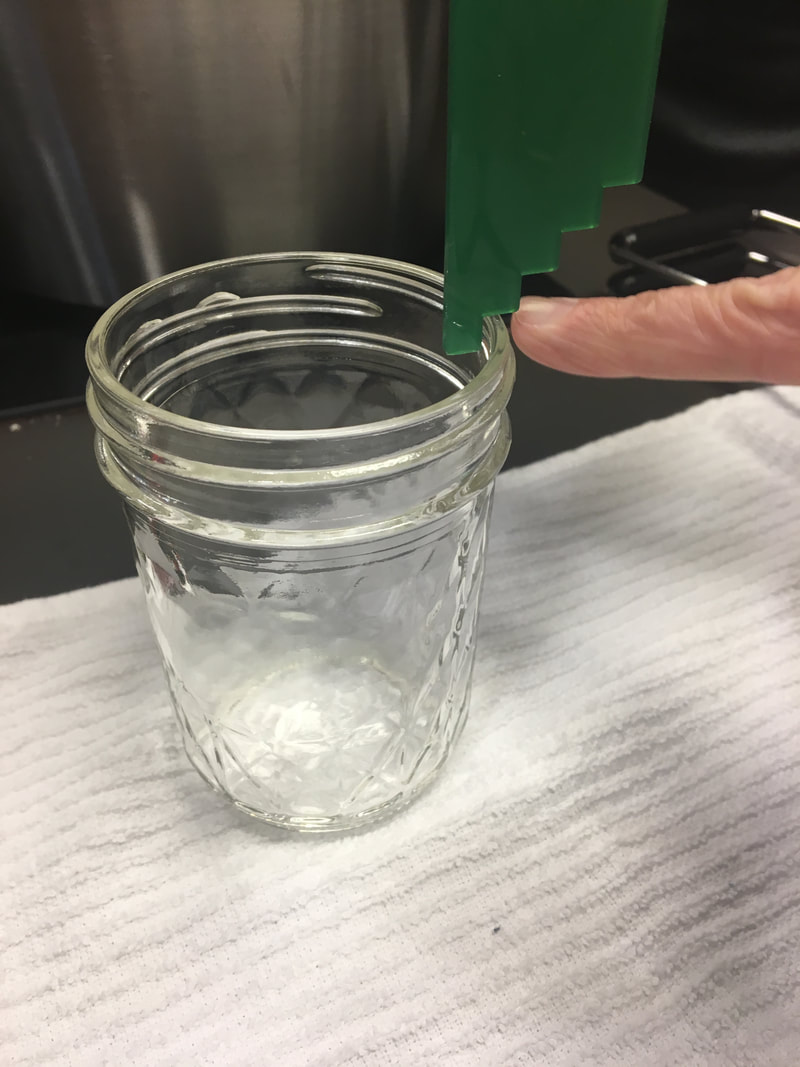 Fill the jars, leaving 1/4-inch head space (space between the jam and the lid). The tool pictured is a bubble freer that we stirred around the edges to free bubbles. It also works to measure the head space. 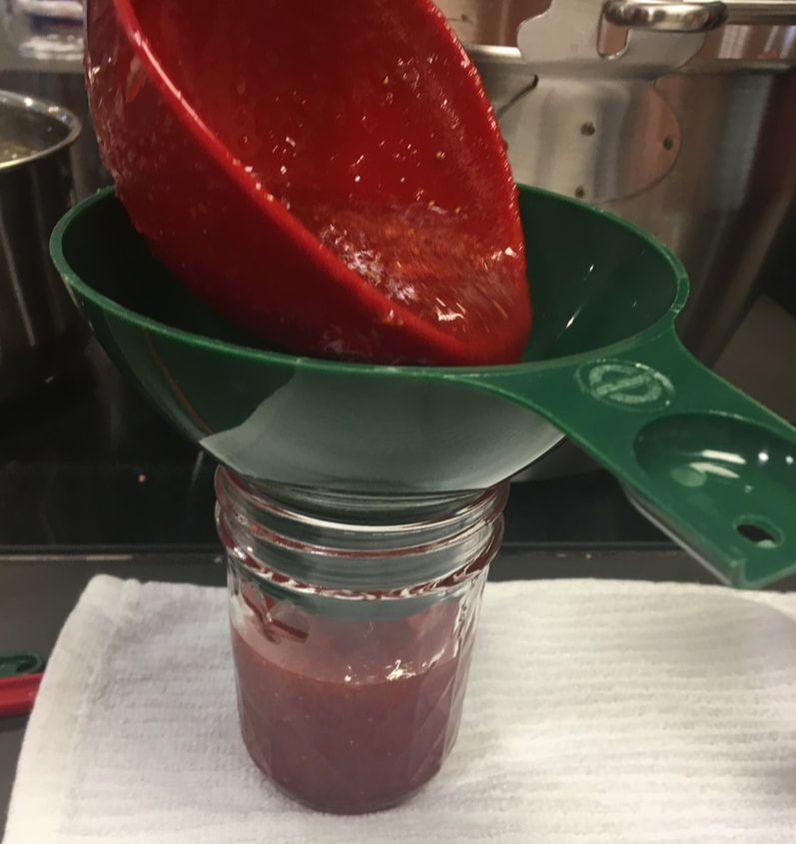 We had a handy ladle and funnel for pouring the jam into the jars. 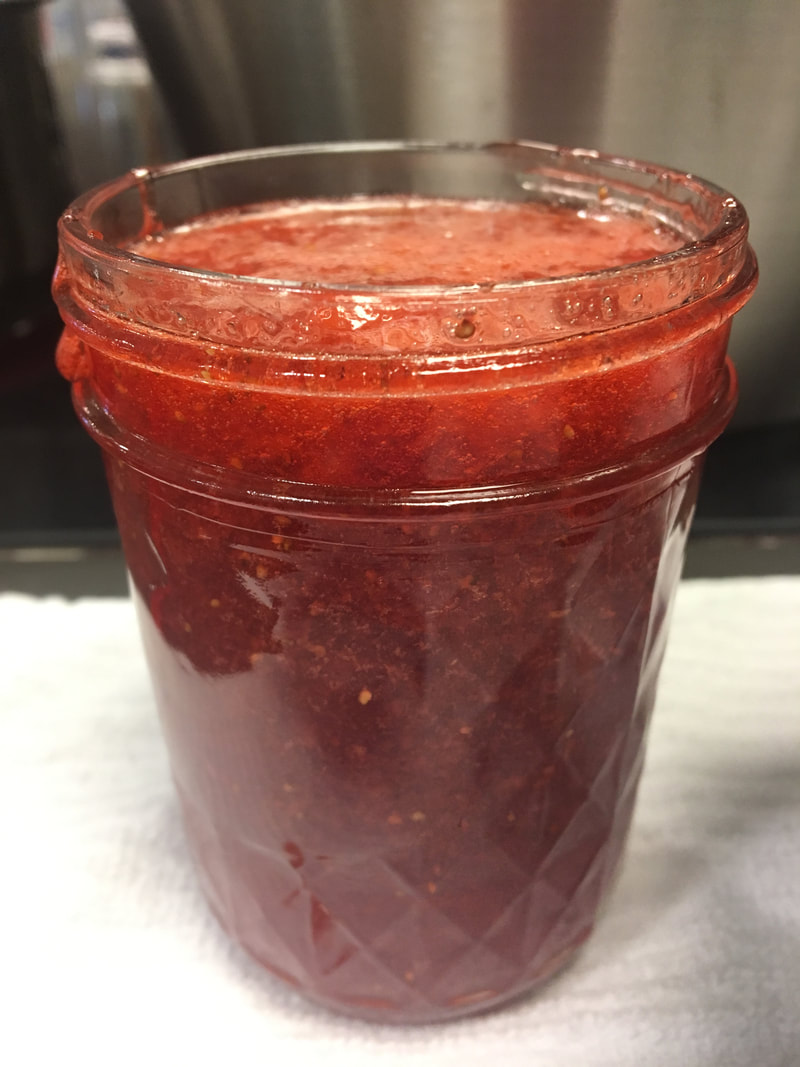 Wipe the rim with a damp paper towel and place the lid and band on. The band does not need to be screwed on tight. Stop when it no longer twists easily.  We processed these jars in a water bath for 5 minutes.
There is the recipe we used. Again, a lot of sugar, but very delicious!
Here is the recommended site for finding more recipes: National Center for Home Food Preservation Happy Canning! Spring is a hopping time on a farm. Plants are thriving and the year is full of possibilities. Because the temperatures are comfortable, we are able to hustle and accomplish a great deal in a day, unlike in the summer when simple tasks require more effort in the heat. Morale is high! The pests have not yet come out and the weeds are still manageable. 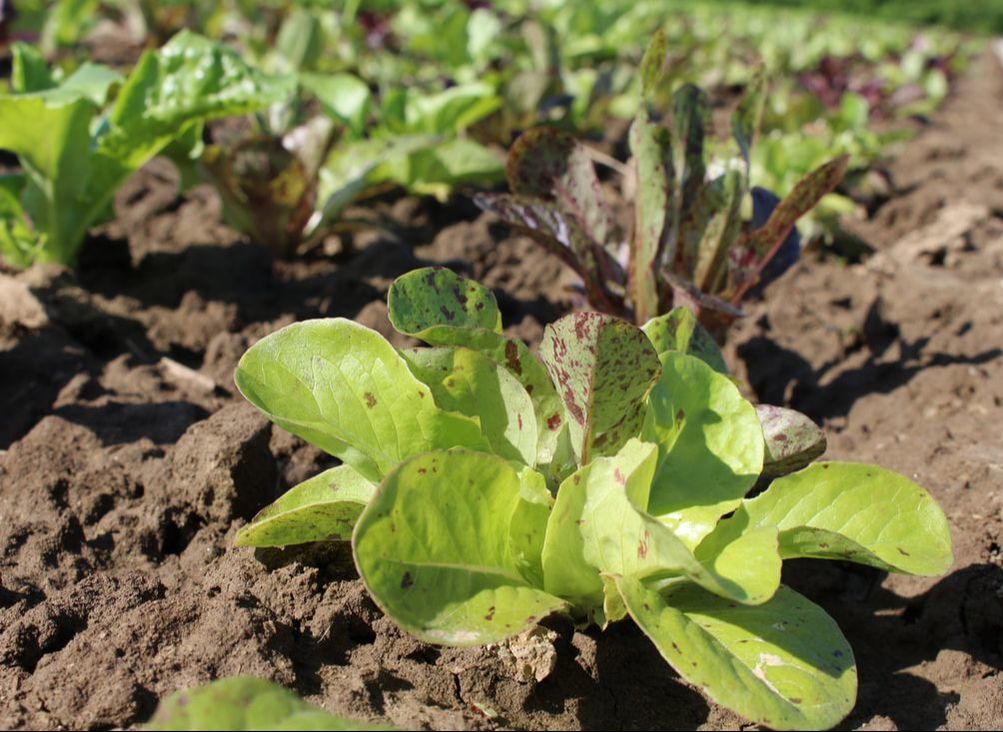 There are fresh crops being harvested, like this lettuce. Also strawberries, radishes, spring onions, herbs, cooking greens, root vegetables, and more. Fava beans coming soon. 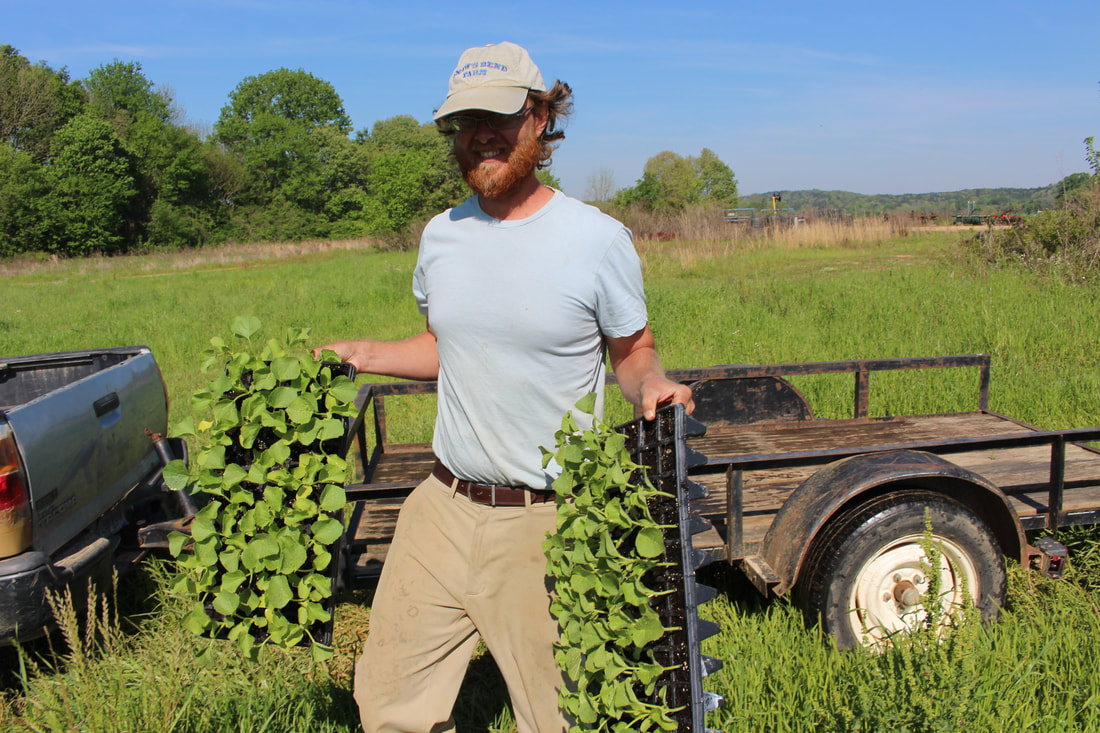 We are also busy planting summer crops such as these cantaloupe. As we plant, we anticipate enjoying their sweet flavor on a warm July day. Conversation while potting on tomato plants is often about how we plan to prepare the fruit when it ripens. This is part of eating seasonally. We appreciate these foods more when we only eat them certain times of the year. 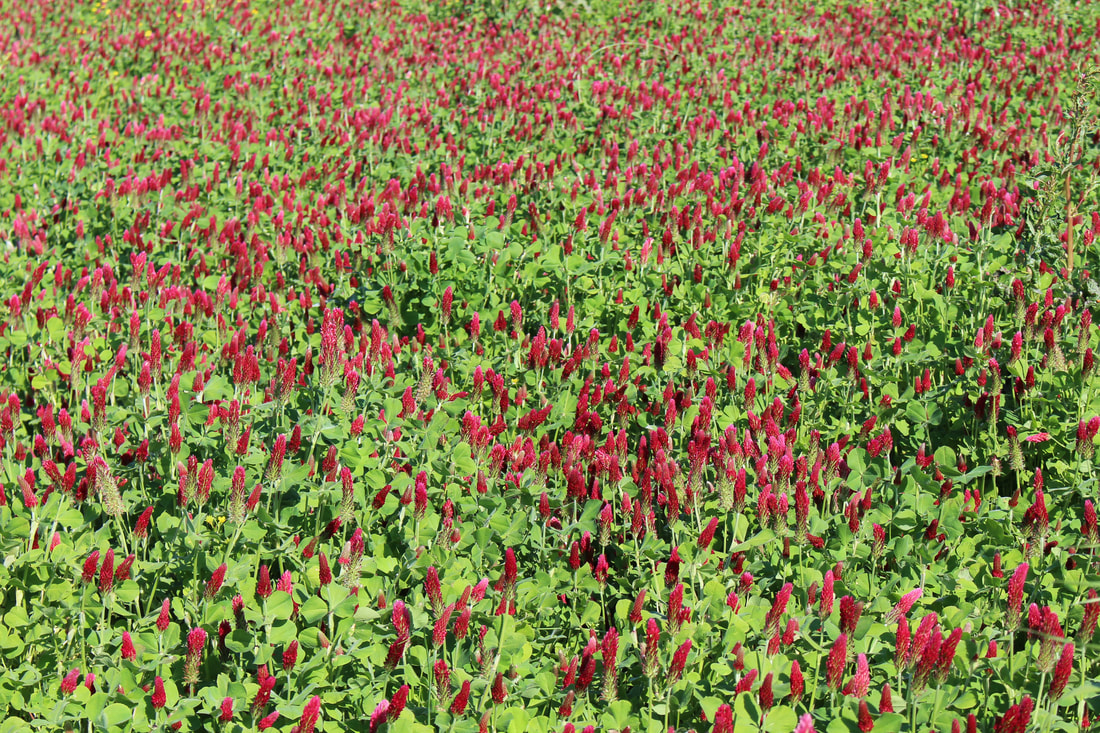 When asked what my favorite crop to grow is, I always answer with cover crops! They represent responsible management, fertility, and good things to come. In spring, the cover crops reach maturity and, if we can, we will follow with a summer cover crop as well before planting a cash crop. Above: crimson clover; Below: Rye and winter peas 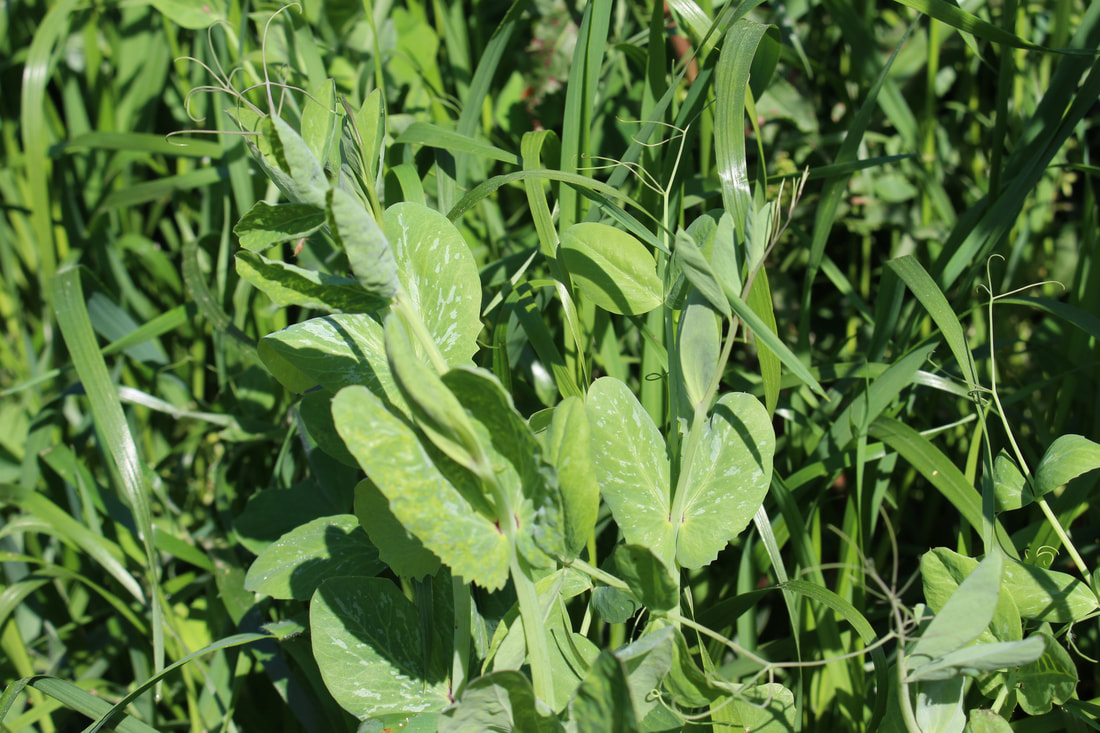 Over-wintered crops, such as cilantro, arugula, collards, and kale, we allow to flower and go to seed. These flowers attract beneficial insects to prey on pests. We also eat and market the flowers! They are delicious and turn a normal salad into springtime on a plate. Below: cilantro flowers 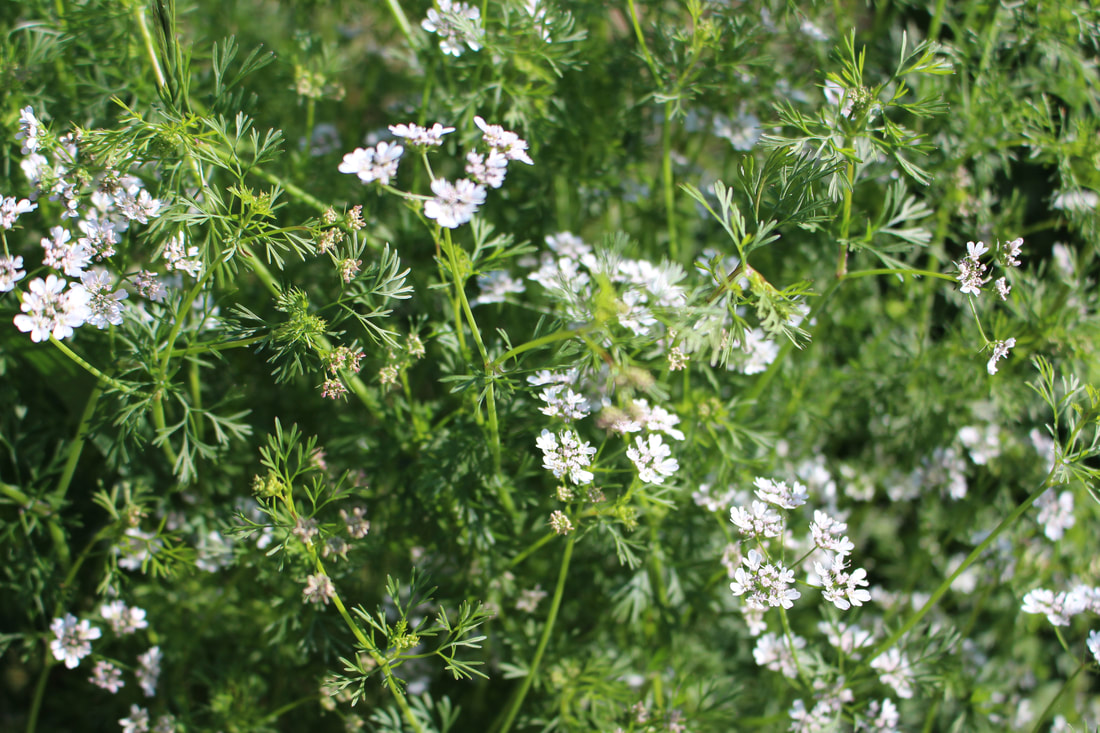 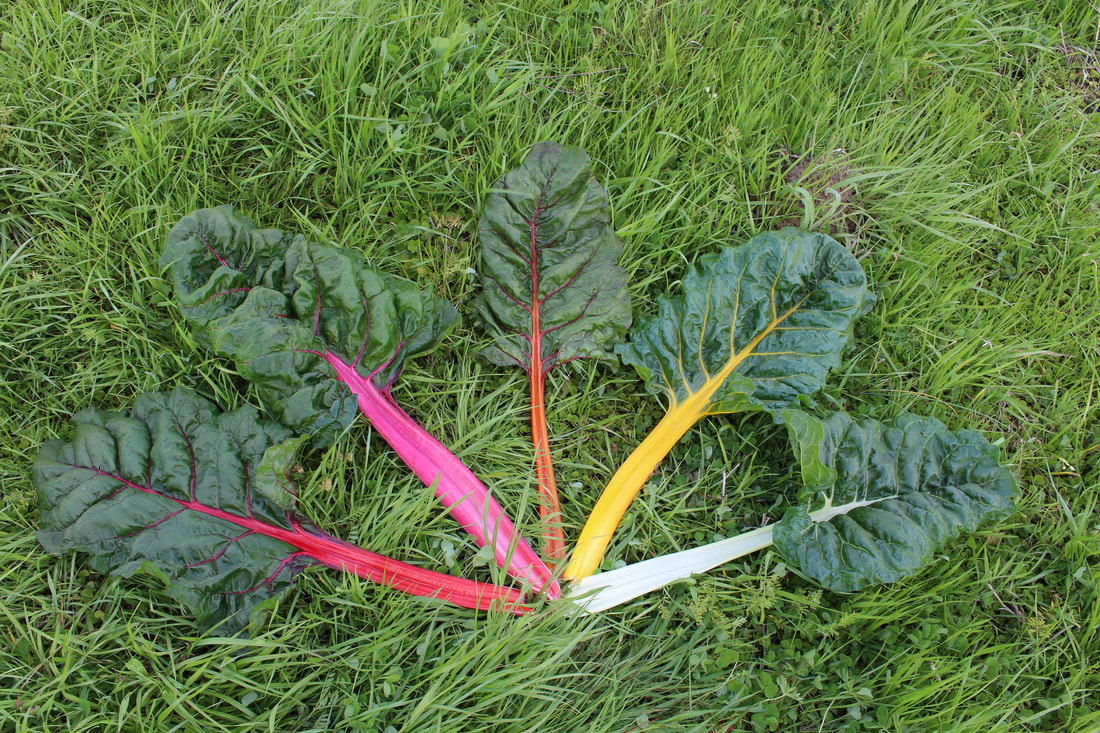 My favorite cooking green! And I was thrilled to see I am not alone. If you are in the mood for some feel good reading loaded with fiber check this out: Not Easy Being GreenIt's Not Easy Being Green Tweeting about chard is the only thing that will save us If that doesn't convince you that you need some chard in your life, maybe these two can. 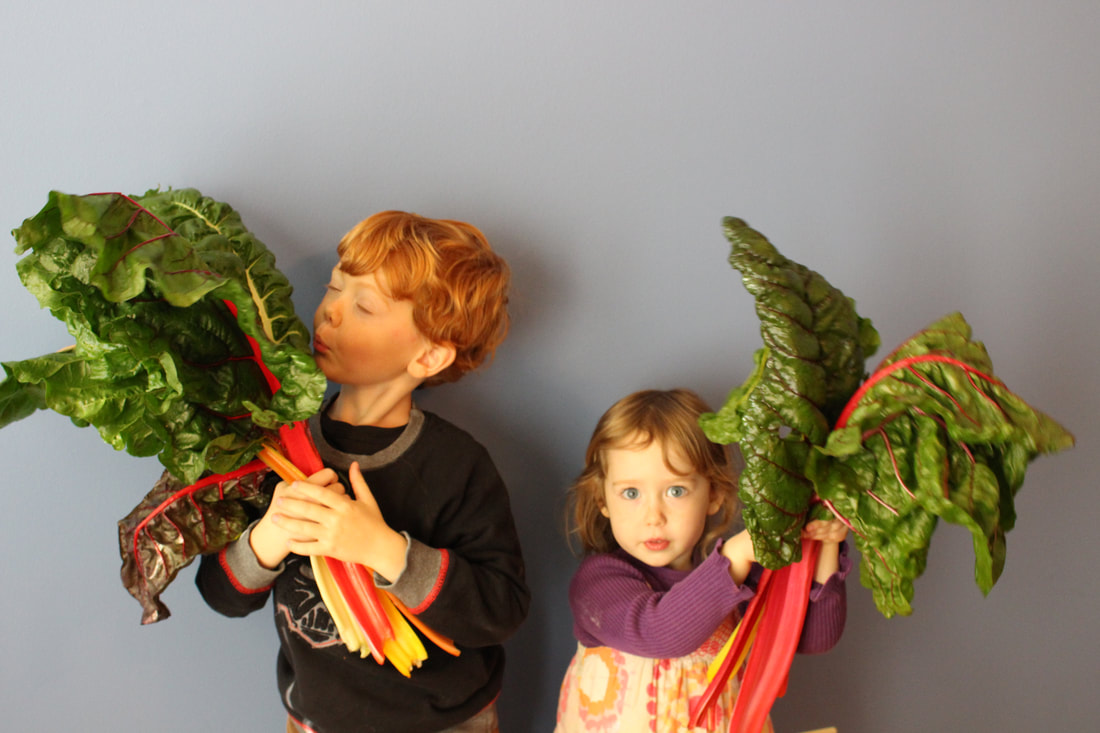 Wondering what to do with those colorful stems? Pickle them or make a gratin with them! Recipes below 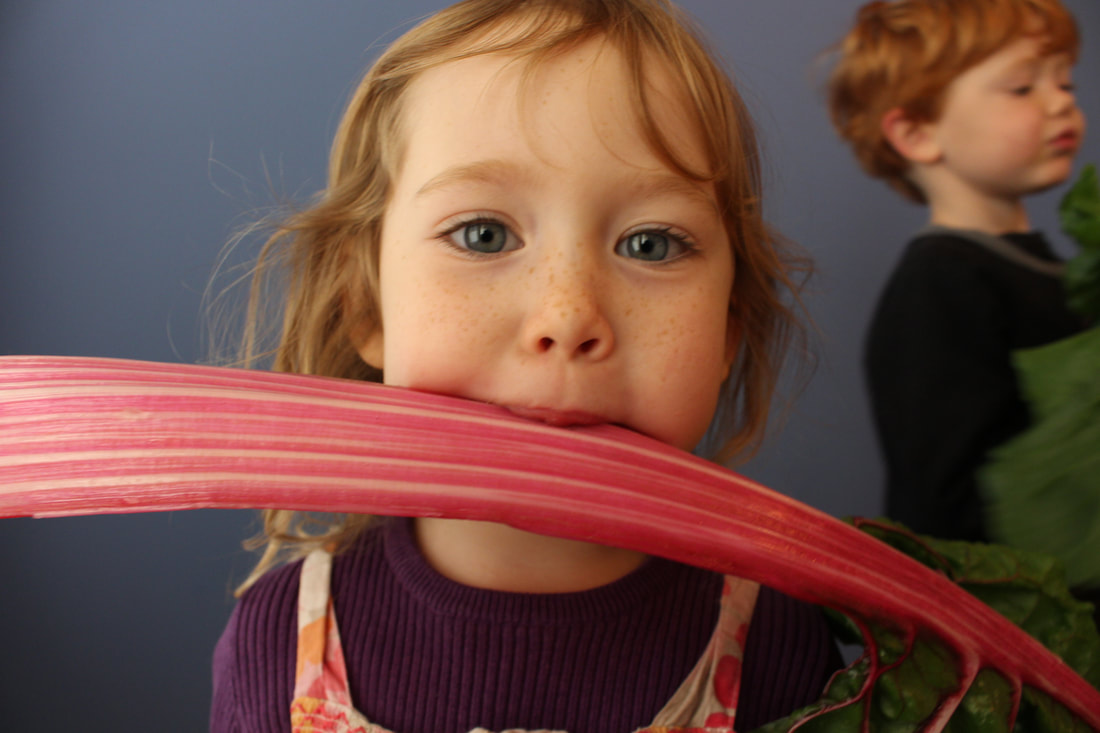 Chard Stem Gratin Chez Panisse Vegetables by Alice Waters Chard stems are delicious. Parboil until tender, drain, and arrange in a gratin dish with bits of fried pancetta, some chopped garlic, chopped flat-leaf parsley, and a seeded coarsely chopped tomato. Cover with a bit of bechamel sauce or cream and gratinee in a preheated 450 degree oven or under the broiler until golden. Pickled Chard Stems The Broad Fork by Hugh Acheson Makes 1 pint 2 cups finely sliced chard stems 1 teaspoon pickling salt 2 teaspoons sugar 1 teaspoon yellow mustard seeds 1 cup distilled white vinegar 1/4 teaspoon chile powder Pack the chard stems into a clean pint jar, leaving 1 inch headspace. Combine the pickling salt, sugar, mustard seeds, vinegar, chile powder, and 1 cup of water in a nonreactive pot and bring to a boil. Reduce the heat to low and simmer for 5 minutes. Then carefully ladle the hot mixture into the jar, leaving 1/2 inch of headspace. Cap the jar with its lid and band, and let cool for 2 hours. The jar can be stored in the refrigerator for up to 3 weeks, or processed according to the jar manufacturer's directions to store on the shelf for up to 10 months. The following is an excerpt from Vegetable Literacy by Deborah Madison. Good companions for chard:
Rainbow Chard 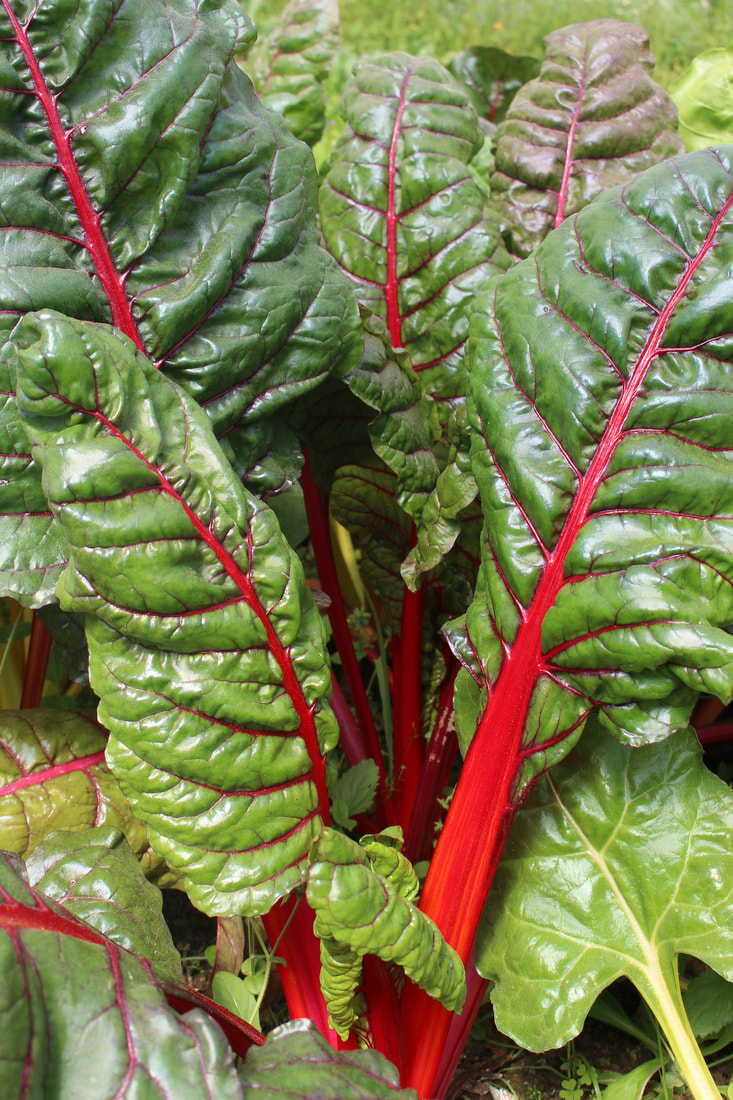 Community is at the heart of Community Supported Agriculture. 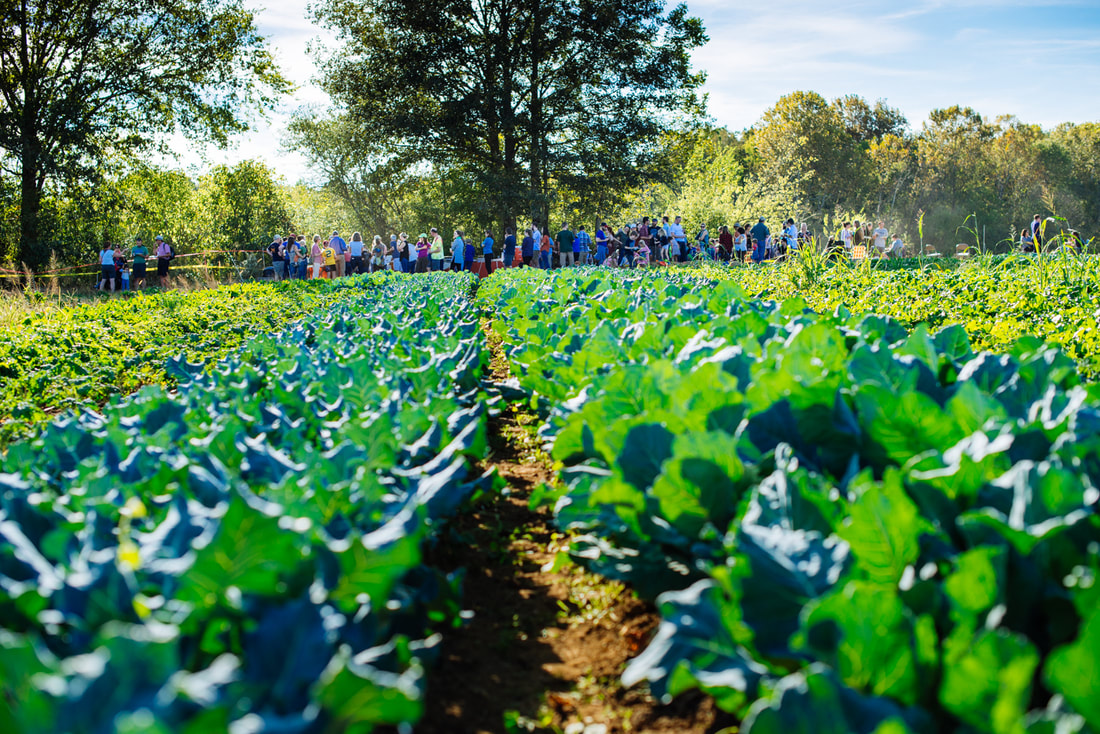 As the farmers, the community that supports us allows us to feel financially comfortable undertaking such a risky occupation. You allow us to know that we can hire and fairly pay employees for their work. You allow us to plan, plant, and cultivate crops with confidence that they are paid for and will be enjoyed. There is also the community within CSA members, which we have renewed commitment to strengthen, through hosting voluntary work days and social events. 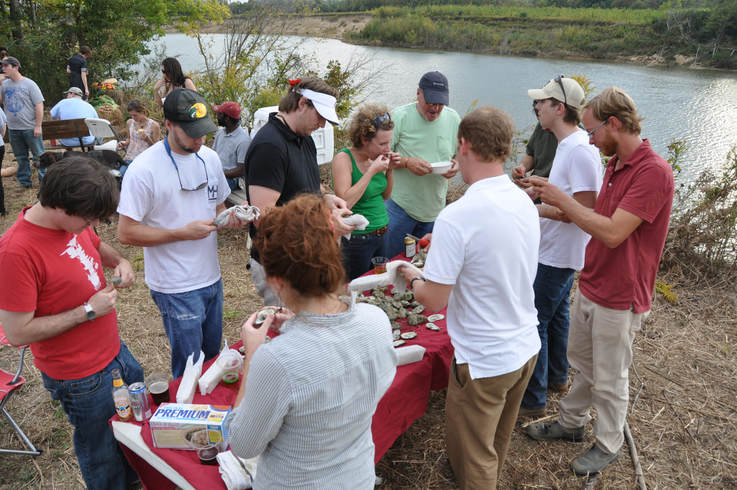 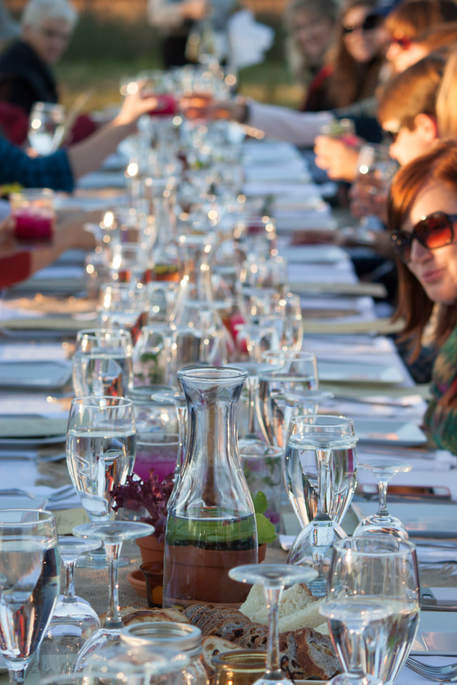 We also have a renewed commitment to giving back to the community at large, through education and donations of extra produce. This year we hosted a group of YMCA day campers and showed them around the farm, asking them to identify the crops. It was fun for everyone. Children’s curiosity is endless and this includes food and how it is grown. Can you believe they all wanted to take armloads of fresh produce home? They did! I spoke at a couple of elementary schools, where again the produce props were a hit.  Each week, a CSA member arrives at the end of the River market to collect extra produce for a weekly food share program.
We have donated some CSA shares to locate organizations through silent auctions. Please keep us in mind, if you know of other ways in which we can contribute to enhancing our community, as our community enhances our lives. Join our CSA 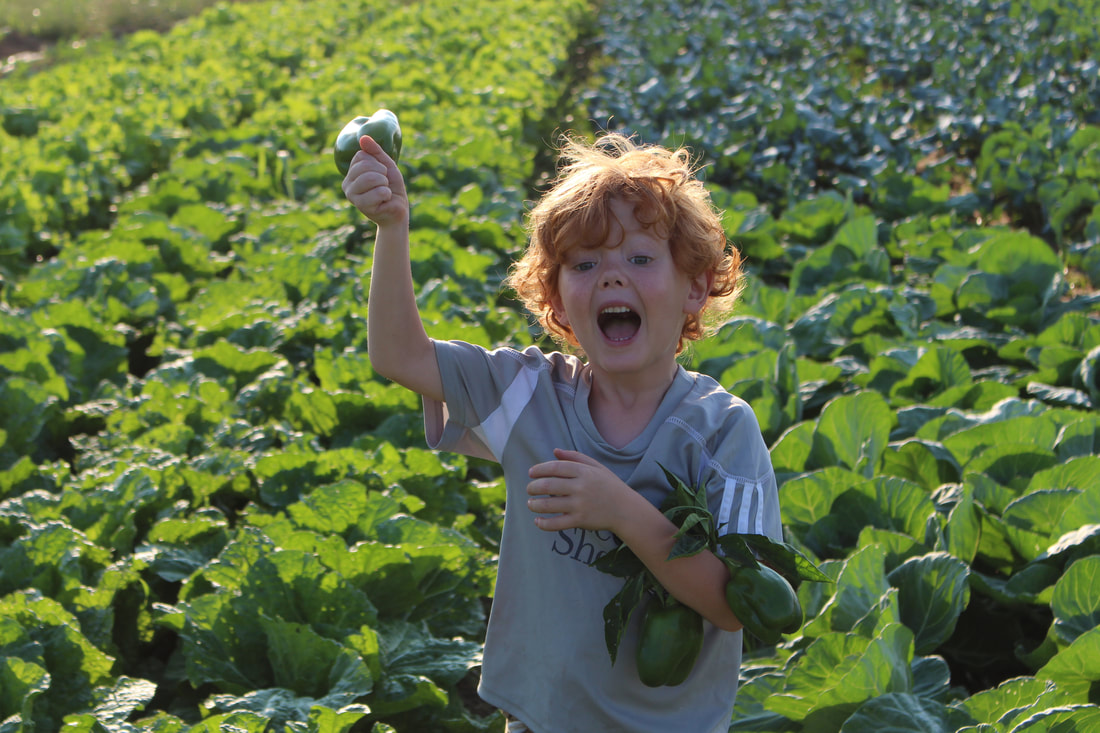 There is no ingredients list on food fresh from the farm! 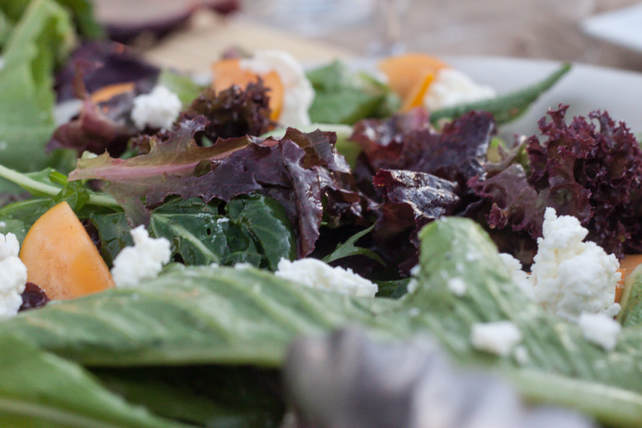 Eating is something you do every day. When thought is put into the preparation of food, it tastes better and is better for you.  Why not make it a priority?  When you are a member of a CSA, it encourages you to cook more meals and eat out less often. That also means more wholesome meals around the table with friends and family. 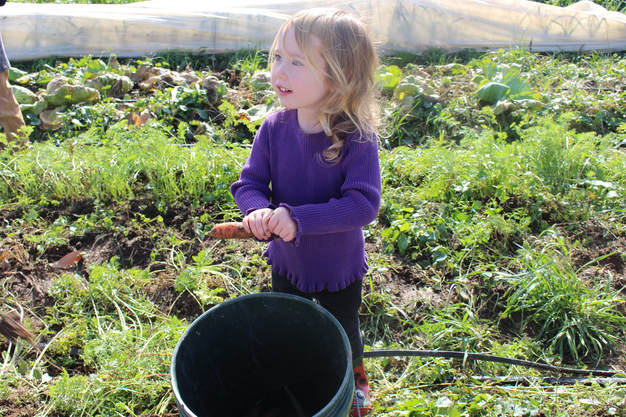 When you eat food from our farm, you know who grew that food and exactly where it came from.  |
NEWS FROM THE BENDFrom planting time to the growing and harvesting seasons, Archives
January 2024
Categories |
||
 RSS Feed
|
|
Snow's Bend Farm ~ Coker, Alabama ~ 205-394-3561
|
|
|

|